*This post may contain affiliate links for which I earn commissions.*
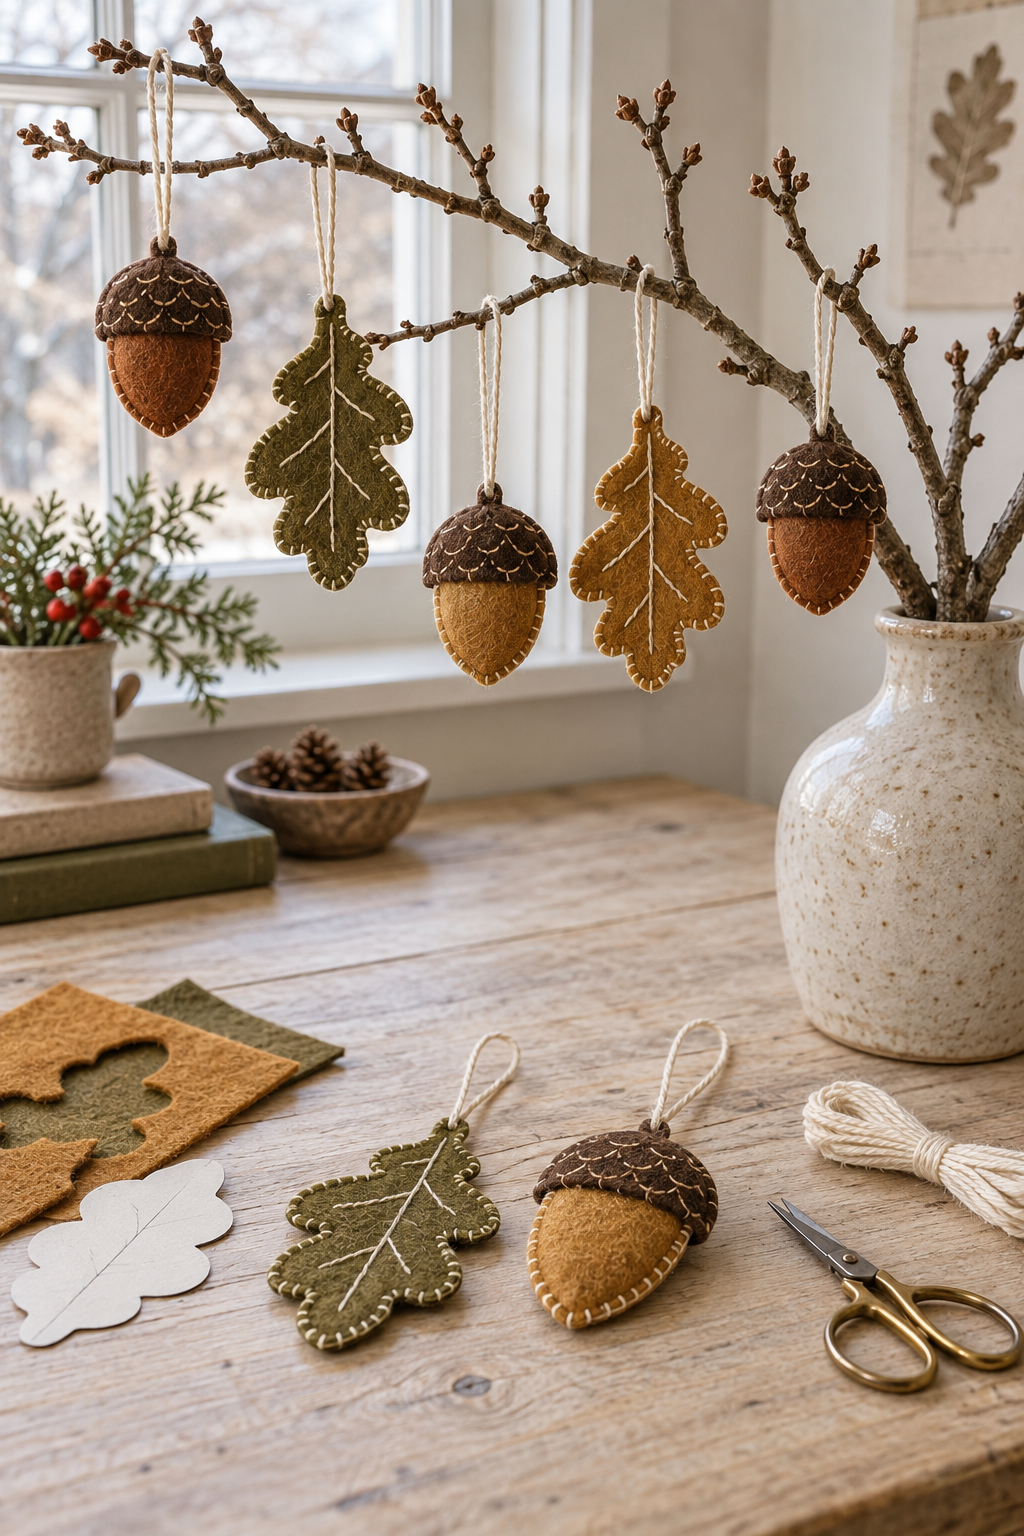
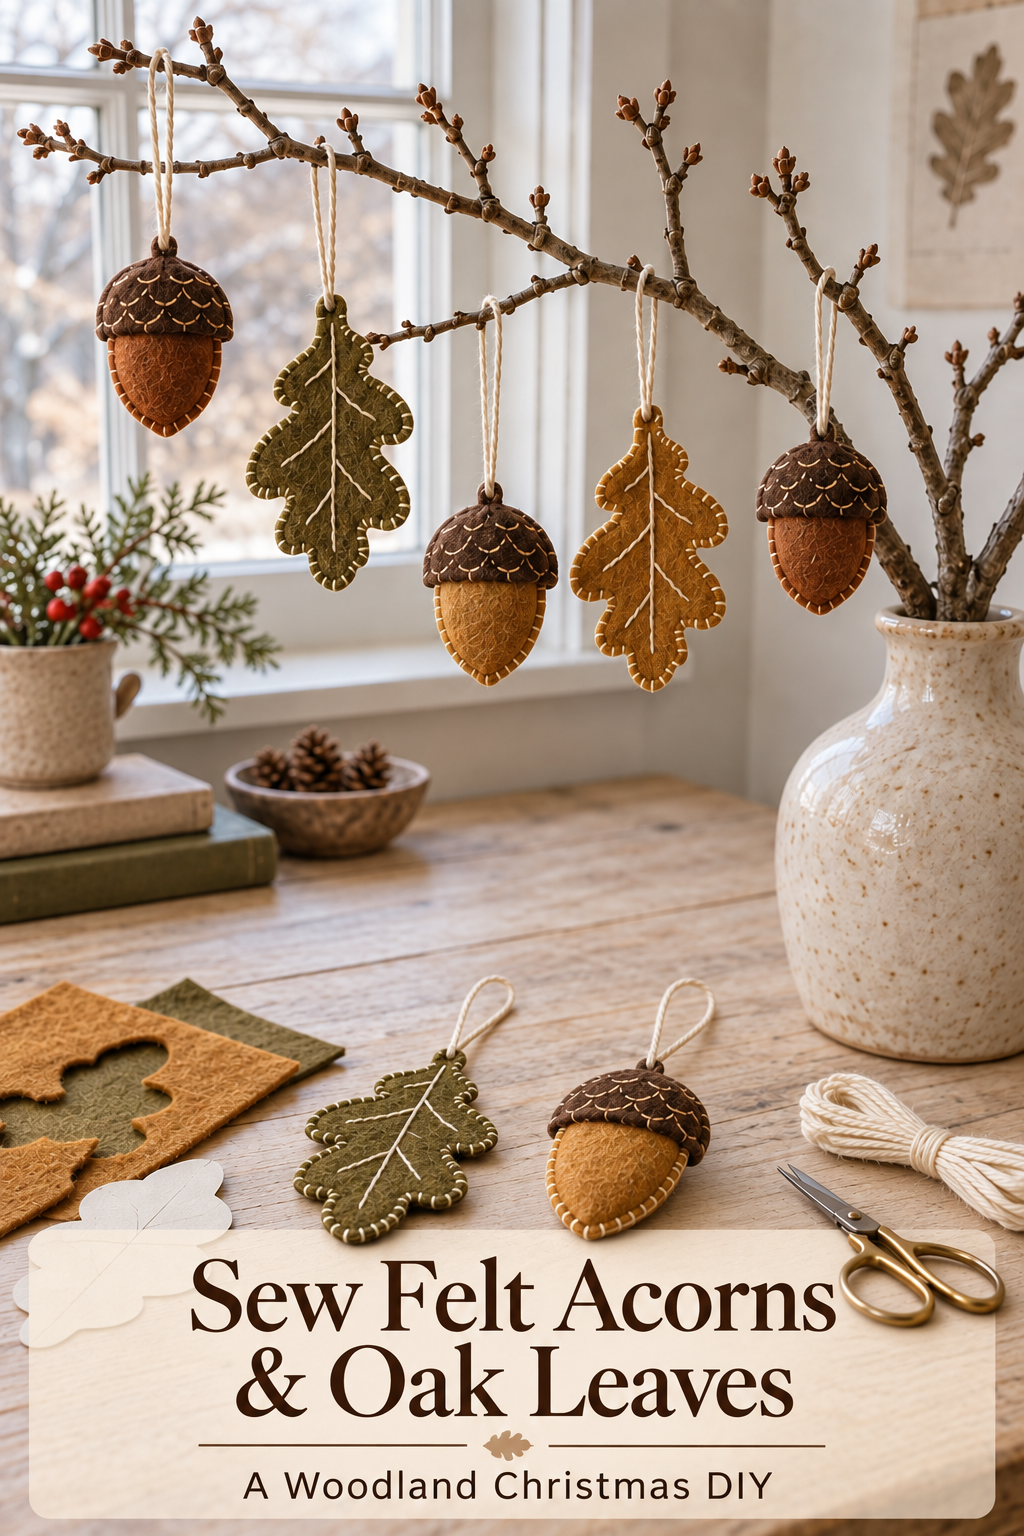
Image created with AI. This image serves as visual inspiration for the project below.
Rust, ochre, and olive felt give these woodland ornaments a quiet Christmas palette. Cream stitching brings out the oak leaves’ rounded lobes and the acorns’ dark, scalloped caps. Make a small mixed set for a tree, or hang a few from a branch near a window.
What You’re Making
This tutorial makes unstuffed, two-layer felt ornaments with embroidered fronts and plain backs. The acorns have a colored body beneath a separate brown cap on each face; the oak leaves have stitched veins on the front. Each ornament hangs from a loop of cream cotton cord. The two felt layers give the ornaments enough structure without the need for stuffing.
Materials and Supplies
Main Materials
- Sewable craft felt in olive, ochre, rust, and dark brown, approximately 1–2 mm thick.
- Cream stranded cotton embroidery floss for decorative stitching, joining, and securing loops.
- Thin cream cotton cord for hanging loops, soft enough to stitch through.
- Plain paper for drawing reusable patterns.
Tools
- Fabric scissors with sharp tips for rounded lobes and small curves.
- Paper scissors for cutting patterns.
- Sharp embroidery needles with eyes that fit two strands of floss.
- Removable fabric marking pencil suitable for the chosen felt.
- Pencil for drawing paper patterns.
- Ruler for planning ornament proportions.
- Straight pins for holding patterns and felt layers.
Before You Start
Choose a manageable size
For a first set, try leaves roughly 5 inches tall and acorns roughly 3½ inches tall, then adjust to your display. These are suggested starting sizes, not measurements taken from the image. Leave enough room between the leaf’s lobes to stitch comfortably around the curves. A smaller pattern needs fewer, broader lobes.
Check the felt and stitching
Try the needle and two strands of floss on a scrap. They should pass through two felt layers without excessive force. Choose thinner felt if the stack is difficult to sew. Test the marking pencil on a scrap and follow its removal directions before marking the fronts.
Step-by-Step Tutorial
1. Draw the leaf and acorn patterns
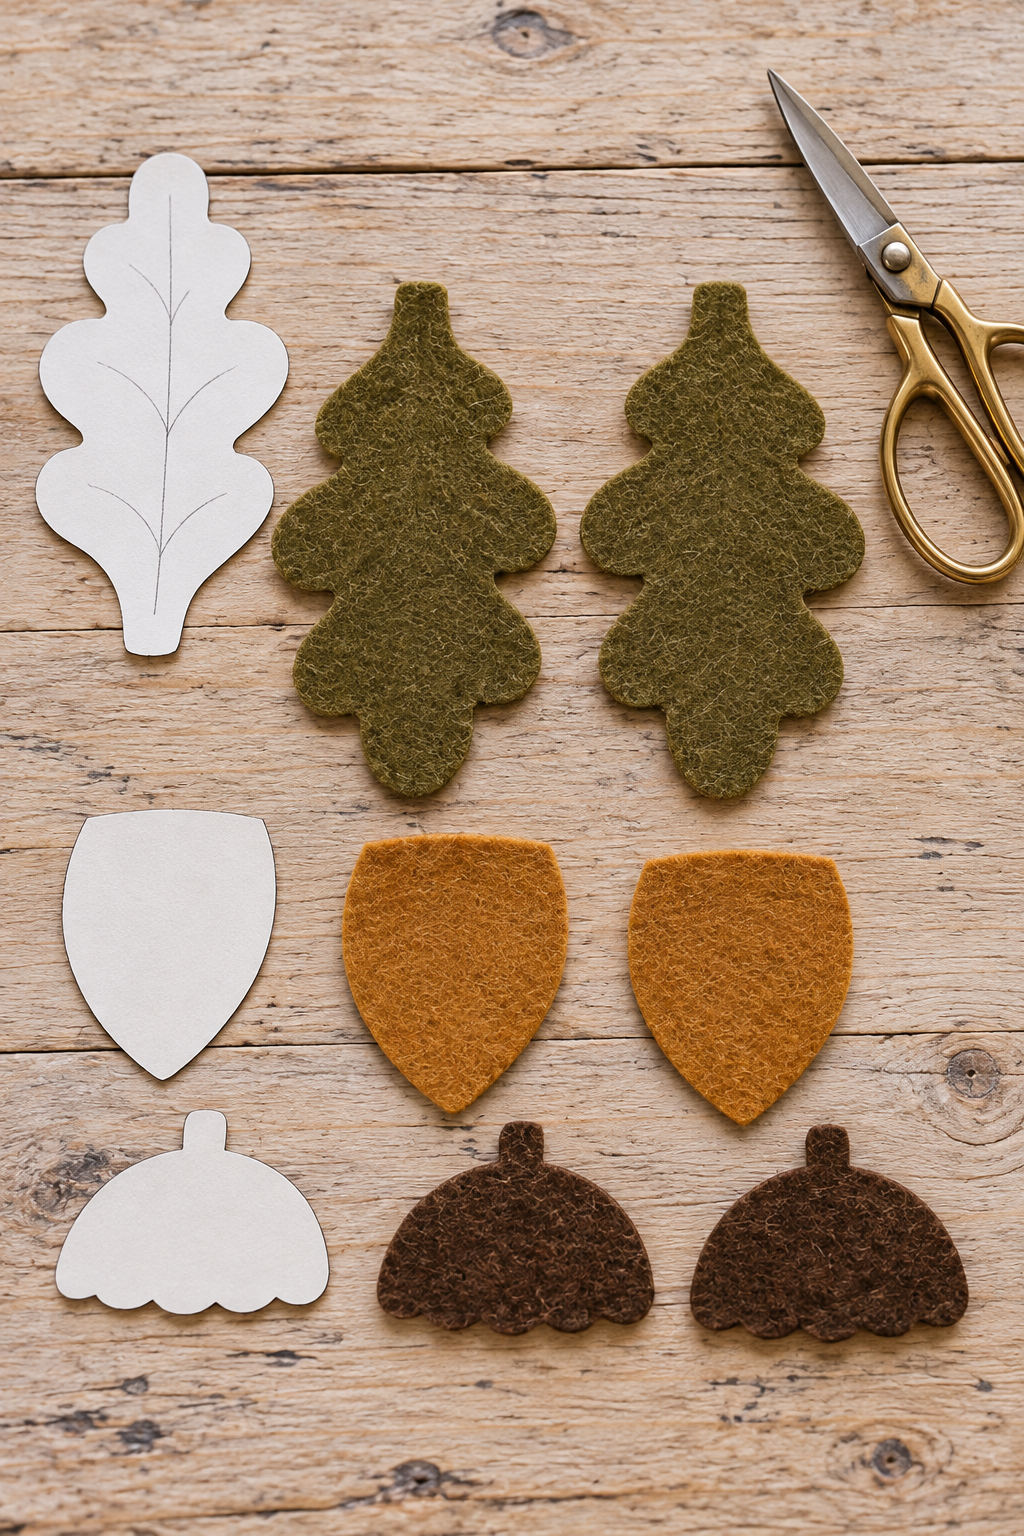
Draw an oak leaf on paper with a narrow rounded tip, three broad rounded lobes on each side, and a short, wide stem at the base. Connect the lobes with shallow inward curves rather than sharp notches. Make the lower lobes slightly larger than the upper ones. Keep the top broad enough to receive a hanging loop.
For the acorn, draw a rounded body that narrows to a soft point at the bottom. The top edge can be gently curved since it will be covered by the cap. Draw a separate broad dome with a shallow scalloped lower edge and a small rounded stalk at the top. Let the cap overlap the body’s upper portion and extend slightly past its sides.
Cut out the paper patterns. Lay the cap pattern over the body pattern to check the overlap before cutting felt. No downloaded pattern is needed.
2. Cut matching fronts and backs
Pin the leaf pattern to olive or ochre felt and mark around it. Cut two matching pieces for each leaf. For each acorn, cut two bodies in rust or ochre and two caps in dark brown. Cut each piece individually if stacked felt shifts under the scissors.
Keep the fronts and backs paired. Trim any obvious mismatch now, and remove marks as directed for the marking pencil. Do not add an extra seam allowance: the pieces will be joined along their visible edges.
3. Embroider the fronts while they are separate
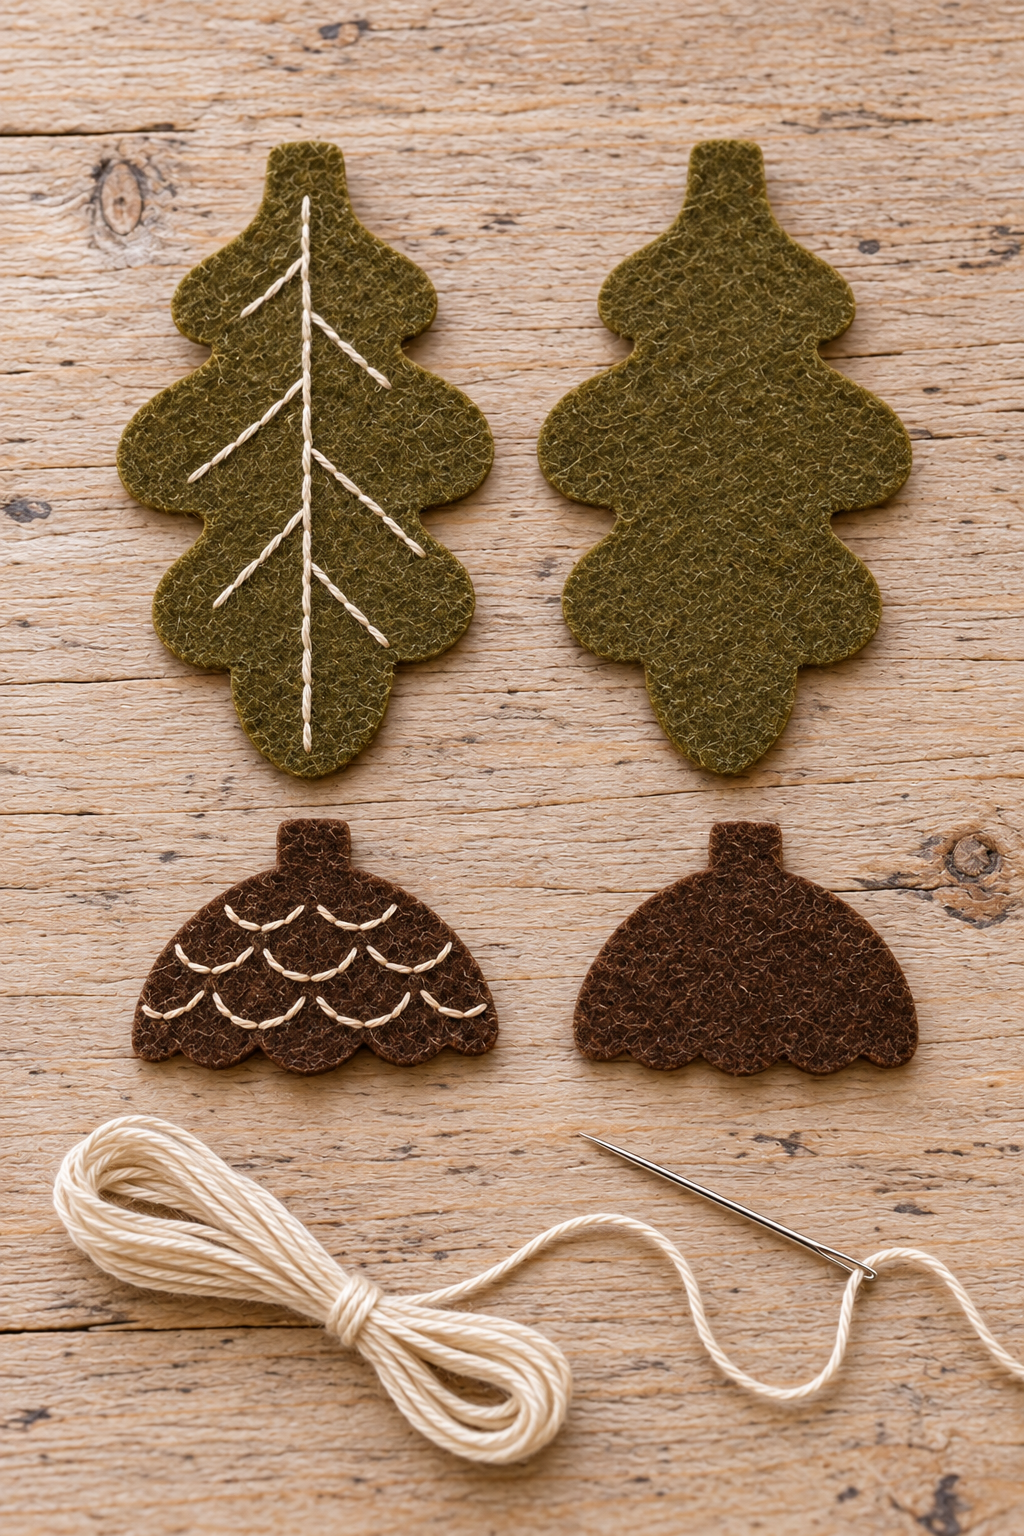
Separate two strands from the cream floss and thread the needle. Tie a small knot at the end. On one leaf piece, stitch a center vein from near the base toward the tip, leaving space around the outer edge. Add short branching veins toward the lobes.
Use backstitch: bring the needle up a short distance ahead, take it down at the end of the previous stitch, then bring it up farther along the line. Keep the stitches short enough to follow the curves. Finish on the reverse by passing the needle beneath several stitches and tying a small knot.
Embroider shallow curved rows on one brown cap. Work each curve with small backstitches, stagger the curves between rows, and keep them clear of the edge. Leave the second cap plain. The leaf back also stays plain, so it can cover the embroidery knots later.
4. Sew a cap onto each acorn body
Place the decorated cap on the front body, overlapping the top as planned. Use small running stitches just inside the scalloped lower edge to join the cap to the body. Bring the needle up and down through both layers, following each curve. Leave the cap’s outer dome edge free for the final perimeter seam.
Attach the plain cap to the back body in the same way. Hold the two assembled faces together, with their undecorated inner sides touching, and check that their cap and body edges align. Each acorn now has a complete front and back.
5. Anchor the hanging loops before closing
Cut a length of cotton cord for each ornament, leaving enough for the hanging loop plus two short ends to secure inside the felt. Fold it into a loop without tying a bulky knot.
Lay the back piece inner side up. Place the two cord ends at its top center, extending well into the felt. Stitch each end to the back with several small stitches that pass through the cord fibers and felt. Use two strands of floss, then secure the thread. This anchoring may leave small cream stitches on the reverse.
For an acorn, attach the ends inside the brown cap area. For a leaf, attach them at the rounded tip. Keep the loop extending above the ornament, then place the front piece over the secured cord ends.
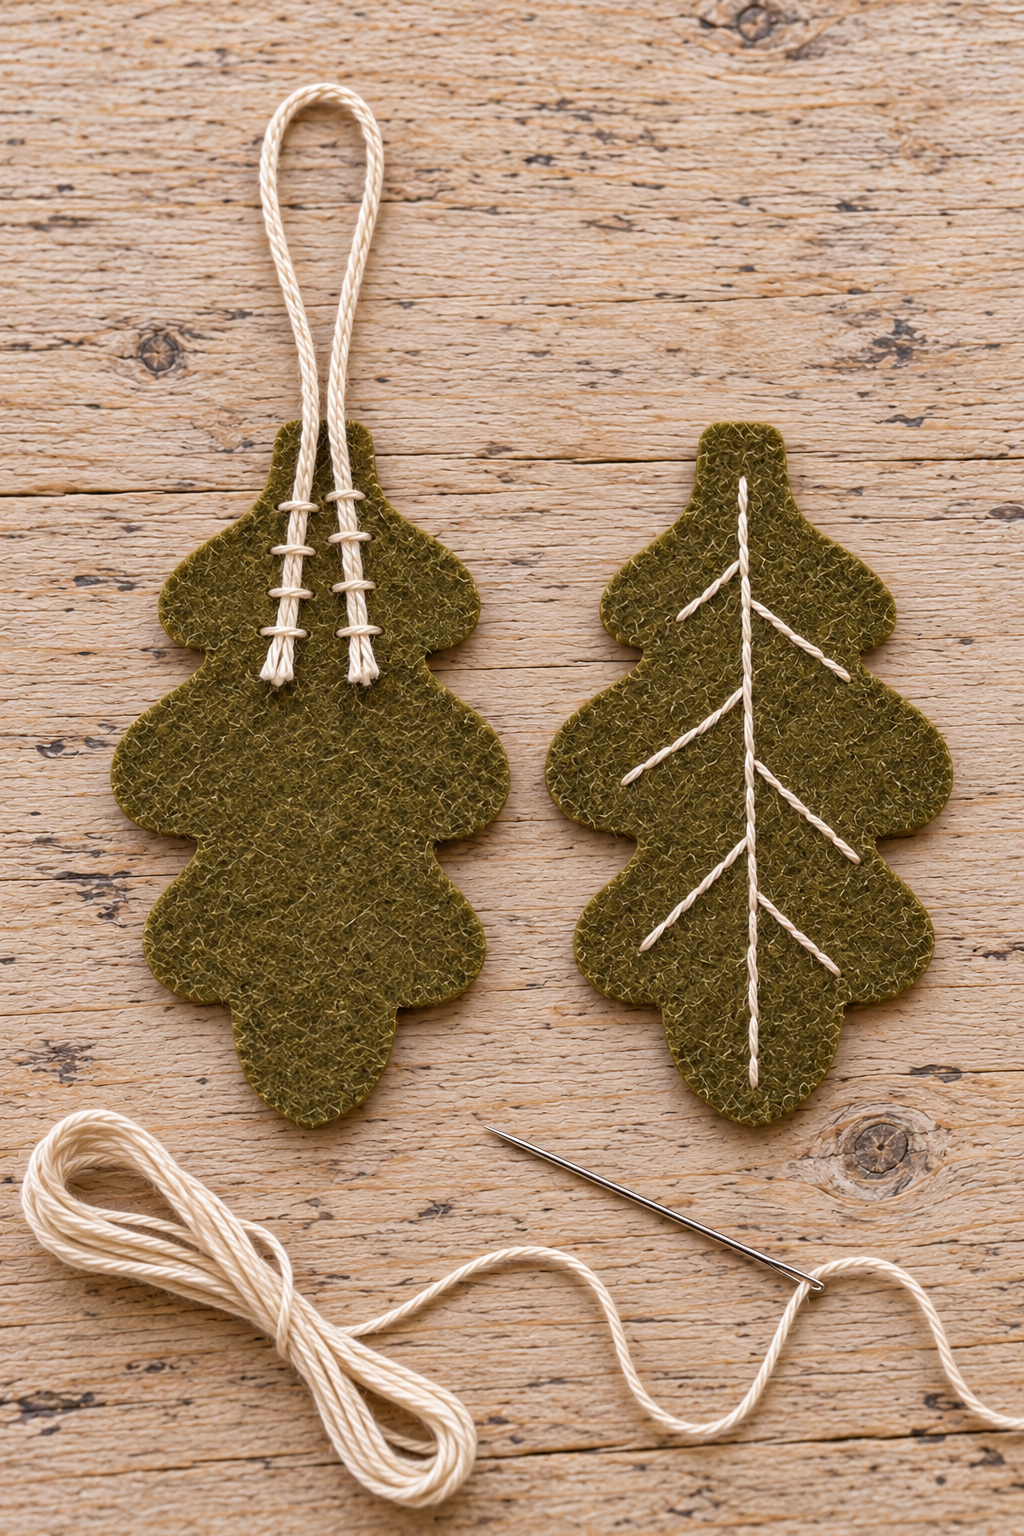
6. Blanket-stitch the layers together
Pin the front and back together with the decorated face outward. Start beside the hanging loop. Hide the starting knot between the felt layers and bring the needle through the front close to the edge.
Take the next stitch through both layers from back to front. Before pulling it tight, pass the needle through the loose floss loop. Pull gently so the thread sits neatly along the felt edge. Repeat, leaving roughly even gaps. The stitches should join the layers without rolling or puckering the felt.
On leaves, shorten the stitches around inward curves. On the acorns, blanket-stitch around the entire outer edge, sewing through the cap layers where they overlap the body. There is no need to sew across the cap’s decorative lower edge again. At the top, stitch on either side of the hanging cord without closing across the loop opening.
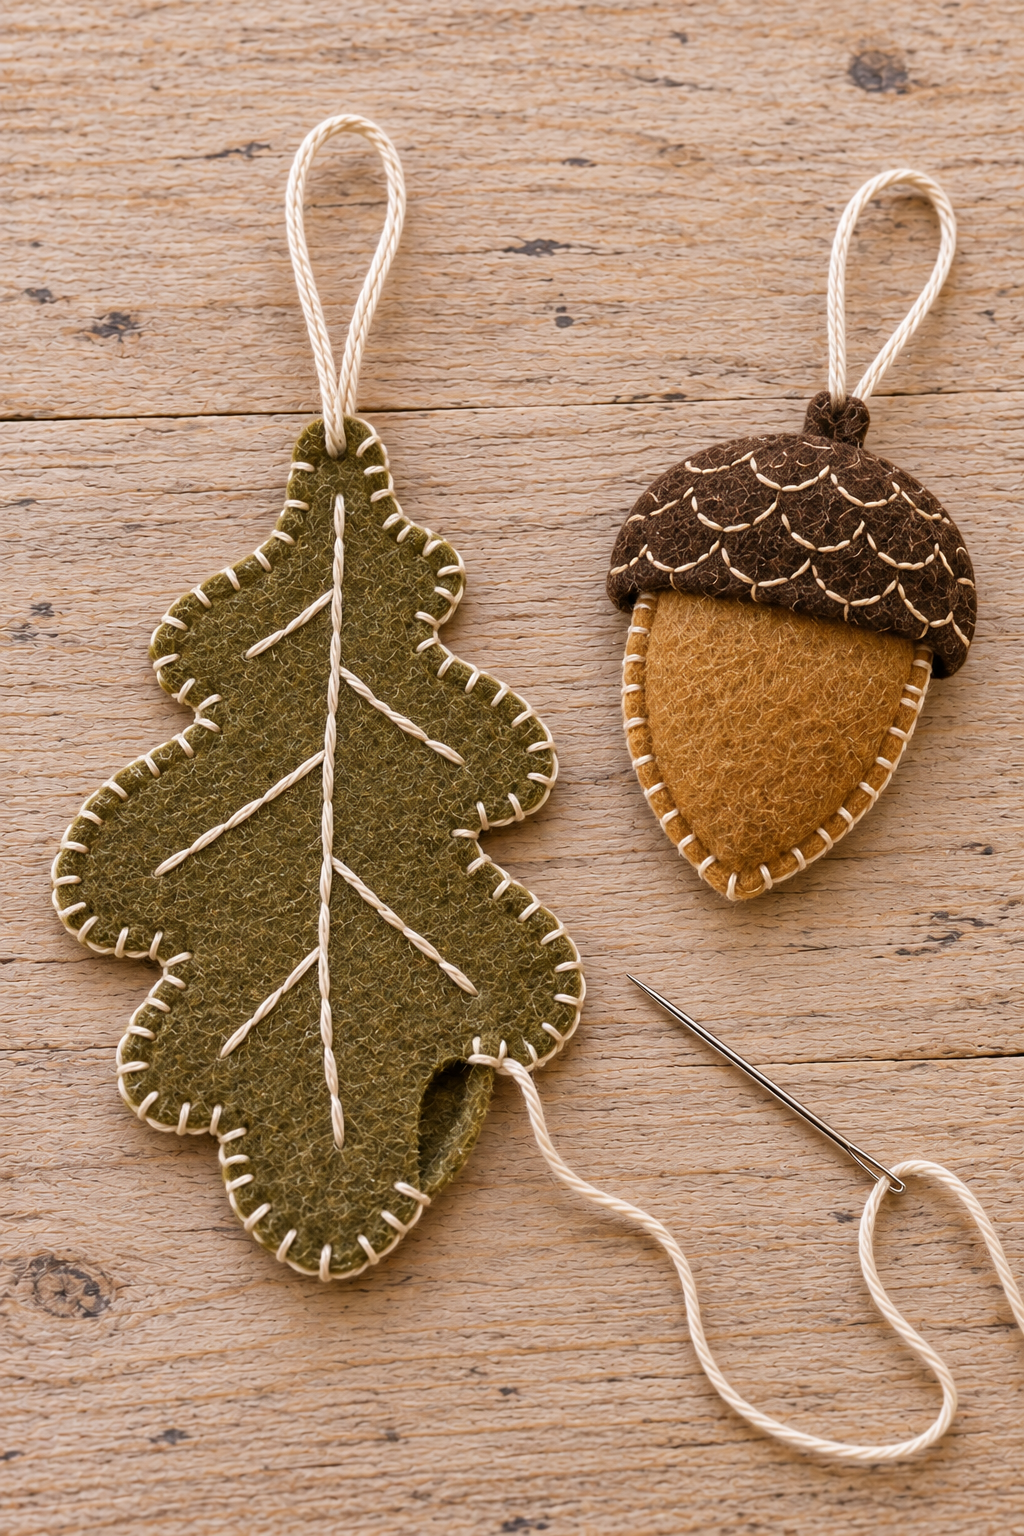
Continue until the seam meets the starting point. Pass the needle beneath nearby stitches, knot securely, and bury the thread tail between the layers before trimming. Gently tug the loop and inspect the perimeter for gaps. Repair a loose attachment or missed layer before hanging.
Keep the Stitching Soft and Even
If a leaf curls, loosen the stitches in that area instead of pulling harder elsewhere. Felt needs a little give around concave curves. If floss twists into knots, let the needle hang briefly so it can untwist. A shorter working length is easier to manage around the small acorn caps.
Make the Set Your Own
Try an ochre leaf beside a rust acorn, or use olive bodies beneath the brown caps for a quieter palette. For a gift set, vary the sizes while keeping the same cream stitching. Enlarge the paper patterns rather than stretching the felt, and simplify the lobes when making smaller leaves.
Hang and Store Your Woodland Ornaments
Hang the loops over tree tips or a stable branch display. Leave space between ornaments so the leaf shapes remain clear. For a branch display like the one shown here, use a sturdy vase and make sure the branch is stable before adding the ornaments. Keep felt away from candles and other heat sources.
Store the pieces flat in a dry box, with the loops laid beside them rather than folded across the embroidered fronts.
A few rounded leaves and warm-colored acorns bring woodland detail to Christmas decorating without needing glitter or bright red trim. The cream stitches give each small silhouette its own character.