
*This post may contain affiliate links for which I earn commissions.*
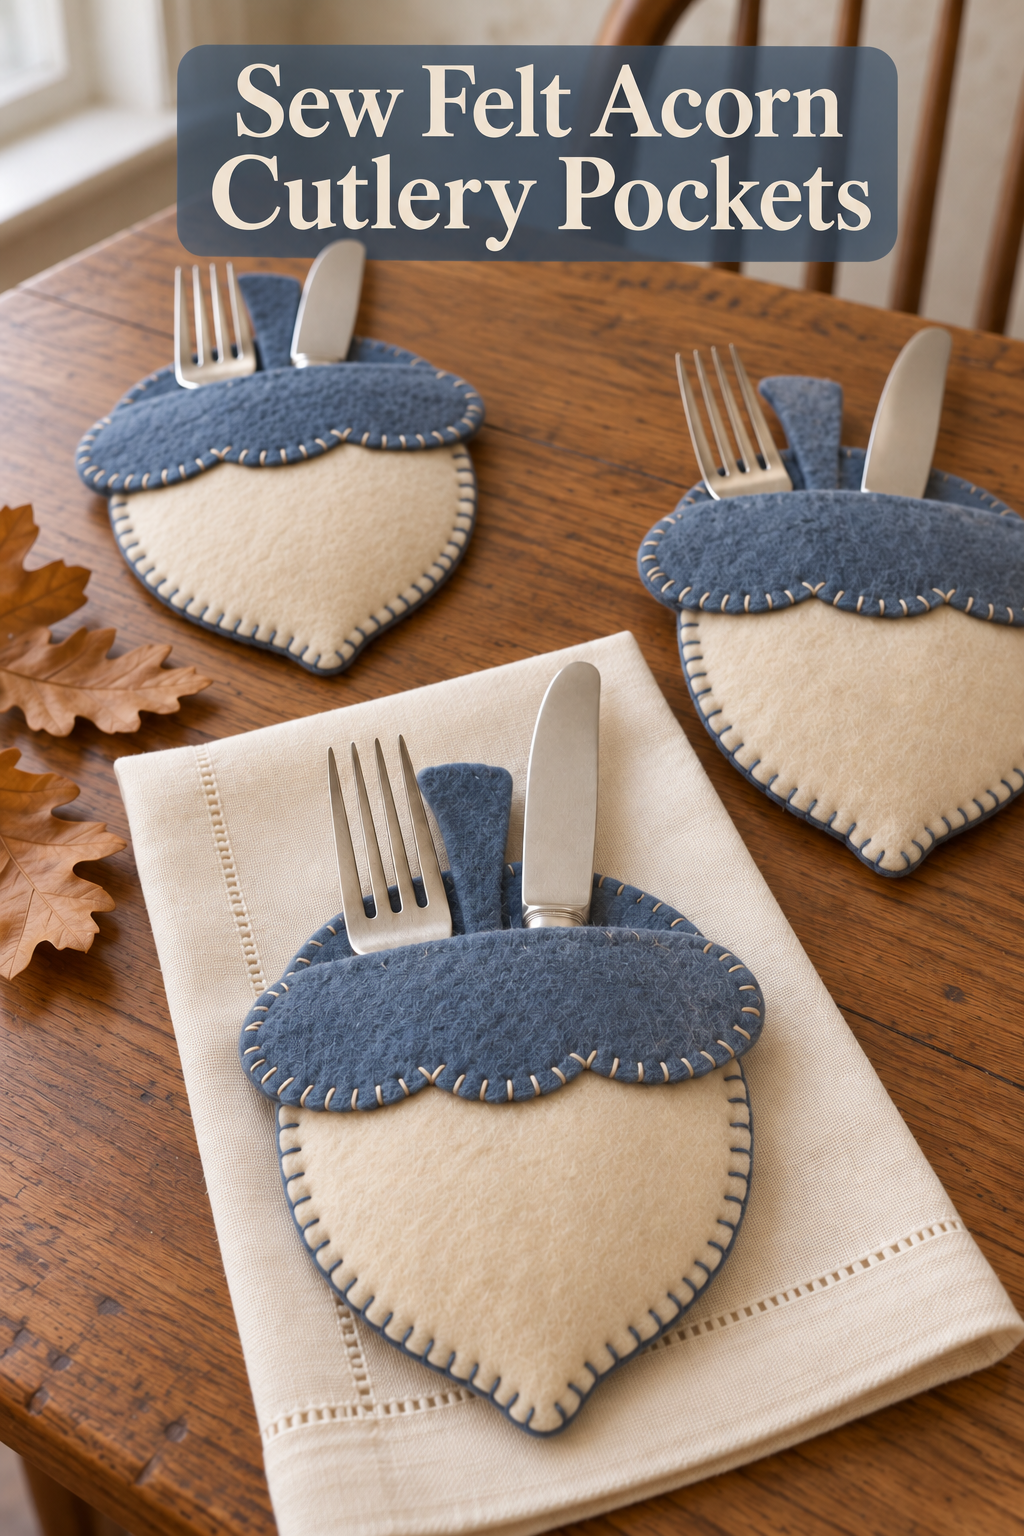
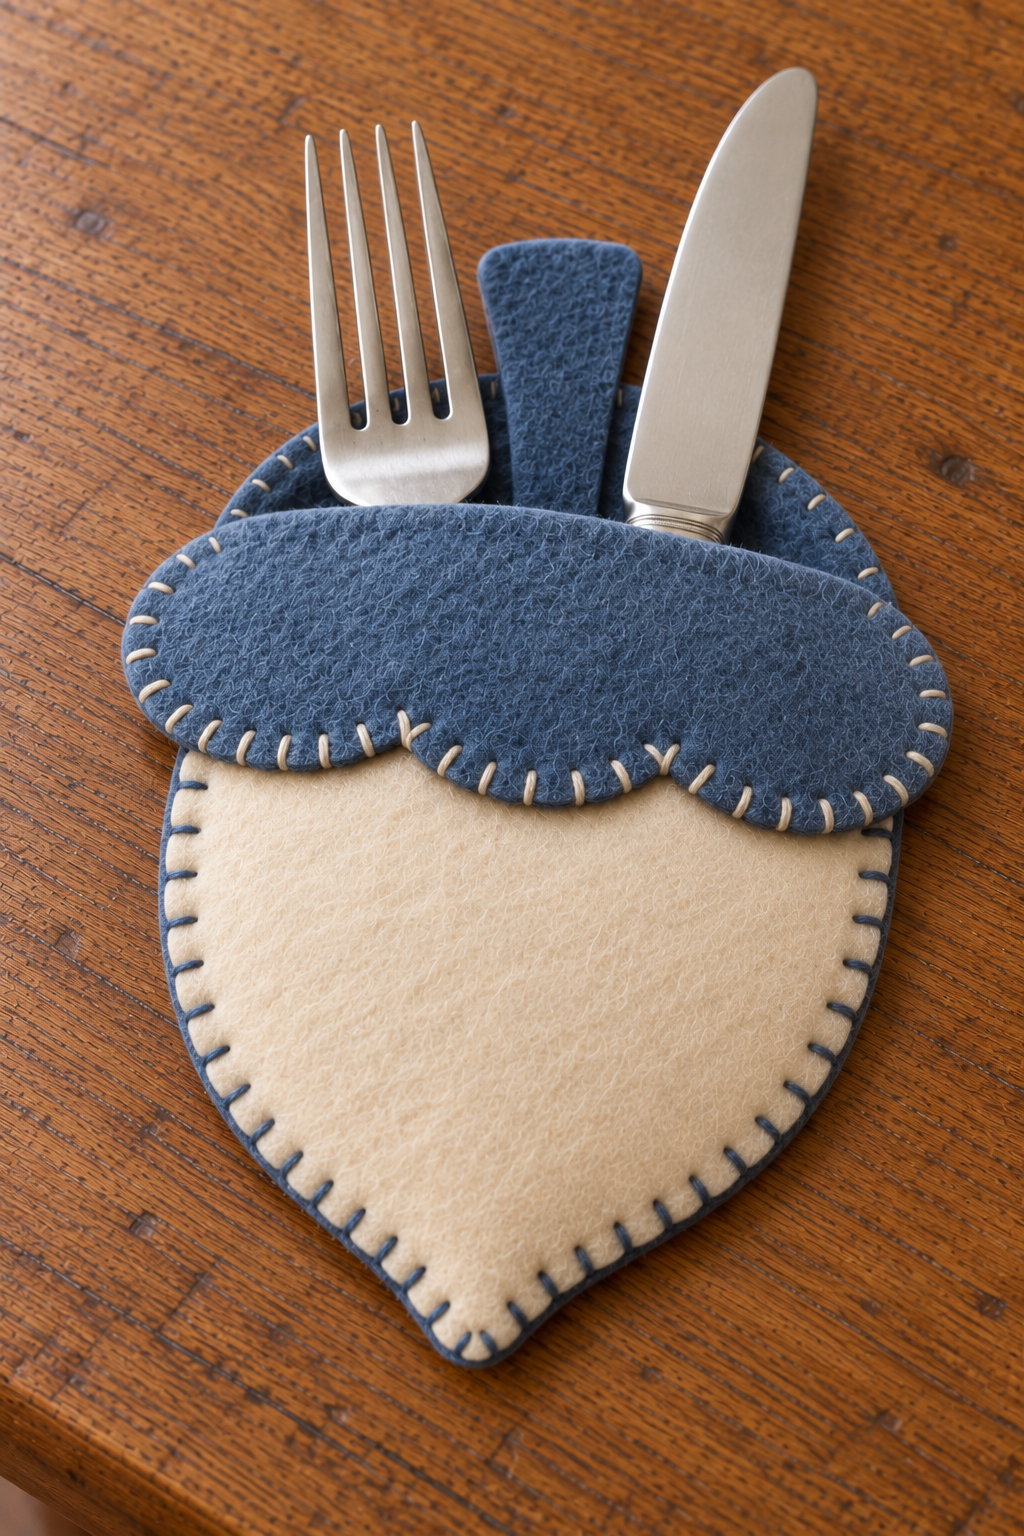
Image created with AI. This image serves as visual inspiration for the project below.
A felt acorn makes a useful little place-setting detail: its rounded body holds a fork and knife, while a blue cap gives the familiar autumn shape a quiet change of color. Warm ivory felt keeps the project soft against a cloth napkin. The visible edge stitches give the pockets their handmade character without needing an embroidered design.
The method here uses flat felt layers and hand stitching to make a similar pocket. Size each one around the flatware you actually plan to use.
What You’re Making
Each pocket has a full blue back with a short stem, an ivory front body, and a separate blue cap attached to that front. The back supports the whole outline. The front and back join around the sides and pointed bottom, leaving the cap’s upper edge open for the utensils.
The result is a flat sleeve, not a stuffed acorn. That keeps it comfortable on a napkin and avoids adding bulk underneath a place setting.
Materials and Supplies
Main Materials
- Muted blue and warm ivory craft felt
- Blue and ivory cotton embroidery floss
- Plain paper for the pattern
Tools
- Hand-sewing needle suitable for felt and embroidery floss
- Sharp fabric scissors
- Ruler
- Pencil
- Removable fabric marker or tailor’s chalk
- Sewing pins
Before You Start
Fit the pattern to your flatware
Place a fork and table knife side by side on paper, with the parts you want concealed at the bottom. Mark a body wide enough to enclose both handles, allowing extra room at each side for seams and easy removal. Choose the height so the eating ends project clearly above the pocket.
Draw rounded shoulders, gently curved sides, and a small point at the bottom. Above the body, add a broad shallow cap and a short centered stem. Keep the cap wider than the body so the finished outline reads as an acorn.
Cut out this trial outline and check it on your napkin. A pocket that covers almost the entire napkin may need narrowing rather than simply shortening. Make one test pocket before cutting a dinner set.
Choose felt that holds an edge
Use felt that can take small stitches without tearing or stretching badly. A very loose or thin sheet may sag around the utensils. Test a few stitches on an offcut, especially if the blue and ivory sheets differ in thickness.
Check whether your marking tool can be removed from the actual felt. Place marks on the reverse whenever possible, and keep them away from the finished opening.
Step-by-Step Tutorial
1. Separate the pattern into three pieces
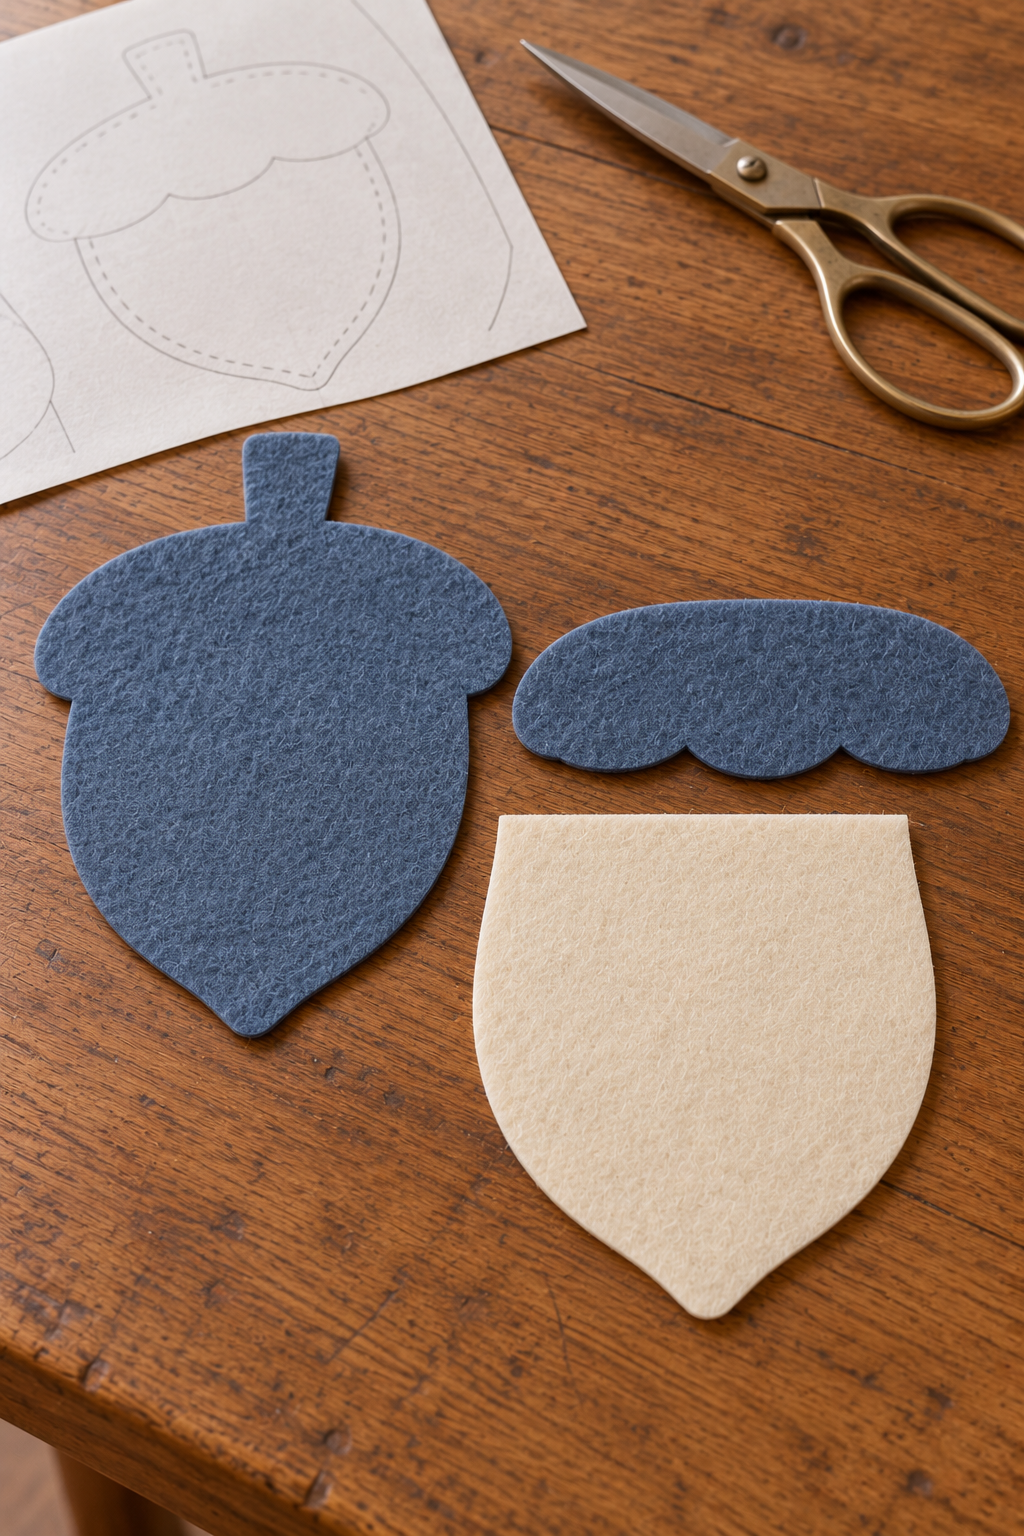
Use the complete acorn outline for the blue back, including the stem. Make a second paper pattern for the ivory front: trace the body from its pointed bottom to a straight upper edge beneath the cap area. The front needs enough height to overlap the cap.
For the third pattern, trace the broad cap without the stem. Give its lower edge a few shallow rounded scallops rather than small complicated notches. This piece will overlap the ivory front while remaining separate from the back across its top.
Arrange the paper layers together. The cap should conceal the ivory front’s straight upper edge, and the outline below it should remain recognizably rounded with a small bottom point.
2. Cut and check the felt layers
Trace the full back and cap onto blue felt and the front body onto ivory felt. Cut slowly around the curves, turning the felt rather than making many short snips. A smooth, slightly handmade outline looks more convincing than a ragged edge.
Lay the cut pieces in their finished order: back below, ivory front above it, blue cap across the front’s upper portion. Align the body edges and center the cap. Check the fork and knife against this arrangement again before sewing.
3. Stitch the cap to the front only
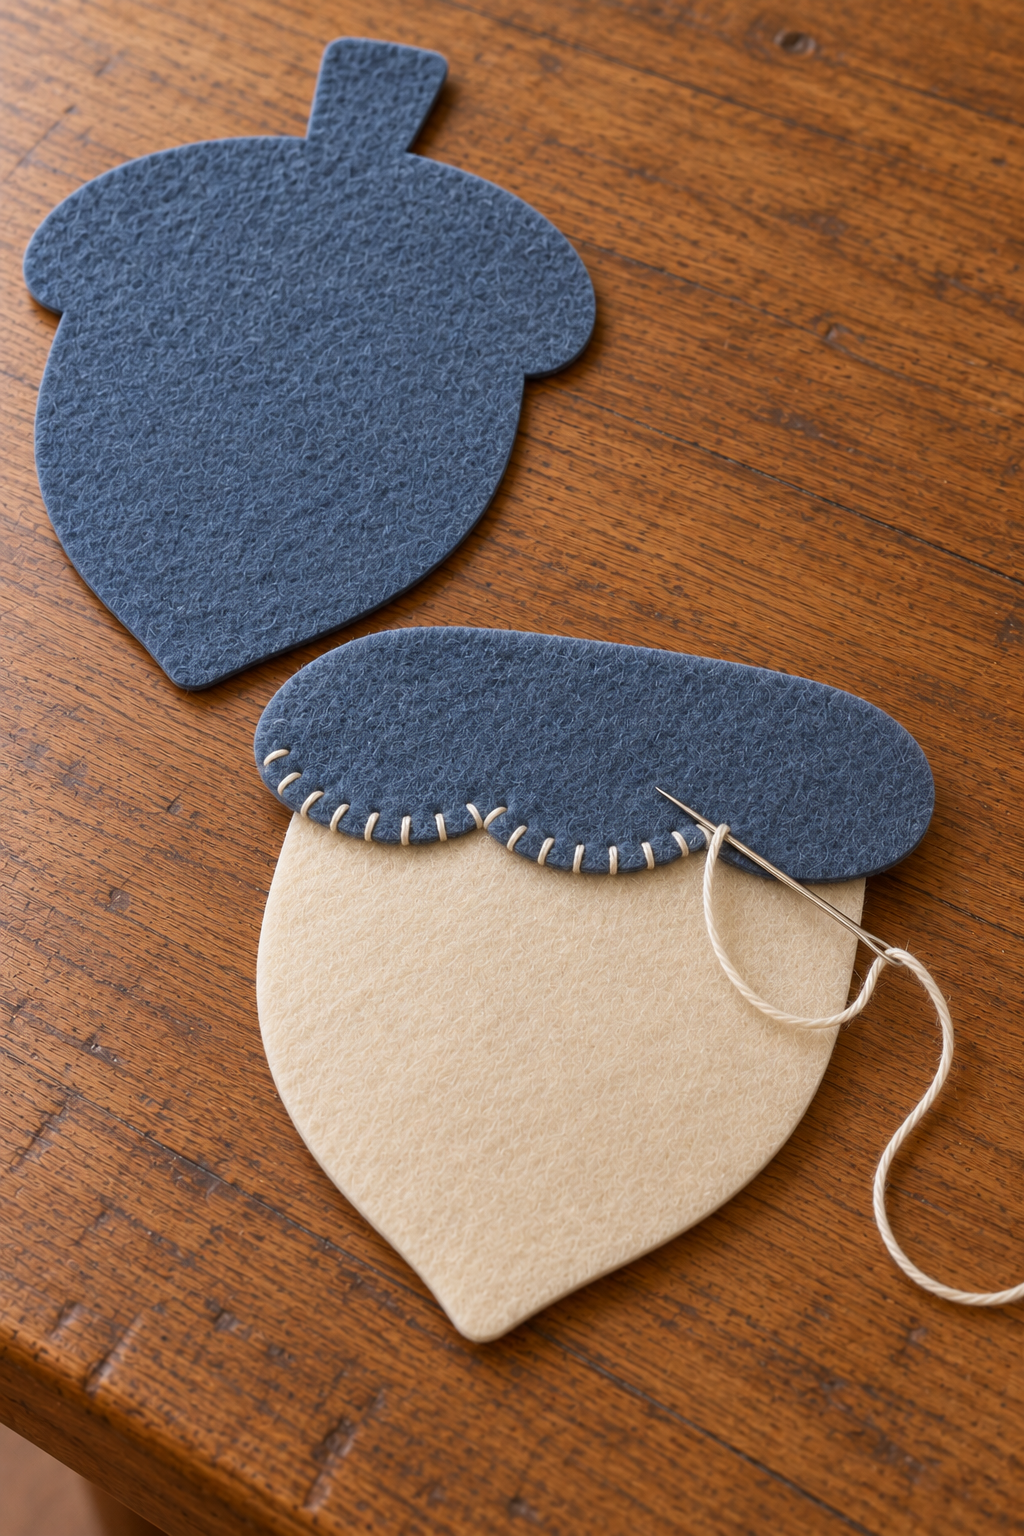
Lift the ivory front and blue cap away from the back. Pin the overlap, keeping the scalloped lower edge visible. Thread the needle with ivory floss, using enough strands to show clearly without forcing a large needle through the felt.
Sew the cap’s lower edge to the ivory front with small blanket stitches. Start with a knot concealed between the layers. Bring the needle through both layers near the edge, then make the next stitch a short distance along. Before pulling the loop closed, pass the needle through it so the thread settles neatly around the blue edge.
Continue along the scallops with even tension. Stop before the outer corners, secure the thread on the reverse, and remove the pins. Do not sew this assembly to the back yet.
4. Join the pocket around its sides and bottom
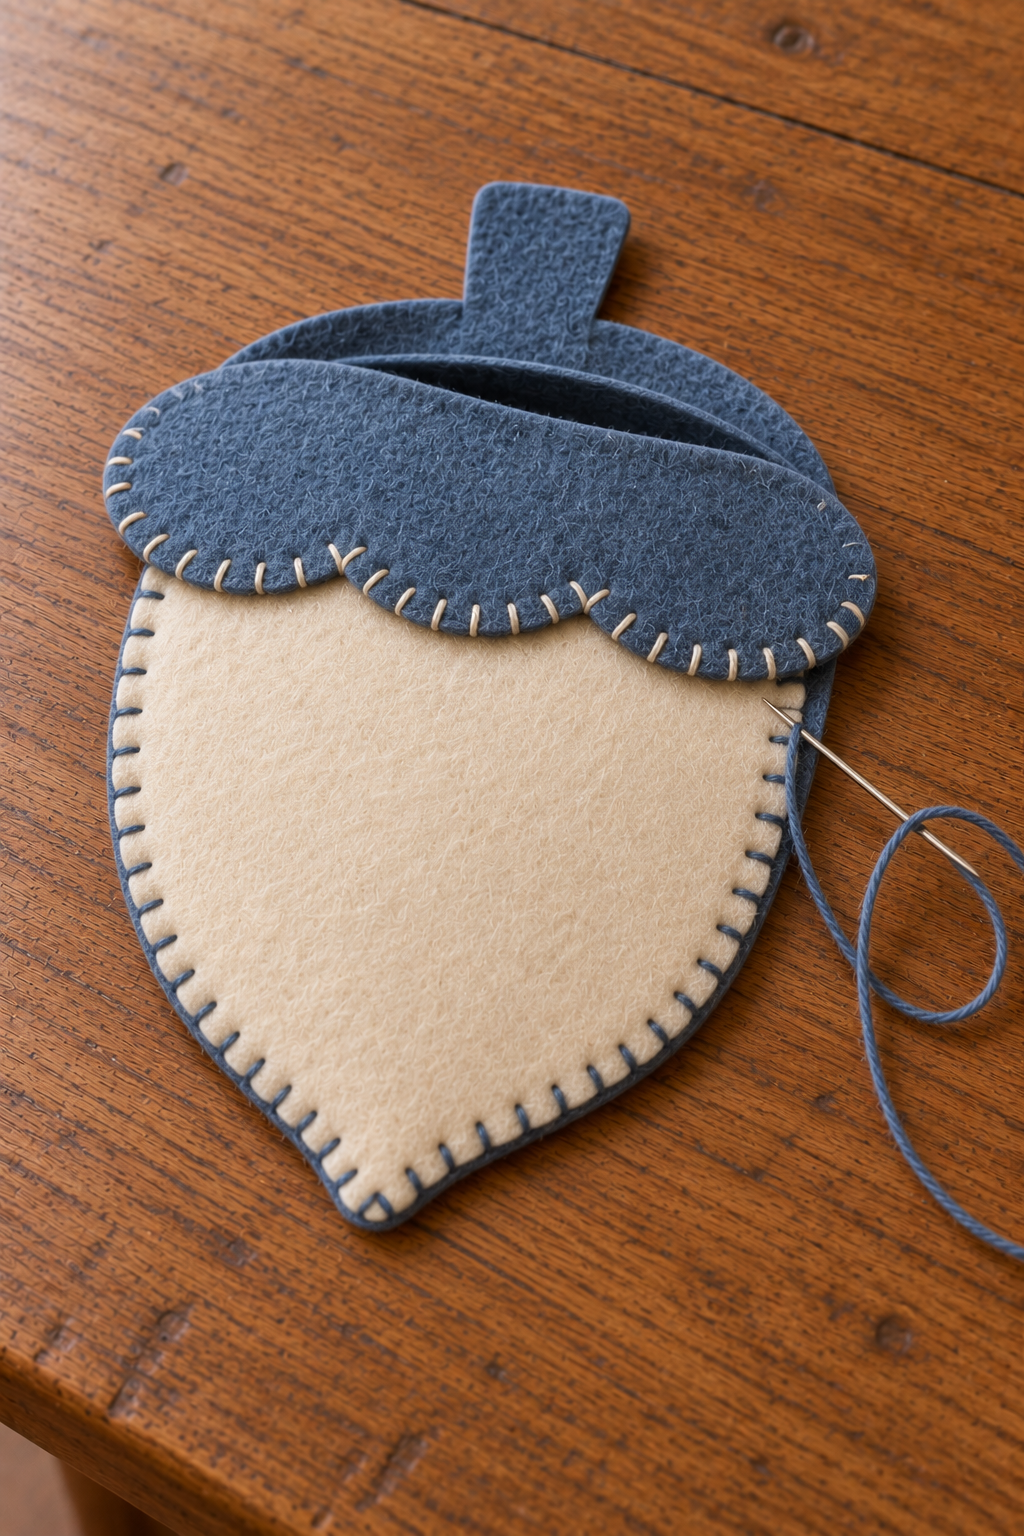
Place the completed front over the full blue back. Match the body outline and pin away from the stitch path. Begin at one side near the pocket opening, sewing through the front and back together.
Use blue floss around the ivory body’s sides and bottom. Work small blanket stitches along the curves, keeping the layers flat. At the bottom point, turn gradually rather than pulling several tight stitches into the same spot. If the cap’s projecting ends meet the back, join those short side edges with ivory floss.
Leave the entire upper mouth open. No stitch should cross between the cap’s upper edge and the back: that gap is where the utensils enter. Finish with a small secure knot concealed between the layers.
5. Test the opening and make the remaining pockets
Slide the utensil handles into the open top. They should settle inside without forcing the seams apart. If the opening catches, check for a misplaced stitch joining the front to the back across the mouth. Remove that stitch before widening or cutting anything.
Lay the pocket on its napkin and lift out the utensils several times. Once the fit works, reuse the paper pieces for the remaining pockets. Keep the same opening size even if the scallops and stitch spacing vary slightly.
Keep the Felt Edges Looking Neat
Short thread lengths are easier to control around the cap’s curves than a long strand that twists and tangles. If a stitch pulls the felt into a ripple, loosen it immediately rather than hoping the next stitch will flatten it.
Remove small felt fibers with a soft brush. Avoid trimming close to the completed seams, where a stray cut could weaken the edge.
Adjust the Acorns for Your Table
Reverse the blue and ivory layers for a coordinated second version, keeping the acorn outline unchanged. A narrower pocket can hold a single spoon for a dessert place setting; make a new paper trial around that utensil rather than scaling the whole pattern blindly.
A plain rounded cap is an alternative if scallops are difficult to cut cleanly. The broad cap, short stem, and pointed body still provide the essential acorn shape.
Place and Store the Finished Pockets
Set each pocket on a folded napkin with clean utensils inserted shortly before the meal. Keep decorative leaves separate from the flatware and remove any loose fibers before use.
Empty the pockets after the gathering and store them flat. Follow the felt supplier’s care instructions; spot cleaning may suit some felt better than soaking. These sleeves are table decorations, not a substitute for keeping utensils clean.
A little contrast at the cap and a clearly open pocket are the details that make this acorn both recognizable and useful at a Thanksgiving table.