
*This post may contain affiliate links for which I earn commissions.*
Image created with AI.
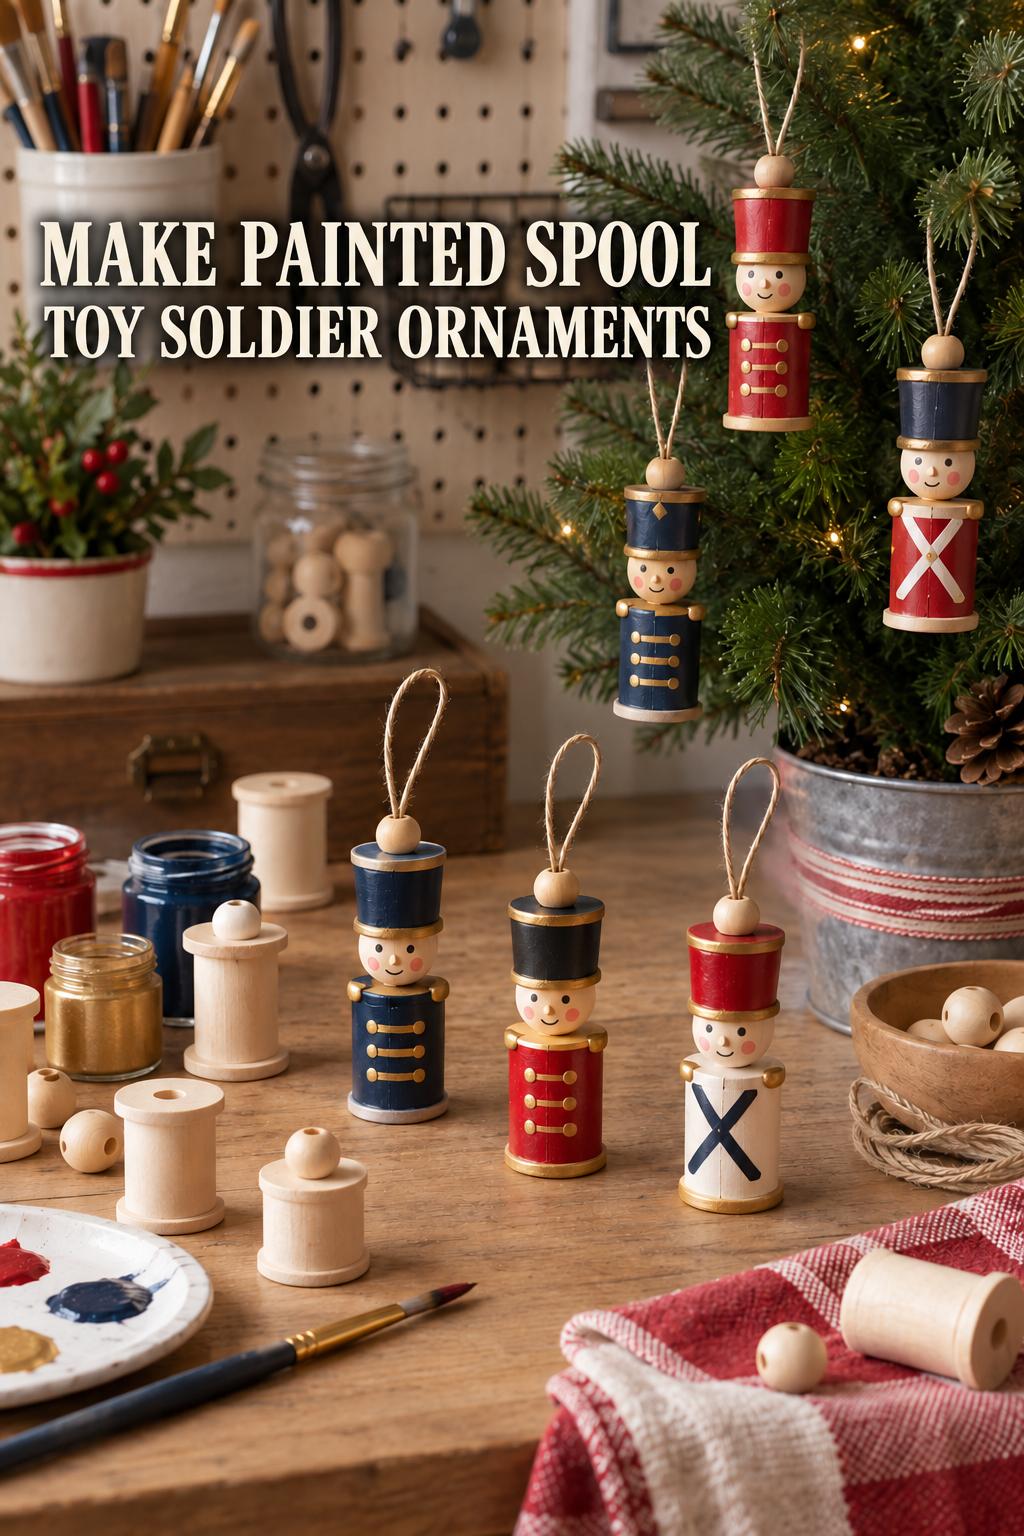
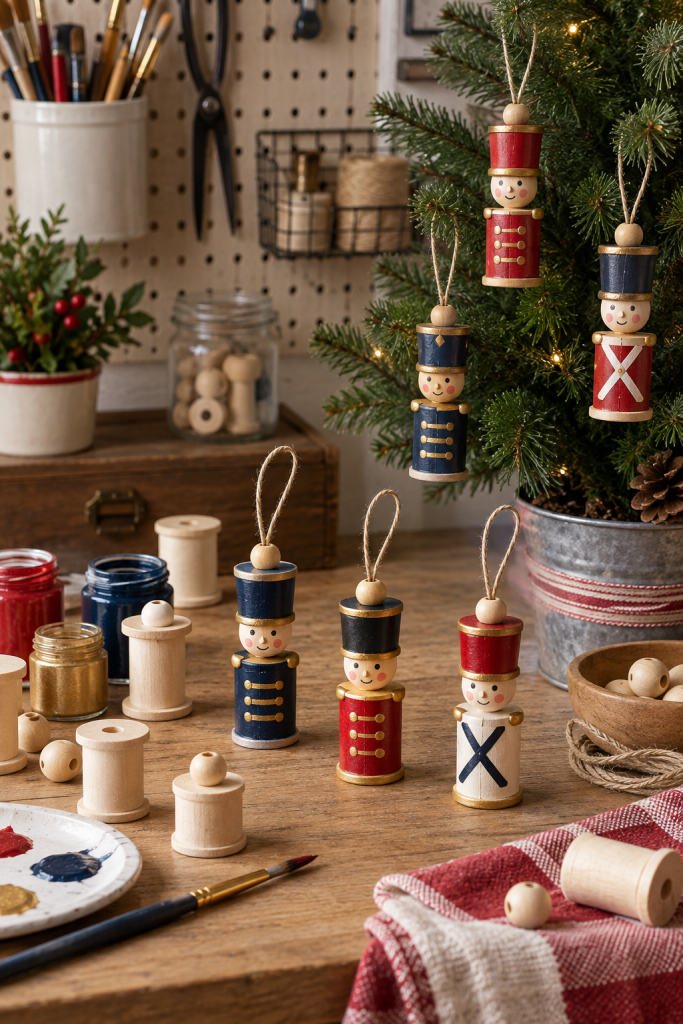
These painted spool toy soldier ornaments turn basic wooden craft pieces into small Christmas characters with just enough detail to feel special. The image pairs crimson, navy, antique gold, and natural wood on a practical workbench, so the project looks festive without requiring advanced painting skills.
The finished soldiers have simple cylindrical bodies, round bead heads, tall spool-like hats, and visible twine loops. Their handmade differences are part of the appeal. A slightly uneven smile or a softened gold line gives the set the character of old toys brought out each December.
Materials and Tools
Gather unfinished wooden spools for the bodies, round wooden beads for the heads, and smaller beads or flat wooden discs if you want to build up the hats. Choose pieces with holes large enough for your hanging cord or plan to secure the loop beneath the top bead.
You will also need water-based craft paint in red, navy, cream, black, and metallic gold; a small flat brush; a fine detail brush or paint marker; craft glue rated for wood; thin jute twine or narrow cotton cord; scissors; a pencil; and a clear water-based sealer. A scrap of fine sandpaper and a wooden skewer are useful for smoothing edges and holding pieces while they dry.
Before You Start
Dry-fit one complete soldier before opening the paint. Check that the bead sits squarely on the spool and that the hanging loop can be trapped securely between components. If a spool rocks on its end, sand it lightly so the finished ornament hangs straight.
Set aside a few pieces to remain partly natural. The exposed wood prevents the red, navy, and gold palette from becoming too heavy. I would also limit each figure to two uniform colors plus gold details; that keeps the small shapes readable from across the room.
Work in a ventilated area, follow the adhesive and sealer instructions, and let every painted surface dry fully. These ornaments are decorative, not toys, and small beads and cord should be kept away from young children and pets.
Step-by-Step Instructions
1. Sort and smooth the wooden parts. Pair spools and beads by scale, then lightly sand rough rims or splinters. Wipe away dust with a dry cloth.
2. Plan the hanging loop. Cut a length of cord, knot the ends together, and test how the knot will sit in the upper opening or beneath the head bead. The loop should be long enough to clear the hat without becoming floppy.
3. Paint the body. Hold the spool on a skewer and apply two thin coats of red or navy, leaving the rim natural or painting it gold. Thin coats preserve the wood grain and dry more evenly than one heavy layer.
4. Paint the head and hat. Keep the face area warm cream or natural wood. Paint the larger upper spool or disc as a tall hat, then add a narrow gold band once the base color is dry.
5. Add a simple face. Mark the eyes and mouth lightly in pencil. Use tiny dots and a short curved line, then add restrained rosy cheeks. Avoid crowding the bead with too many features.
6. Create the uniform. Paint three small gold dots or short horizontal bars down the front. Shoulder beads are optional; if used, keep them small enough that the figure still hangs cleanly.
7. Assemble the ornament. Thread or position the cord first, then glue the body, head, and hat in a straight stack. Support the piece upright until the glue has reached the handling time listed on its label.
8. Seal and cure. Brush on a thin clear matte or satin sealer, keeping it out of cord fibers. Let the ornament cure completely before hanging it on a tree.
Display the Finished Ornaments
Mix red and navy soldiers rather than hanging every color together. On a tabletop evergreen, three to five ornaments are enough to establish the toybox theme while leaving room for the branches to show. Natural pinecones or plain wooden beads can repeat the unfinished wood without competing with the painted faces.
If the figures rotate on their loops, position them near branch tips with a little open space. I would test one ornament overnight before finishing the full set, especially if the chosen glue or sealer is new to you. That quick check catches loose heads and tacky finishes early.
Shop Materials and Tools
Wooden craft spools: Look for unfinished, smooth pieces with consistent center holes and enough flat surface for uniform details.
Round wooden beads: Choose heads that are slightly narrower than the spool body. Pre-drilled beads simplify the cord path.
Water-based craft paint: A small coordinated set in red, navy, cream, black, and metallic gold covers the whole project.
Fine detail brushes: Short, pointed bristles offer better control for eyes, buttons, and hat bands.
Wood-compatible craft glue: Check the label for porous materials and allow the stated cure time before hanging.
Thin hanging cord: Jute gives a rustic finish, while narrow cotton cord creates a cleaner line against painted wood.
Final Project Tip
Write the paint colors and component sizes on a small card before packing the ornaments away. Next year, you can replace a damaged figure or expand the set without guessing which red or bead proportion made the group feel coordinated.