*This post may contain affiliate links for which I earn commissions.*
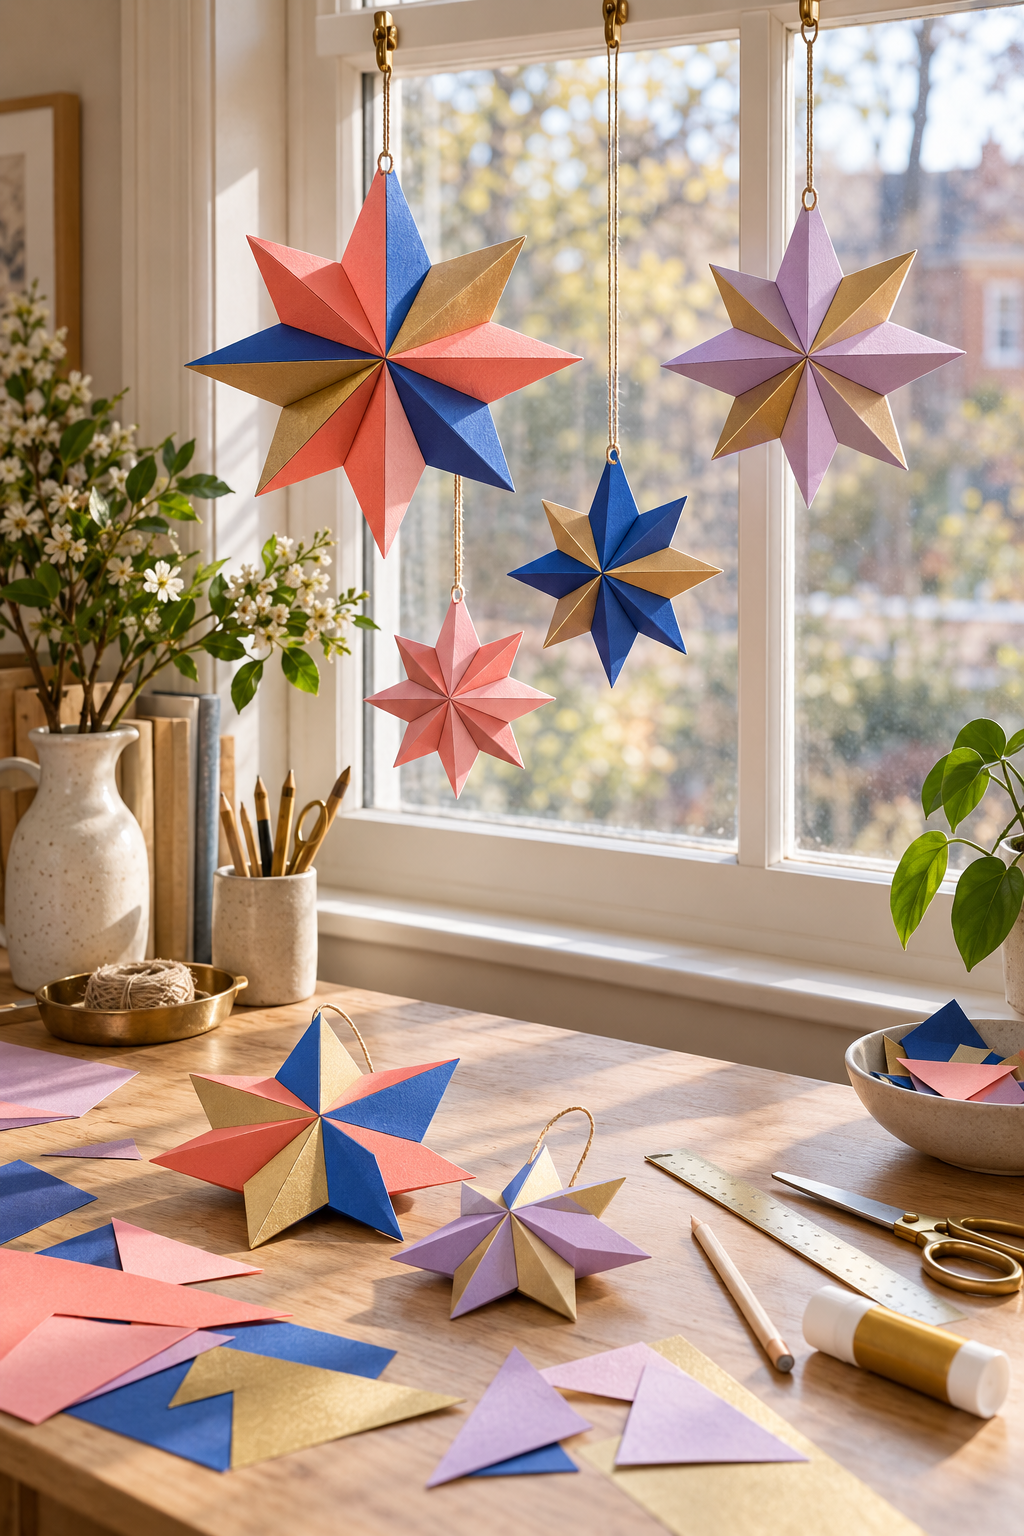
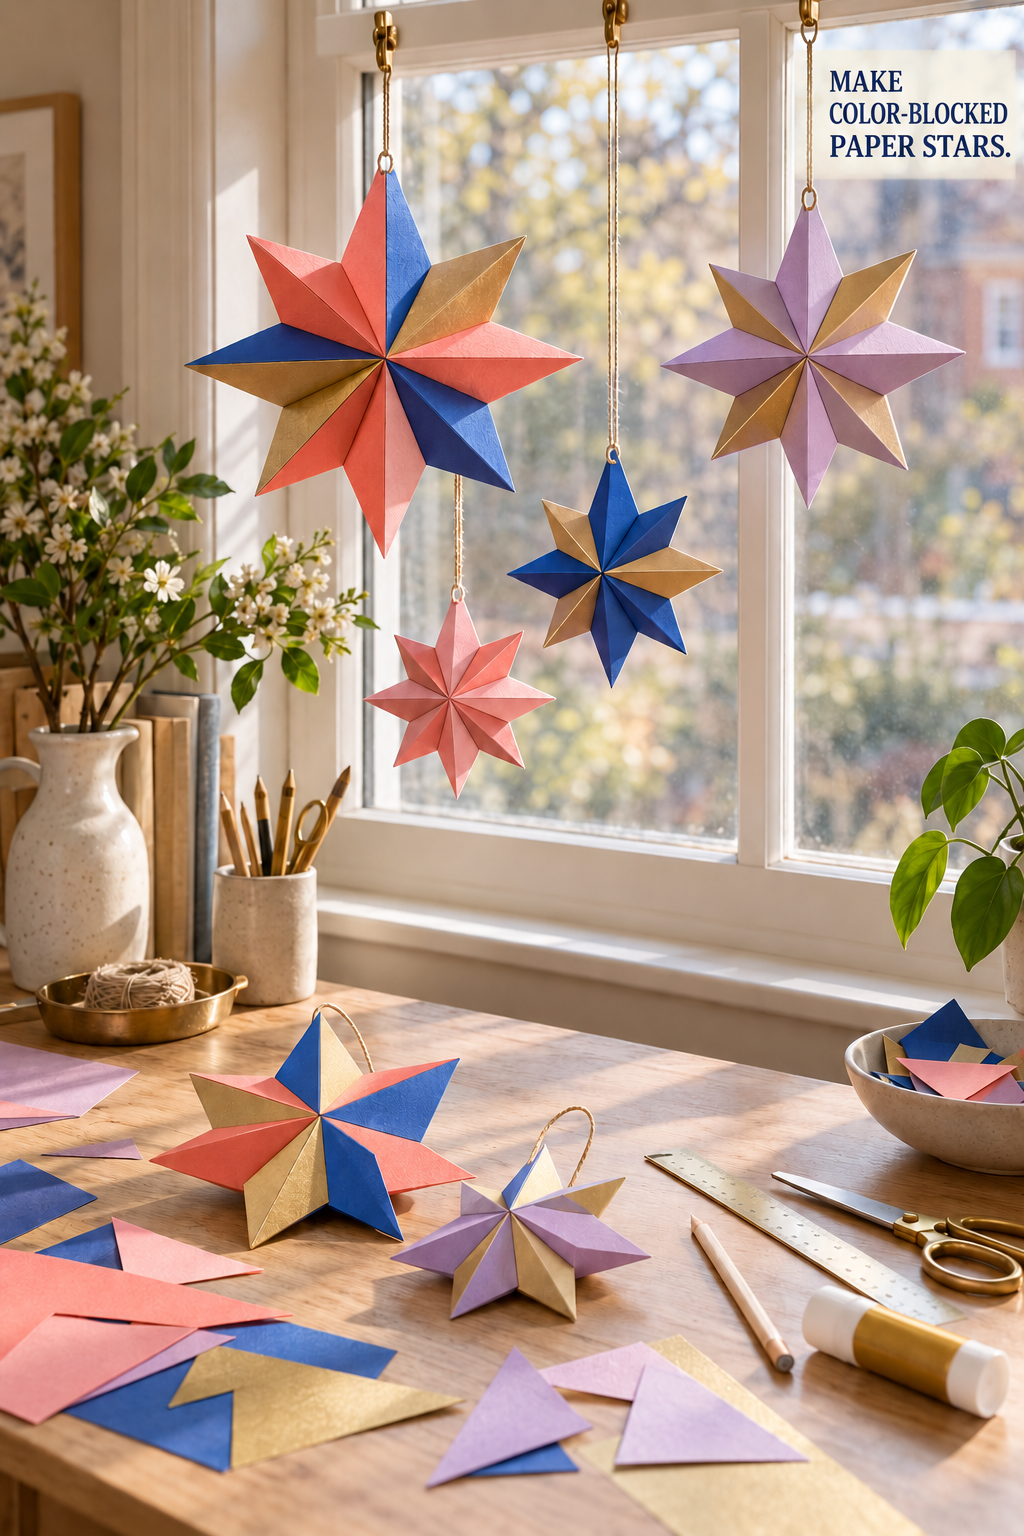
This AI-generated image provides inspiration for the project below. The tutorial builds an eight-point star with raised triangular facets on both sides and a concealed cardstock core for support.
Make eight-point paper stars with crisp triangular faces, then hang a few at different heights in a window. The inspiration image pairs coral, cobalt blue, and lavender with gold. This tutorial uses warm ochre cardstock as a matte alternative to the pictured gold, while raised folds create depth and catch the light.
What You’re Making
Each side of the star has eight pointed sections. Two triangular faces meet along a raised ridge in each section, giving each side 16 visible facets. Eight sections join along their inner edges, with their centers meeting at one raised apex. Make two matching shells and attach them to opposite sides of a flat cardstock core. The core stays hidden inside the finished star and supports the hanging cord.
The reference size is 250 mm across opposite tips, approximately 9.8 inches. Each center rises 20 mm, about 0.8 inch, from the internal core, giving the star a total depth of about 40 mm, or 1.6 inches. These are dimensions for this pattern, not measurements taken from the image.
Materials and Supplies
Main Materials
- Foldable cardstock, approximately 160–200 gsm, in shades close to coral, cobalt blue, lavender, and warm ochre. Each star needs 16 two-face sections, eight for each side.
- Lightweight colored paper for contrasting triangular face panels.
- Cardstock for one 250 mm internal star-shaped core and a small reinforcement patch per star. Use the same colored cardstock listed above.
- Plain paper for the master pattern and a practice assembly.
- Paper craft glue suitable for the selected paper finishes.
- Lightweight cord or twine.
- Window-frame hooks compatible with the actual surface.
Tools
- Metric ruler with millimeter markings, pencil, compass, and protractor.
- Scissors.
- A blunt, narrow-tipped scoring tool and an optional bone folder for pressing the folds.
- Small hole punch, approximately 2 mm.
- Small craft clips.
Before You Start
Use millimeters for the pattern so the small measurements stay consistent. The inch values are size references, not a second set of cutting measurements.
Test a scrap of cardstock to make sure it creases without splitting. Apply glue sparingly, especially to the lightweight colored overlays, so they stay smooth and do not stiffen the folds.
Plan the hanging positions around your window handles and curtains. Make a plain-paper practice star using the same pattern before working with the decorative sheets. Use the practice star to become familiar with the folds, glue tabs, and assembly order.
Download the Full-Size Paper Star Pattern (PDF). The four-page PDF includes the point section with glue tabs and fold lines, plus the internal core with reinforcement and cord-hole guides. Print on US Letter paper at 100% or Actual Size, with “Fit to page” turned off. Check that the printed scale bar measures 50 mm before cutting. Join pages 3 and 4 using the alignment marks to complete the core pattern.
If you use the printable pattern, skip the drawing instructions in Steps 1 and 2. The glue tabs are already included. Cut out the templates, trace them onto cardstock, and transfer the letters and fold lines from the point-section template before cutting your pieces.
Step-by-Step Tutorial
Step 1 Draw the internal core
On plain paper, mark a center O. Draw two circles centered on O, with radii of 125 mm and 55 mm. Draw 16 rays spaced 22.5 degrees apart, beginning with a ray pointing straight up.
Mark the outer circle on the top ray and every other ray after it. Mark the inner circle on each intervening ray. Connect the marks in order, alternating outer tips and inner notches. This creates an eight-point star. Cut out the outline, trace it onto cardstock, and cut one internal core without tabs.
Keep the paper pattern with its center and rays marked. It will serve as an alignment guide during assembly. The internal core stays flat and is not scored into mountain and valley folds; both exposed sides of the finished star will be raised.
Step 2 Draw a two-face point pattern
Each raised shell needs longer center-to-tip edges than the flat core. Make a separate pattern for one pointed section rather than tracing triangles from the core.
Draw a line from C to T measuring 126.6 mm. C represents the raised center; T is an outer tip. Set the compass to 58.5 mm and draw an arc centered at C. Set it to 77.1 mm and draw another arc centered at T. Mark their intersection on one side of the line as L. Repeat on the other side to mark R.
Connect C–L, L–T, T–R, and R–C. You now have two mirrored triangles sharing the line C–T. Each triangle has sides of 126.6 mm, 58.5 mm, and 77.1 mm. The dimensions are rounded to the nearest 0.1 mm; use the same master pattern for all 16 sections.
Add a 5 mm glue tab outside C–R only. Add 5 mm tabs outside L–T and T–R as well. Leave C–L without a tab. Taper all tab ends so they stop about 2 mm short of the corners and cannot overlap there. Cut out the complete pattern, including its three tabs.

Keep C, T, L, and R marked on the reverse of every traced piece. Trace and cut 16 identical sections from colored cardstock, then divide them into two groups of eight. Mark the shared C–T ridge and the three tab fold lines on each reverse side.
Step 3 Score the ridges and arrange the colors
Score C–T and each tab fold line lightly against a ruler. Do not cut through the cardstock. Viewed from the colored front, C–T becomes a mountain fold: the ridge rises toward you while L and R move behind it. Fold the tabs toward the inside, behind the visible faces.
Use each group of eight sections to plan the color distribution for one side. For a four-color star, repeat coral, cobalt blue, lavender, and warm ochre around each shell. The two sides can use the same palette without matching every color position. To split one point between two colors, trace one face triangle onto thin contrasting paper, trim it about 0.5 mm inside all three edges, and glue it onto that face while the section is still open. Keep overlays off the ridge and tabs.

Let the overlays set, then gently refold the ridges. Do not pinch the sections closed. Their final angle will be established when each shell is joined.
Step 4 Assemble two raised shells
Hold two sections with their colored faces toward you. Slip the tab along C–R on the first section beneath the untabbed C–L edge of the next. Match C to C and R to L, then glue the tab to the underside of the neighboring face. Keep the tab hidden behind the colored surface.
Continue joining the sections in the same direction, bringing their C corners together and allowing the assembly to curve into a shallow cap. Align the actual face edges, not the outer edges of the tabs. Keep the long C–T ridges raised and let the inner joins form recessed seams between points.
Bring the last tabbed inner edge to the first untabbed inner edge and close the ring. The shell forms a shallow cap with eight tips around its perimeter and all eight C corners meeting at the raised center.

Allow the inner seams to set before placing the shell over the flat alignment pattern. Its eight tips and eight notches should follow the drawn outline, with the center about 20 mm above the table. Keep the outer tabs folded inward but unglued for now. Repeat with the second group of eight sections to make a matching shell. Check both against the same alignment pattern.
If a seam sits crooked, reopen that joint while the glue is workable and realign its endpoints. Do not flatten the center to force a fit. A noticeably mismatched section should be recut from the master pattern rather than reshaped by trimming its face edges.
Step 5 Anchor the cord to the internal core
On one side of the internal core, glue a reinforcement strip approximately 10 mm wide and 25 mm long inside the top point. Center it on the vertical ray, with its midpoint 35 mm below the top tip. Keep it entirely within the star outline and let it set.
Mark two holes 5 mm apart horizontally and 35 mm below the top tip. Insert the punch from the sloping side edges of the top point to reach the marks, then punch through both the core and reinforcement. Thread one end of the cord from the unpatched side through the first hole, then return it through the second hole. The short bridge between holes sits across the reinforcement patch. Both free ends emerge on the unpatched side.
Run both free ends toward the top tip along the unpatched side of the core, keeping the strands side by side. Tie them together above the tip to form a hanging loop. The knot must stay outside the star. The cord bears on the reinforced core; the two raised shells will conceal the anchor and the cord inside the star.
Step 6 Attach the shells to both sides
Lay the core with its patched side facing up. Position the first shell over it, matching every tip and notch. Working around the perimeter, lift one edge at a time and glue its inward-folded outer tab onto the core. Each tab sits beneath its own triangular face. Use a thin glue layer and a small clip where accessible. Keep the raised center clear of the core.
Let these joints set before turning the assembly over. Support the attached shell by its perimeter with your fingers so its raised center does not press against the table. The unpatched side of the core and the two cord strands should now face you.
Fit the second shell over this side, again matching all tips and notches. Keep the cord strands inside the top point and guide them out together at the tip. Glue the second shell’s outer tabs to this side of the core, leaving about 3 mm beside the top tip on each adjacent edge unglued for the cord exit. Do not glue the cord to the tabs or pull it tightly against the opening. The knot and hanging loop remain outside.
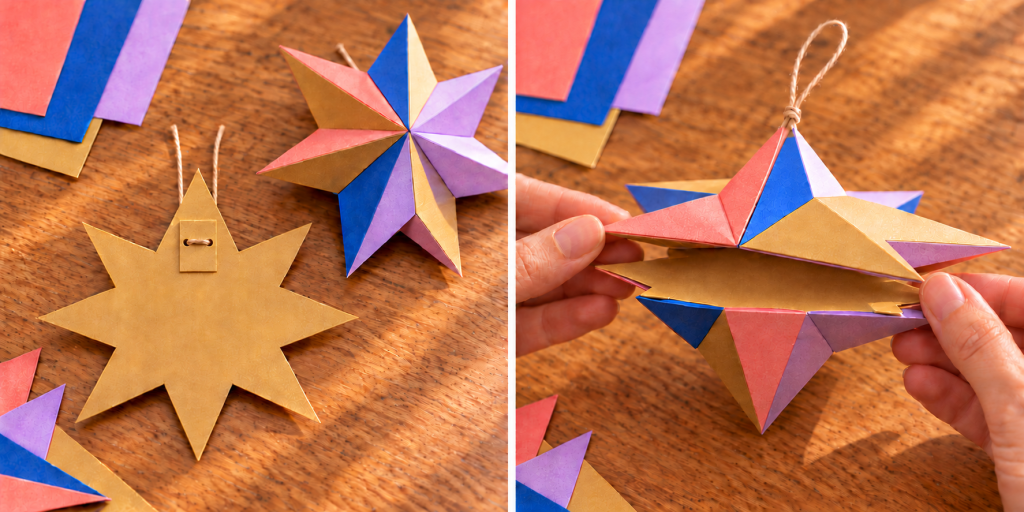
Check the alignment from the side: both centers should project outward, with the thin core concealed between the shells. Neither center is glued to the core. Hold or clip the perimeter where accessible until the joints set, then leave the star to dry fully without pressing either raised center flat.
Step 7 Hang the finished stars
First hold the completed star over a table by its loop and check that the reinforced holes and seams stay intact. Repair any loose joints before hanging it. If the core tears around a cord hole, do not hang the star. Make a replacement using a new core and reuse any undamaged sections.
Install frame-compatible hooks according to their directions. Use one hanging position per star and adjust the cord lengths so the stars sit at different heights. Keep them clear of moving window parts, damp glass, and curtains.
Keep the Facets Crisp
A small amount of glue helps the triangular faces stay smooth. Excess moisture can wrinkle thin overlays and soften the points.
If the center corners separate slightly, apply a small amount of glue from the inside and gently bring the edges together. Let the glue set before attaching either shell to the core. Avoid covering the center with a large decorative patch, which would hide the converging facets.
Make a Coordinated Set
For a smaller star, multiply every pattern dimension, including the core radii, triangle sides, and tab widths, by the same factor. A 0.75 scale gives a star about 188 mm across; a 0.6 scale gives one about 150 mm across. Keep the reinforcement strip and holes within the smaller star’s top point. You can retain the original strip size and hole spacing if they fit, and use finer cord if needed.
Try coral and cobalt blue on the largest star, lavender and warm ochre on another, and a mostly solid-colored smaller star. The palette can repeat across the display without making every star identical.
Arrange the Window Display
Place the largest star to one side and use smaller stars to fill the space below and beside it. Leave room for the points to move without touching another star or the glass.
Both sides have raised facets, so the stars can turn gently and look finished from inside or outside the window. Store them in a box deep enough to protect both raised centers and all the pointed edges.
A few staggered stars are enough to turn the window into a colorful focal point, with the triangular faces doing most of the decorating.