*This post may contain affiliate links for which I earn commissions.*
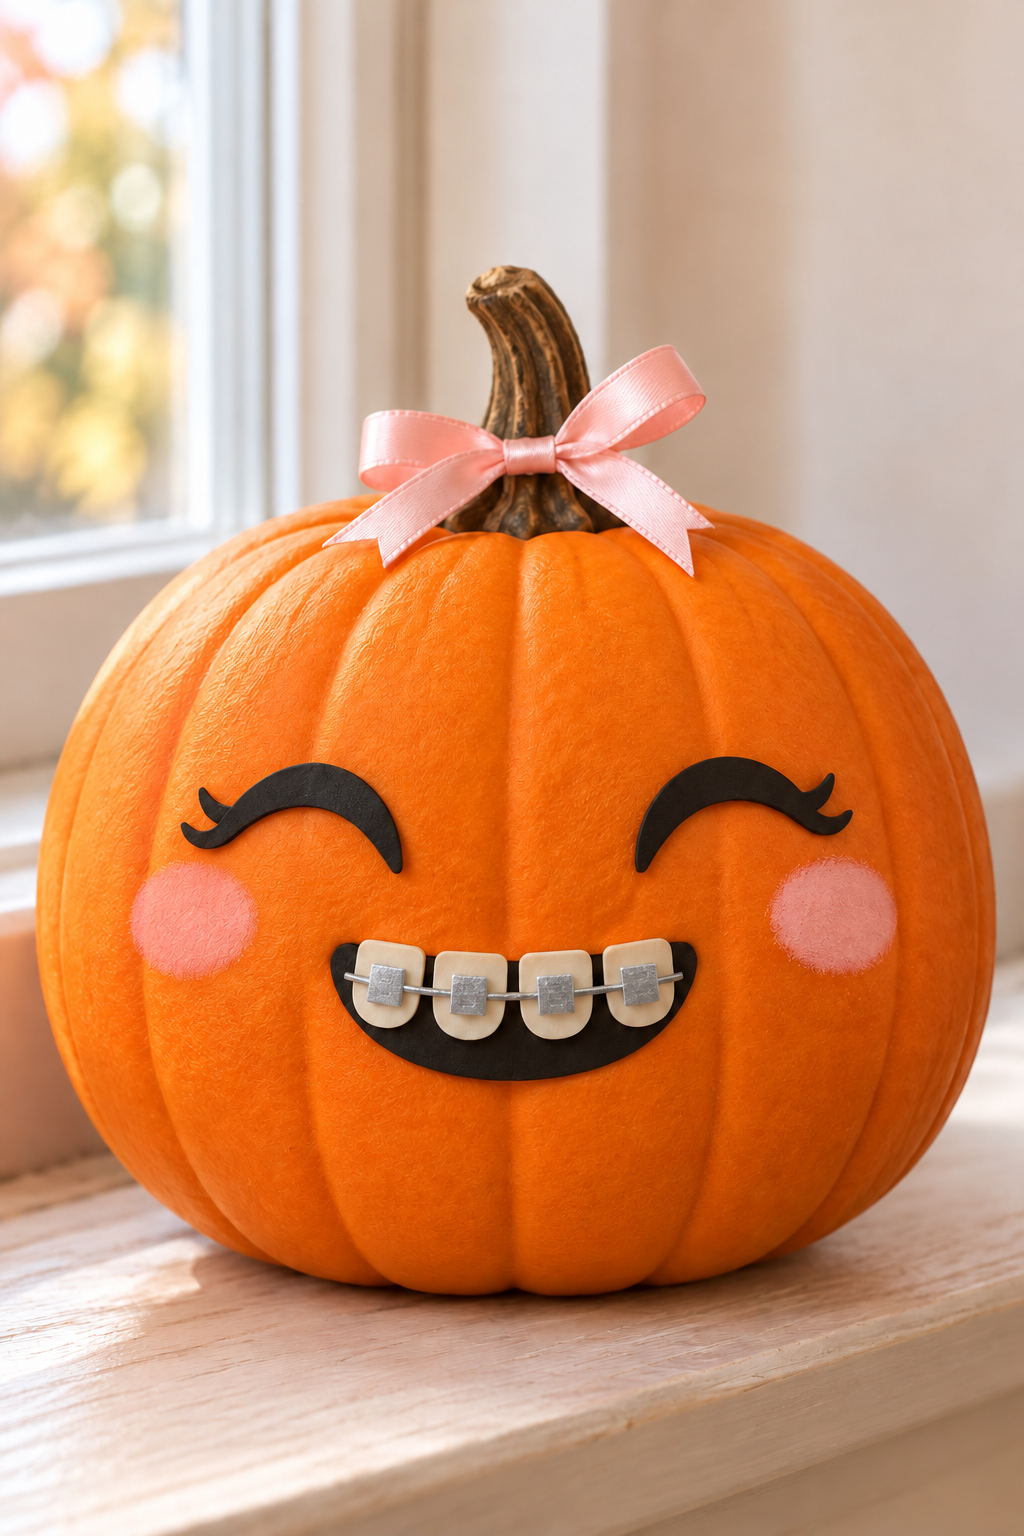
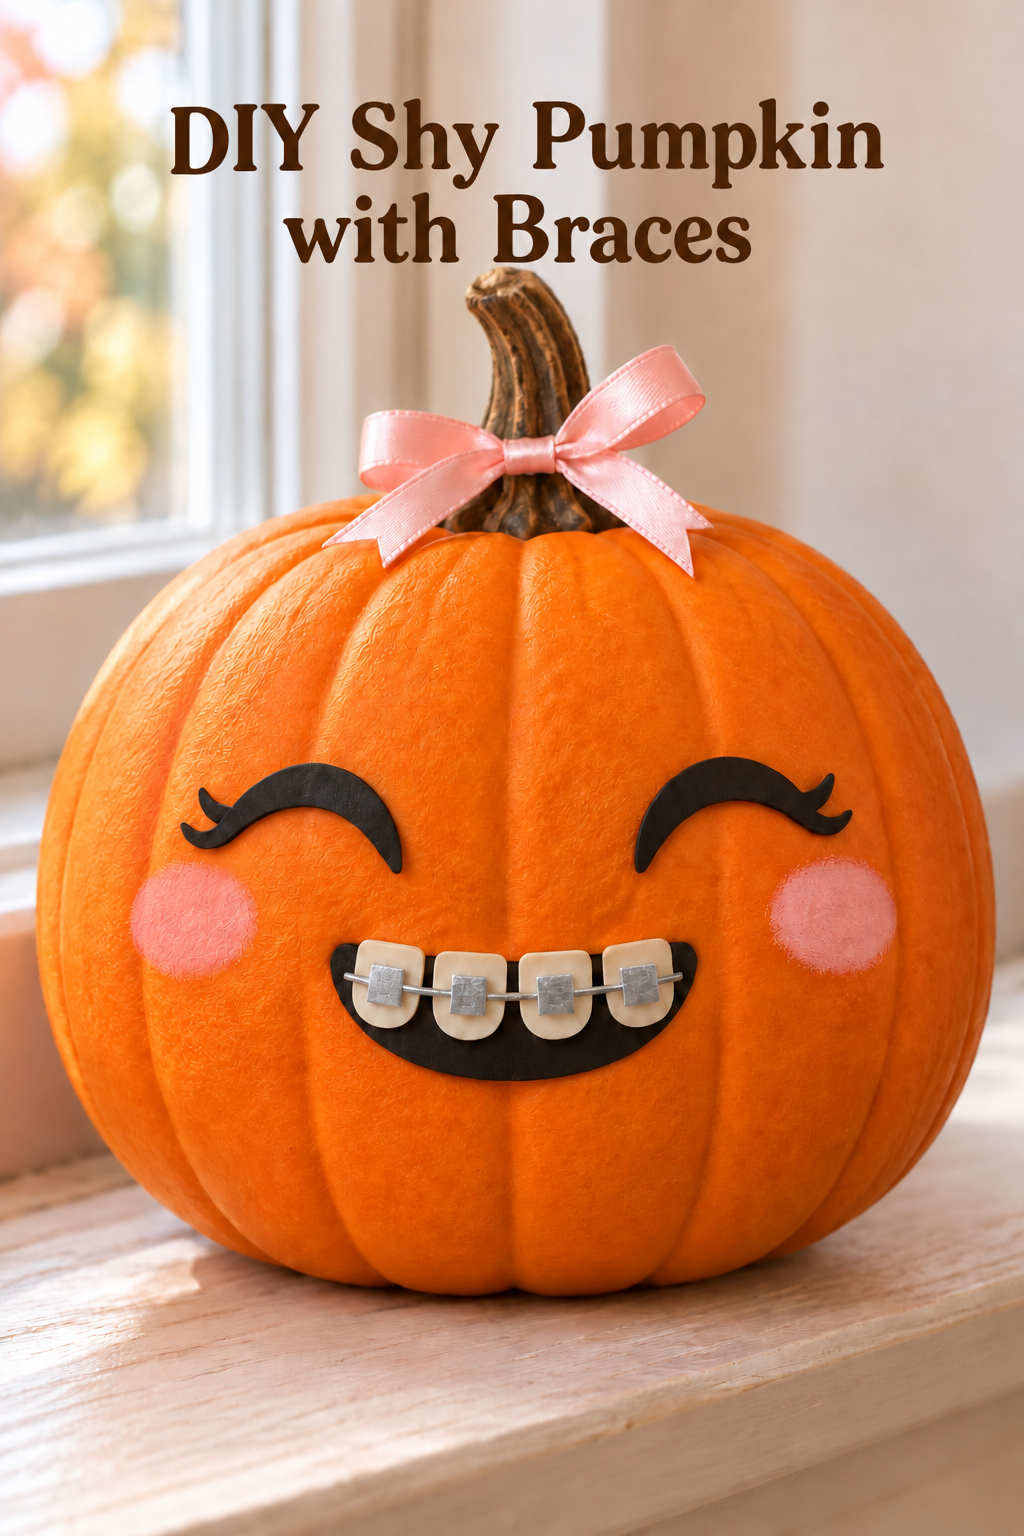
Image created with AI. This image serves as visual inspiration for the project below.
This little Halloween pumpkin smiles with its eyes before you notice its silver braces. Four rounded front teeth, pink cheeks, and a small satin bow give an orange pumpkin a bashful personality without covering it in extra decorations.
The tutorial recreates that expression with lightweight pieces attached to a faux pumpkin. The black mouth is a surface layer, so there is no carving or hollow interior to construct.
What You’re Making
You’ll decorate one squat orange foam pumpkin with black foam eyes and a mouth, four ivory foam teeth, and simplified silver paper braces. Most of each tooth’s back is glued to the black mouth pad, with its top extending slightly above the upper edge. The brackets and connecting strip sit on the tooth fronts, rather than hanging from wire. Painted cheeks and one bow finish the character.
Materials and Supplies
Main Materials
- One orange faux foam pumpkin with a brown stem, approximately 8 inches wide
- Thin black craft foam, about 1-2 mm thick
- Thin warm ivory craft foam, about 1-2 mm thick
- Silver metallic cardstock with a glueable paper back
- Foam-compatible tacky craft glue
- Soft blush pink acrylic craft paint suitable for the pumpkin’s coating
- Soft blush pink satin ribbon, about 1/2 inch wide
- Plain printer paper for the included face pattern
Tools
- Craft scissors suitable for thin foam, cardstock, and ribbon
- Pencil
- Ruler with inch markings
- Fine-tip tweezers
- Small soft round paintbrush
- Scrap paper (newspaper works), a paint palette (a paper plate or clean plastic lid works), and a cloth lightly dampened with water
Before You Start
Choose a smooth face area
Use an artificial pumpkin with shallow grooves and enough smooth surface for the mouth. Deep ribs can lift the edges of flat pieces. This method doesn’t require a carving blank; choose a stable foam pumpkin with a coating that accepts the selected glue and paint.
Check the finish and pattern size
Test glue and paint in an inconspicuous place before decorating. If the coating peels or the glue or paint fails to adhere, choose a different pumpkin.
Print the included Shy Pumpkin Face Pattern (PDF) at Actual Size or 100%, with Fit to Page switched off. Its calibration line must measure 1 inch. The pattern supplies two eyes, a 3-inch mouth, four teeth, four brackets, and a connecting strip. It is a starting size for an approximately 8-inch-wide pumpkin; resize the entire pattern together if the face area is smaller.
Step-by-Step Tutorial
1. Prepare the pumpkin surface
Wipe away dust with a lightly damp cloth and let the surface dry. Set the pumpkin on scrap paper with its chosen face toward you. Keep the stem bare throughout the face assembly so the ribbon won’t get paint or glue on it.
2. Transfer and cut the expression
Cut the paper eyes and mouth from the pattern. Trace around them onto black foam, then cut with short, controlled snips. The eyes have curved upper edges and small outward lash tips. Keep the upward curve of each eye to preserve the smiling expression.
Dry-fit the eyes with the lashes pointing outward and the mouth centered below them. Raise one eye slightly for a gentle asymmetry. Keep space between the outer eye tips and mouth for the cheeks. Lightly mark the positions in pencil, keeping the marks beneath the pieces so they won’t show.
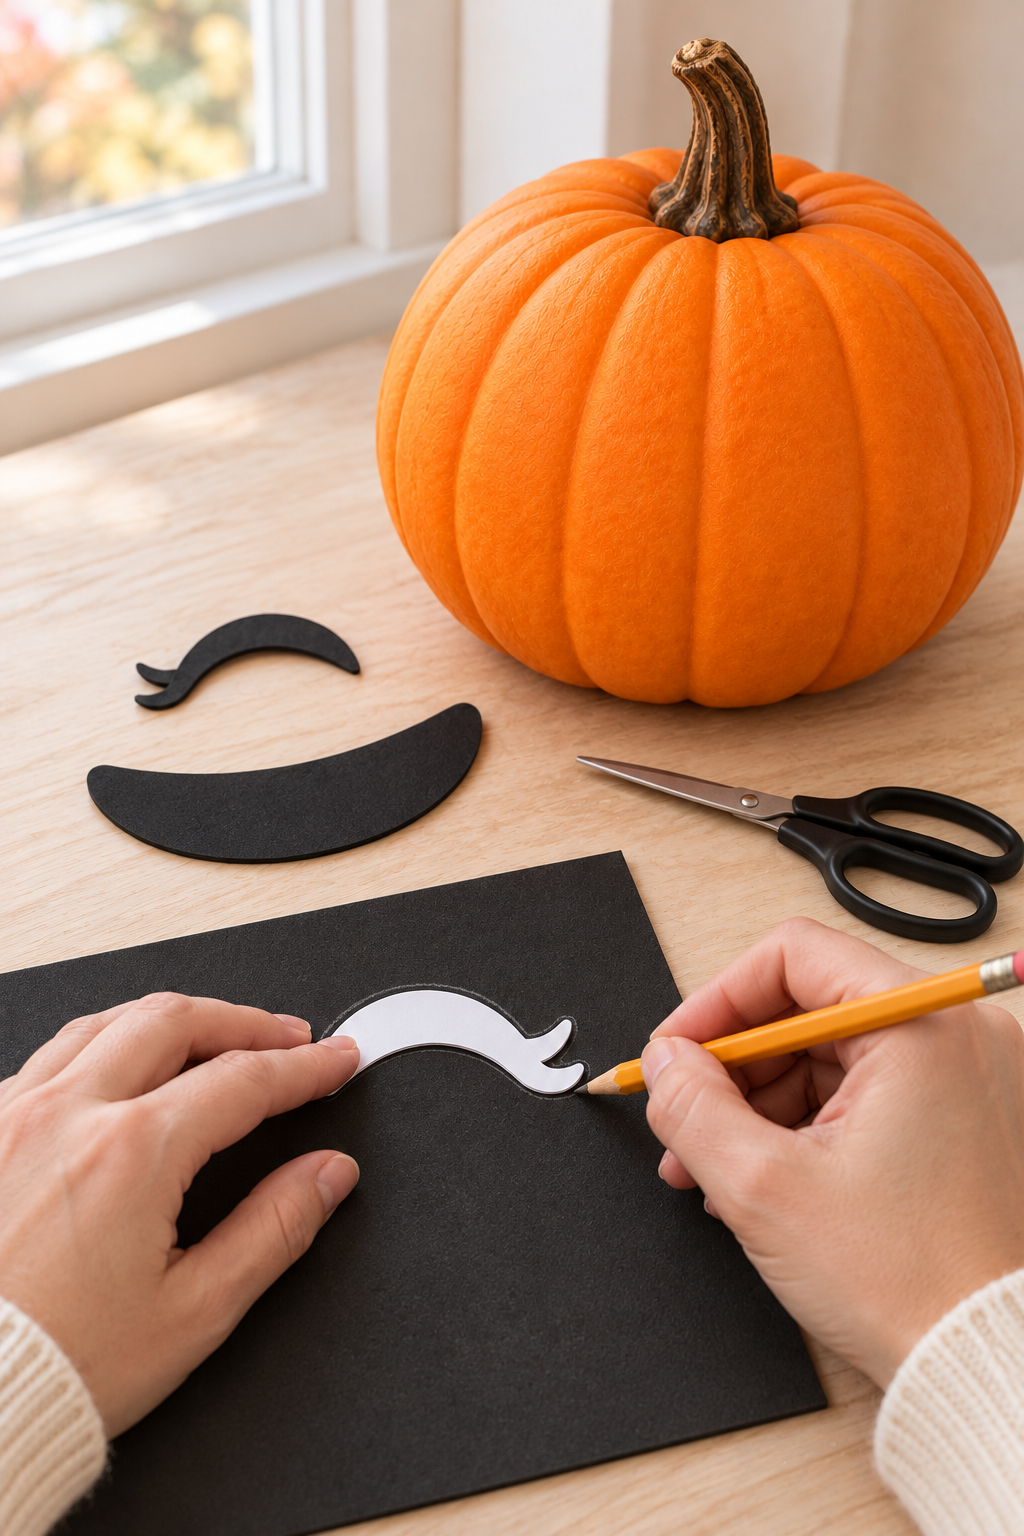
Stand back before attaching anything. The mouth should occupy roughly one-third of the visible pumpkin width, leaving plenty of orange around it. A small mouth still needs enough space for four separate teeth and visible braces.
3. Attach the eyes
Spread a thin, even layer of compatible glue on each eye back. Place them at the pencil marks and press gently along the curves and lash tips. Keep glue away from the cut edges so it doesn’t squeeze onto the orange finish.
Leave the eyes undisturbed until the adhesive has dried sufficiently for handling according to its label. Don’t stick the mouth on yet; assembling its teeth on the table gives you more control.
4. Make and secure the four teeth
Trace the four tooth patterns onto ivory foam and cut them out. Round the lower corners smoothly. Before adding the teeth, dry-fit the bare mouth pad against the pumpkin to check that it follows the surface without springing away. Then lay it face up on the table and arrange the teeth along its upper edge with small black gaps between them. Let the tooth tops extend slightly above the edge, leaving a visible black crescent below them.
Glue most of each tooth’s back to the mouth pad, leaving only the top slightly above the edge. Use a thin, even layer of glue across the overlapping area. Small differences in height help the smile feel handmade, but don’t tilt them so far that the braces cannot cross their fronts.
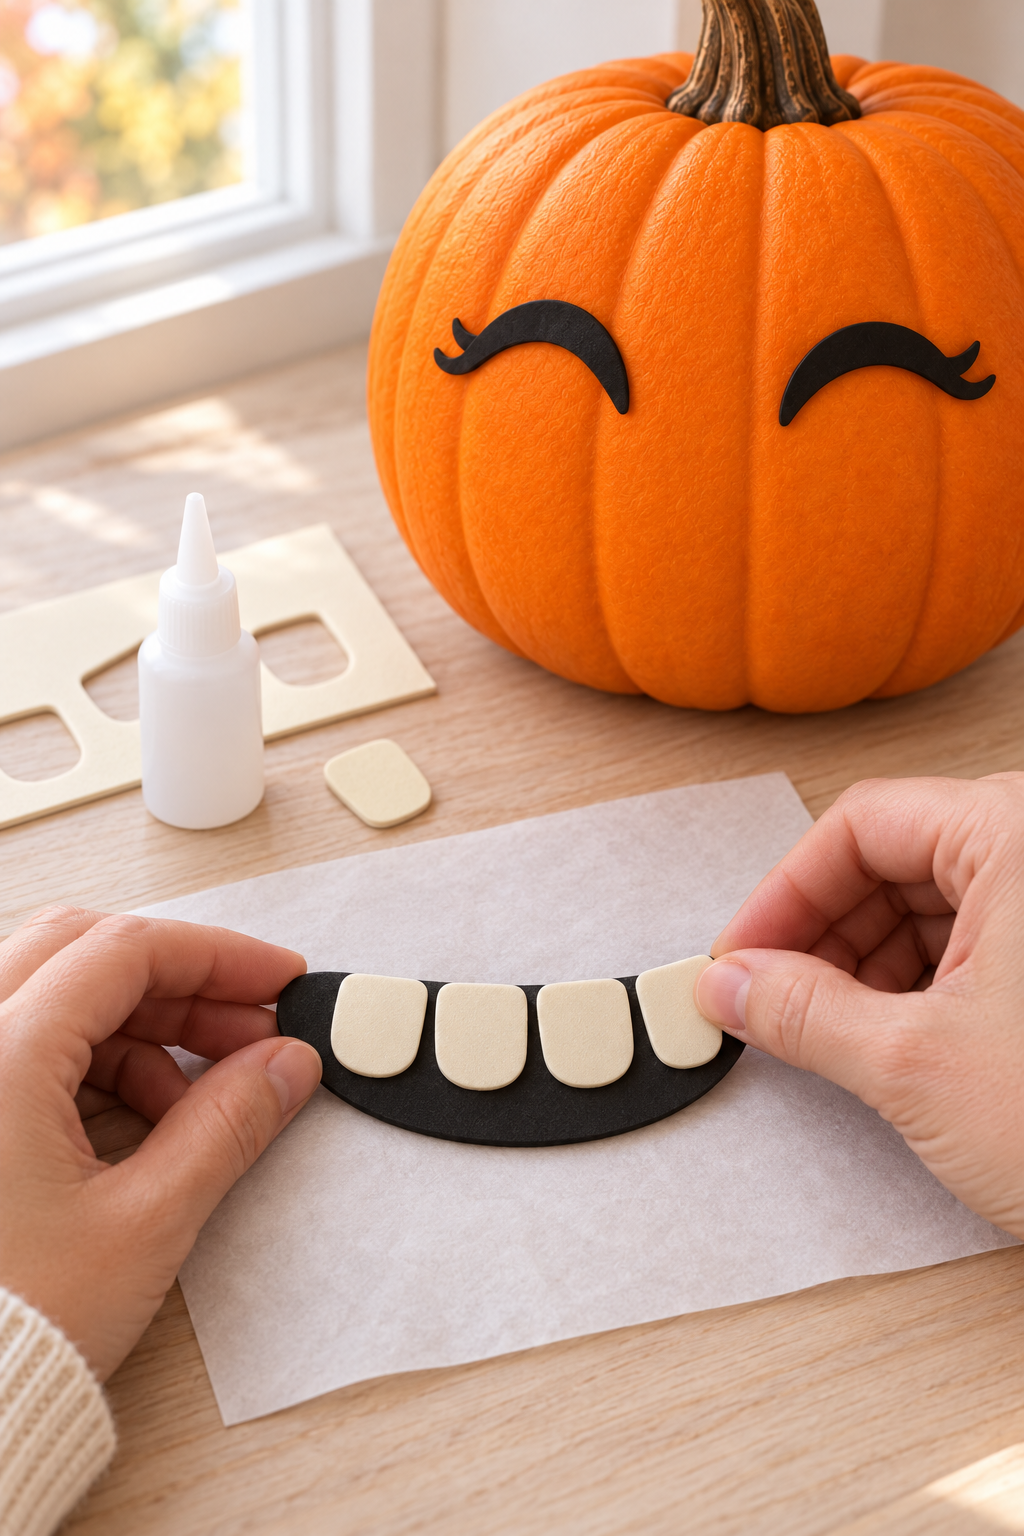
Let these bonds dry before adding the silver details. If a tooth slides, reposition it now and leave the pad flat.
5. Assemble the paper braces
Cut four little squares and one narrow strip from silver cardstock using the pattern. Each square is about 1/4 inch across. The strip is deliberately wider than a real orthodontic wire so the detail remains visible in a small photo.
Position the silver strip across the fronts of all four teeth in a shallow curve that follows the tooth row. Apply a small amount of glue to its paper backing where it touches each tooth, leaving the sections between the teeth unglued. Trim the ends so they stay within the mouth pad’s outline. Then use tweezers to glue one square over the strip at the center of each tooth. The squares cover short sections of the silver line, just like simplified brackets on braces.
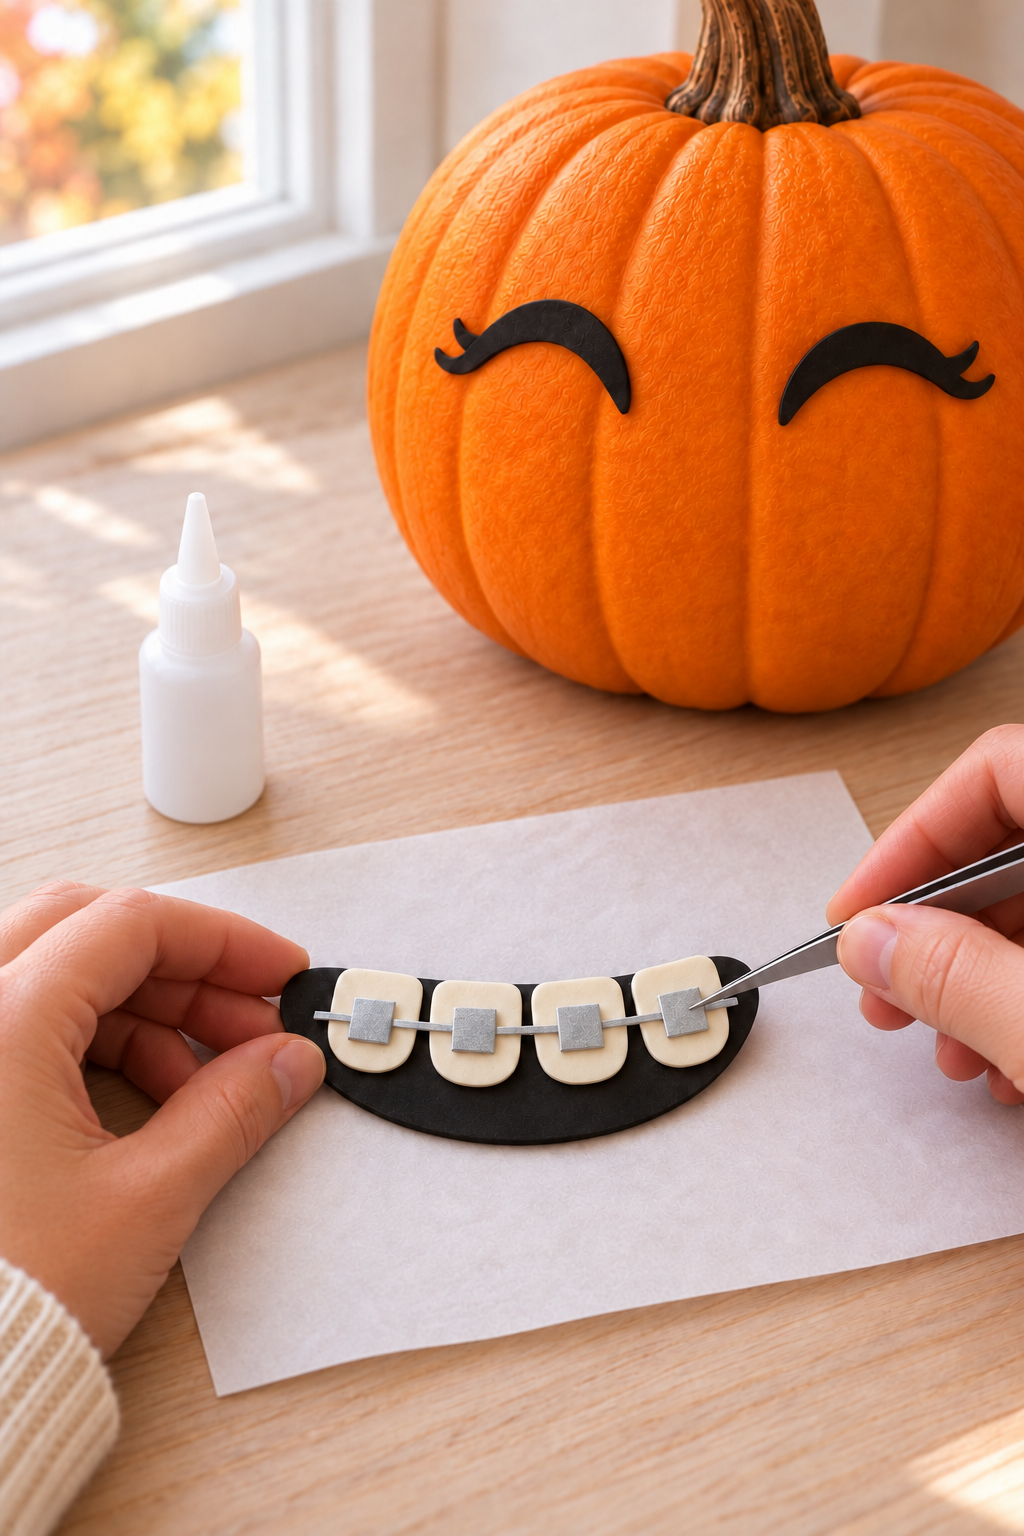
These simple paper braces recreate the silver detail without metal wire. Leave the entire mouth assembly flat until the adhesive has dried.
6. Bond the finished mouth to the pumpkin
Dry-fit the assembled smile at the pencil marks. Spread glue across the back of the black pad, avoiding thick ridges, and press it onto the pumpkin’s surface. The mouth pad supports the teeth; the pumpkin supports the pad.
If the pad bridges a deep groove and springs away, move it to a smoother area or choose a shallower-ribbed blank. Don’t force a flat component to span a large gap. Rest the pumpkin securely with the face angled upward while the glue dries, so the mouth doesn’t creep downward.
7. Add blush and tie the bow
Using very little pink paint on a soft brush, dab a small rounded cheek below each outer eye. Build color lightly and soften the edges with gentle taps. Keep both cheeks smaller than the eyes, and let one sit slightly higher. Allow the paint to dry following the bottle instructions before handling that area.
Wrap the pink ribbon around the base of the brown stem. Tie a simple bow with two small loops, adjust the knot to face forward, then trim two short tails. For the pictured finish, fold each tail lengthwise and snip a small diagonal notch. The bow is tied around the stem, not glued into the face.
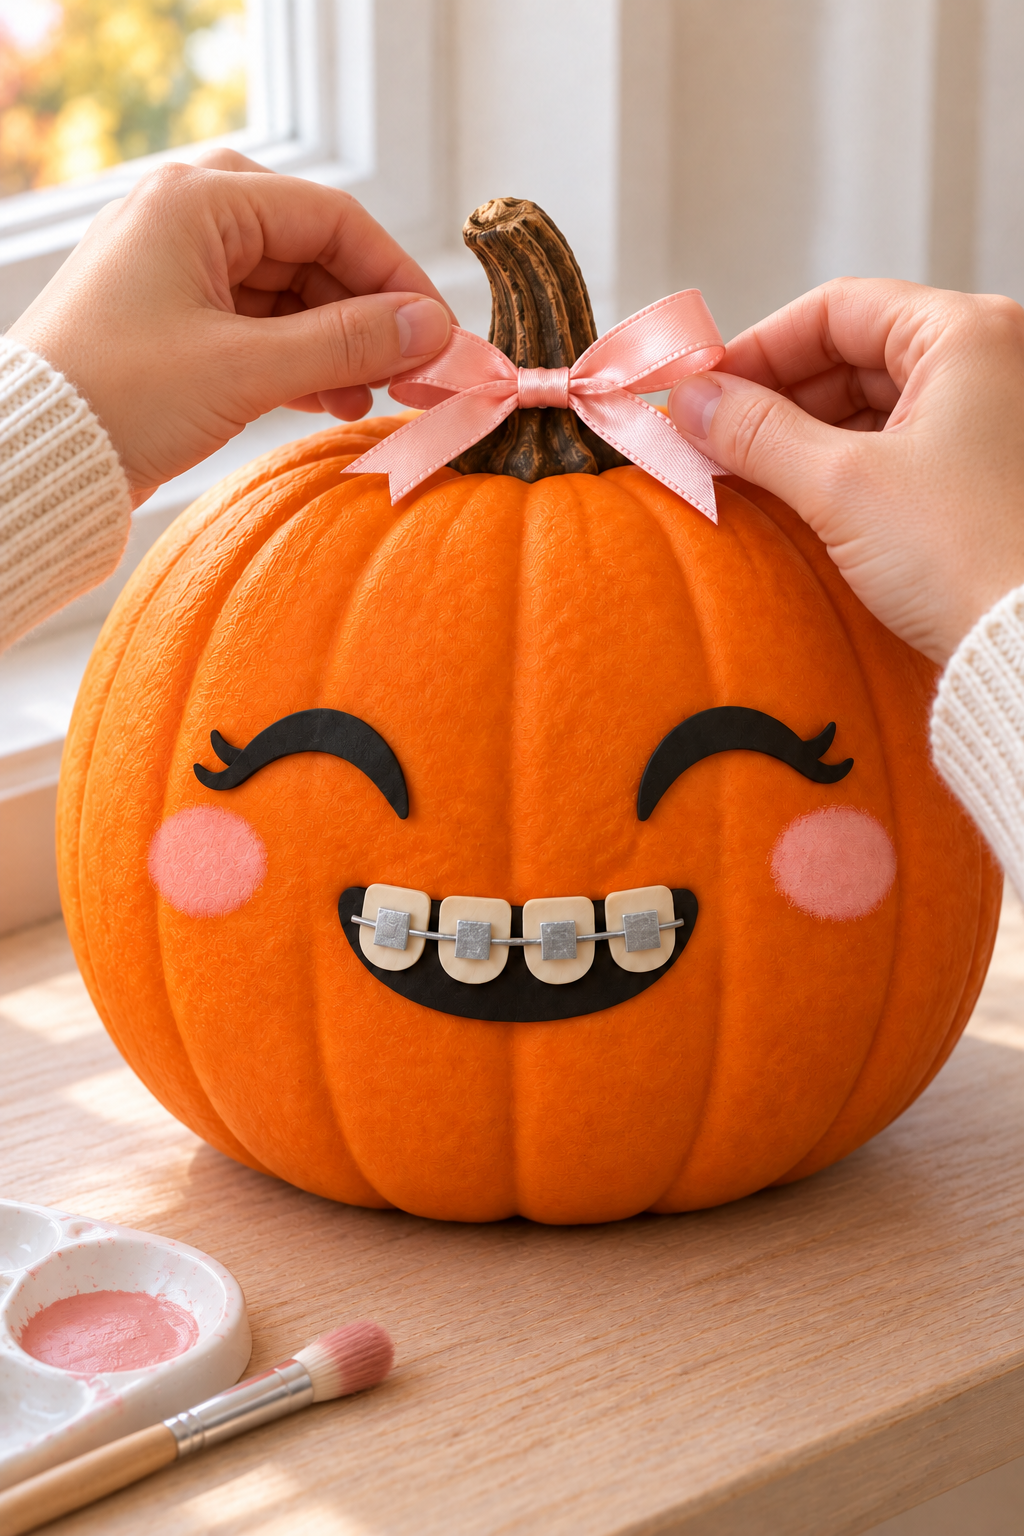
Check every attachment before moving the pumpkin to its display spot. Aleene’s Felt & Foam Tacky Glue instructions call for one hour of drying before handling. Drying time varies with the amount of glue used, temperature, and humidity, so allow longer if any piece shifts or the glue still feels wet.
Keep the Braces Readable
Photograph the finished face at pumpkin height in soft daylight. A strong reflection can wash out the silver squares; turn the pumpkin slightly until their edges remain visible. Check a small thumbnail before publishing. If the smile disappears, move the camera closer rather than enlarging the mouth into a broad grin.
Small Changes to the Personality
You can omit the tiny lash tips for a simpler closed-eye expression or use a quieter dusty-pink ribbon. Keep the four rounded teeth and silver line if you want the braces joke to remain the focal detail. For another pumpkin size, scale the face pattern together rather than shrinking only the mouth.
Give It a Clear Display Spot
A deep indoor window ledge or entry cabinet lets the face stand on its own. Keep the base fully supported and allow space around the cheeks and bow. This foam-and-paper decoration is for a dry indoor display, away from heat and open flames. Lift it by the pumpkin body, not the bow, stem, or face pieces. Store it upright without another decoration pressing on the teeth.
That slightly uneven smile gives the pumpkin its personality. Keep the finishing touches simple so the bashful face and pink bow stand out.