*This post may contain affiliate links for which I earn commissions.*
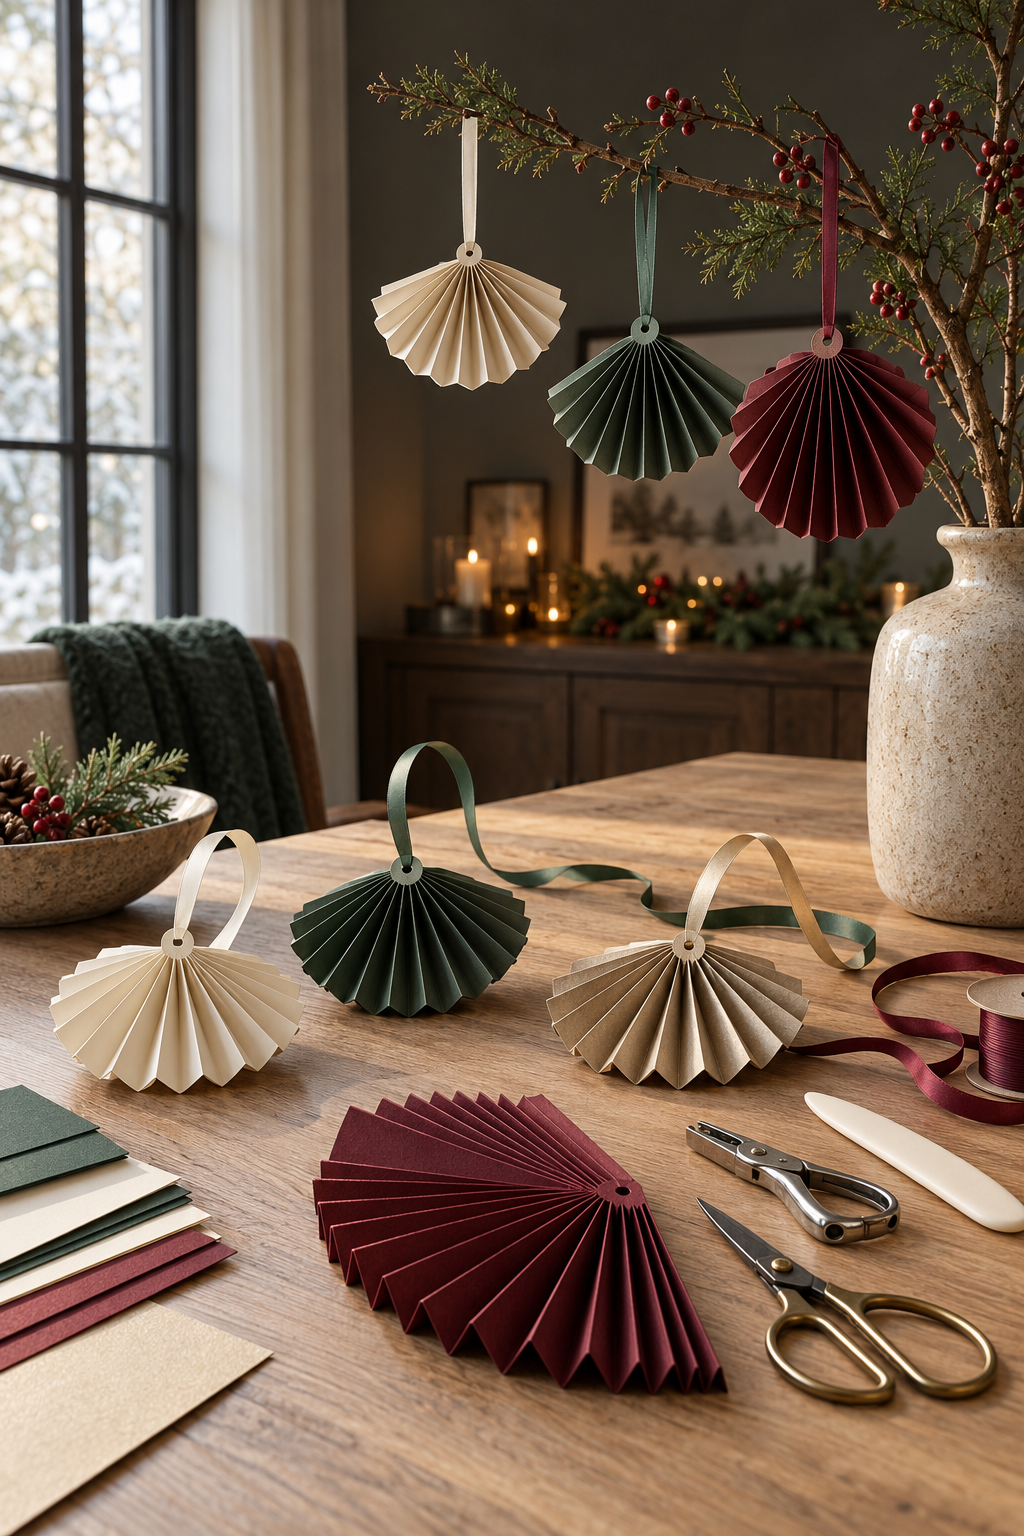
Image created with AI. This image serves as visual inspiration for the project below. The method here makes a similar downward-opening fan with a reinforced paper hanger.
Crisp pleats, small paper circles, and ribbon loops make these Christmas ornaments feel dressed up without much extra decoration. Ivory, forest green, burgundy, and champagne paper create a coordinated set for a branch display or Christmas tree.
What You Are Making
Each ornament starts with one accordion-folded rectangle. One end of the folded stack is gathered and secured, while the other spreads into a broad fan. Two matching paper circles sandwich the gathered top, with a ribbon loop passing through their joined upper portion. The fan remains open at the sides; it is not a circular rosette.
Materials and Supplies
Main Materials
- Foldable cardstock or firm craft paper in ivory, forest green, burgundy, and champagne, with a 12 by 4 inch rectangle for each fan
- Scraps of the same cardstock, cut into two 1 inch circles and one 1½ by ¼ inch reinforcement strip per ornament
- Narrow ribbon about ⅛ inch wide, with a 12 inch length per ornament
- Paper craft glue suitable for the selected paper and cardstock
Tools
- Straight ruler at least 12 inches long
- Pencil
- Craft scissors
- Bone folder
- Small hole punch with an approximately ⅛ inch hole
- Small binder clip
- An adjustable circle ruler set to a 1-inch diameter or a bottle cap of the same diameter
Before You Start
The sizes below are a suggested first sample, not measurements taken from the photograph. Start with one forest-green ornament before cutting a whole set. Choose paper that bends cleanly and holds a crease; very stiff cardstock can crack or resist gathering. Test a fold on a scrap, particularly with metallic champagne paper.
A 12 by 4 inch rectangle marked every ½ inch gives 24 narrow panels. The folds run across the 4 inch depth. Gather the pleats at one end of the folded stack. The 4 inch depth determines the fan’s approximate radius, while the 12 inch length provides the pleats that spread into the arc. Allowing about ¼ inch at the gathered top leaves roughly 3¾ inches of visible fan depth. A broad opening can approach 7 inches across, depending on paper thickness and how far the pleats open. It will not have a predetermined exact width.
Set aside matching scraps before using up the sheet. Ordinary letter-size paper cannot supply the 12 inch length in one piece; select a large enough sheet rather than adding an unplanned seam.
Step by Step Tutorial
1 Measure and mark the rectangle
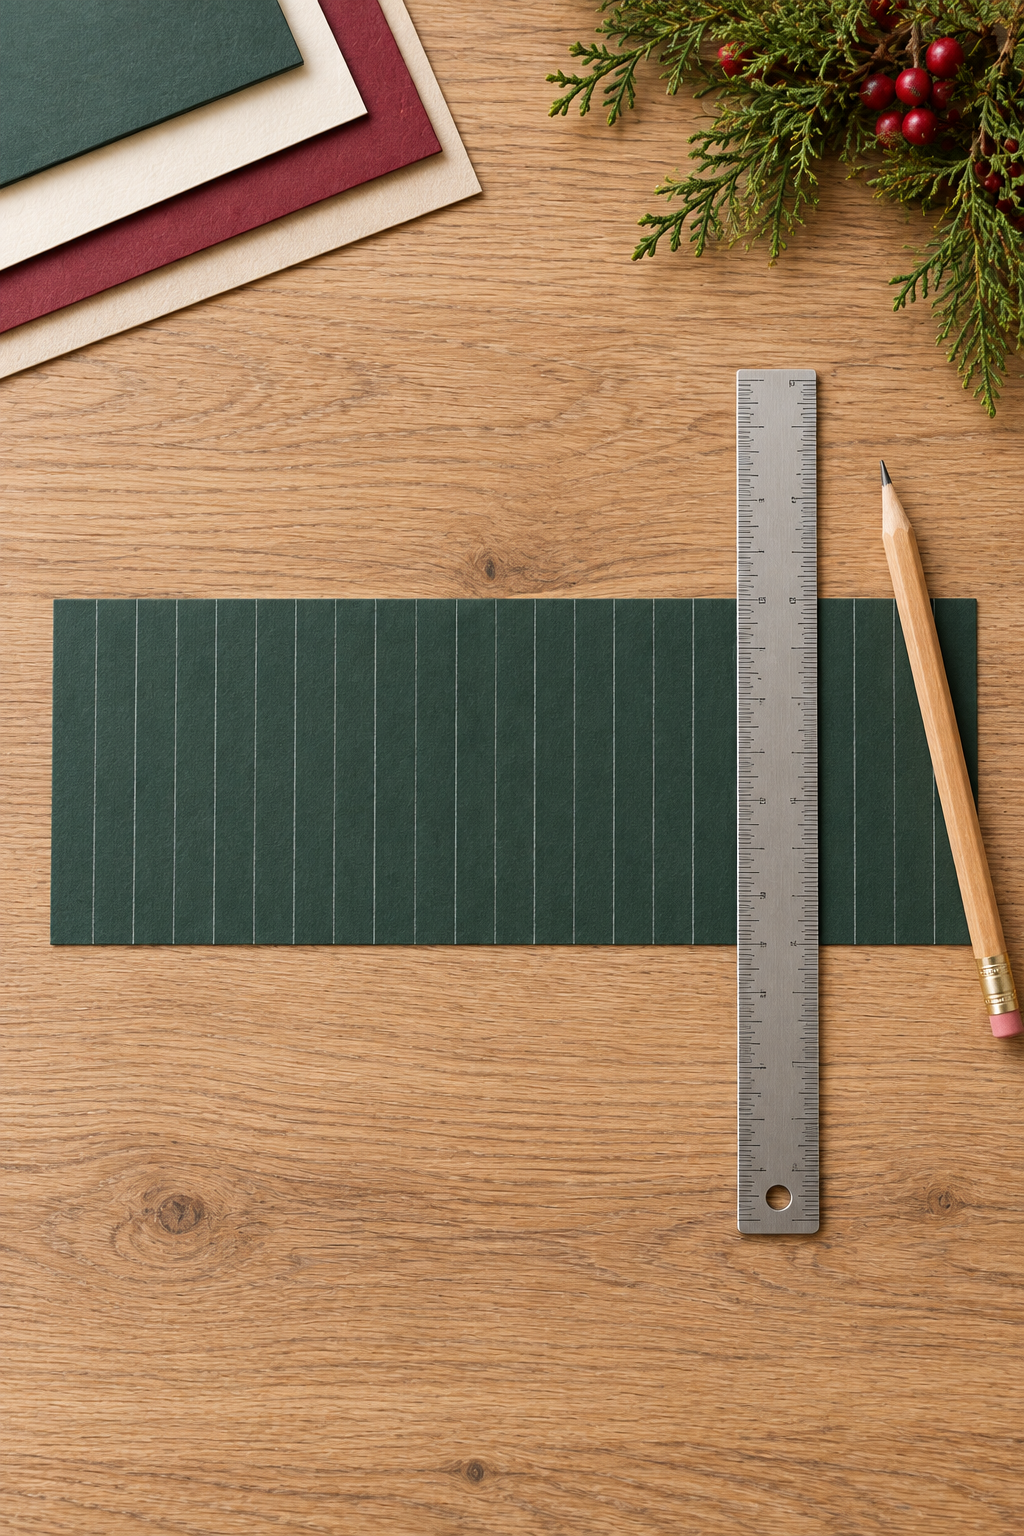
Cut one rectangle 12 inches wide and 4 inches tall. Place it landscape on the table, with the 12 inch edges across the top and bottom. Make light pencil ticks along both long edges at ½ inch intervals, stopping at 11½ inches. Join each pair with the straight ruler to make 23 parallel lines, each 4 inches long, running from the top edge to the bottom edge. Mark on the side you intend to face backward.
Keep the ruler square to the long edge. A diagonal line makes one end of a pleat wider than the other and can pull the finished fan sideways.
2 Fold a regular accordion
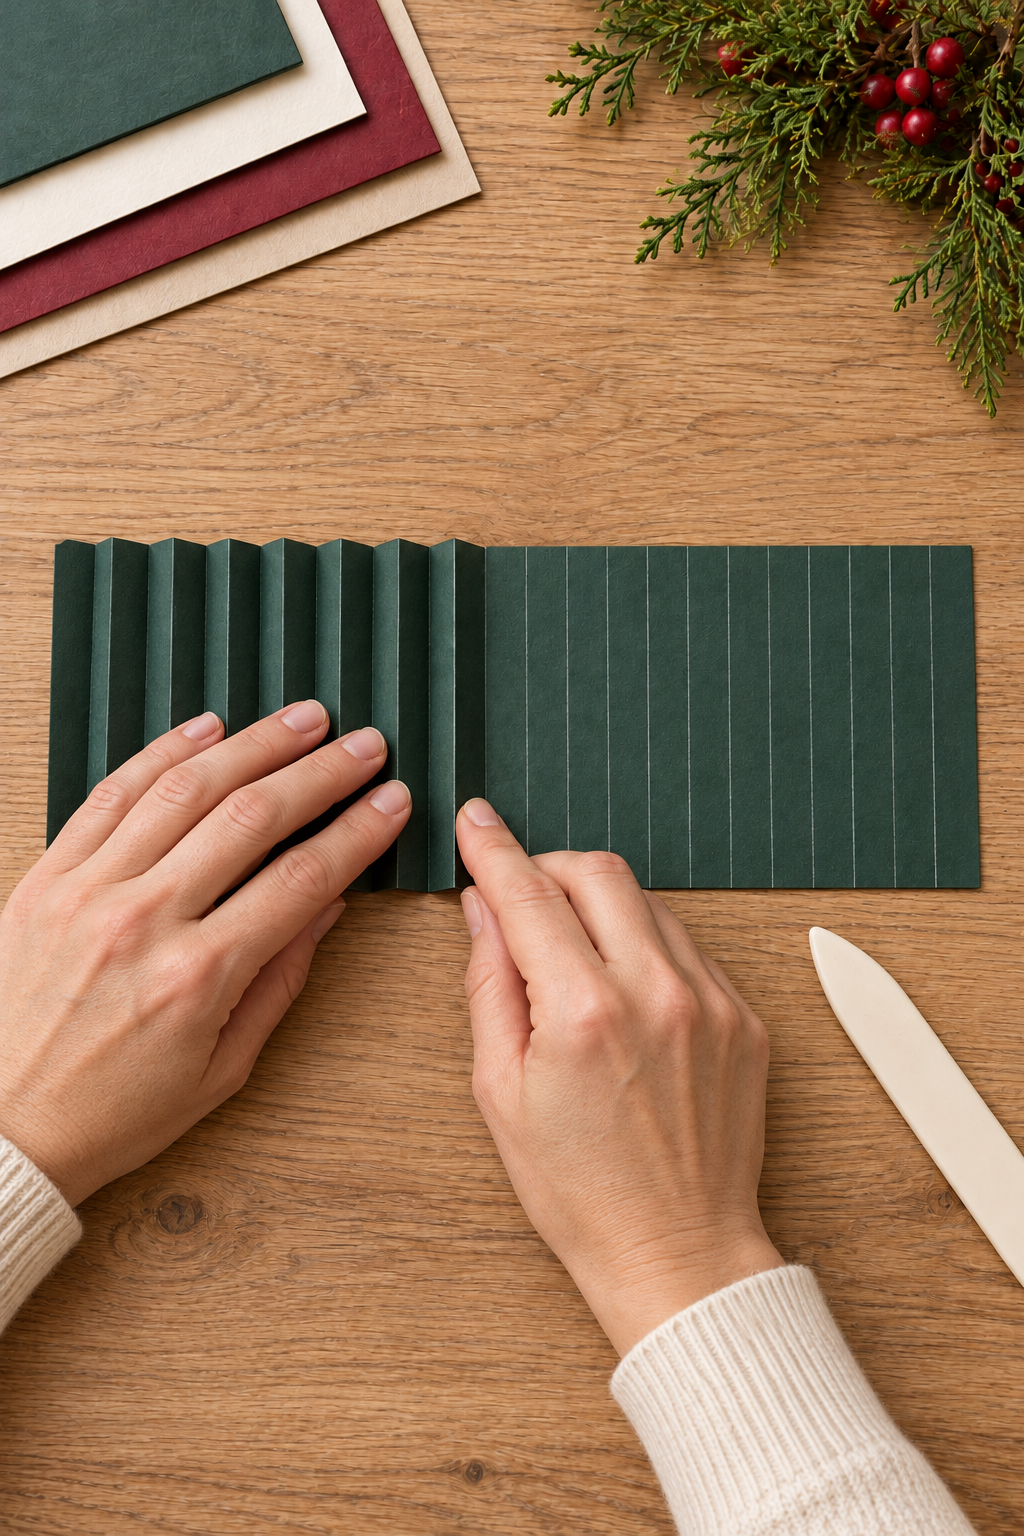
Starting at the left short edge, fold the first ½ inch panel inward along the first line. Turn the sheet over for the next fold, then continue alternating mountain and valley folds along every marked line. Use the bone folder to firm each crease while keeping the paper edges aligned. Avoid pressing so hard that the finish splits.
Compress the finished accordion into a stack approximately ½ inch wide and 4 inches long. Its narrow panel width is the compressed width, not the fan radius. Do not fold this stack in half across its length; that would create a different two-part fan construction.
3 Gather and secure only the top end
Choose one end of the 4 inch stack as the top. Gently separate the layers there and place a very small amount of glue between each neighboring paper surface within the top ¼ inch of the stack. These are the flat surfaces between layers, not a bead smeared only across the cut edge. Leave the remaining 3¾ inches free of glue.
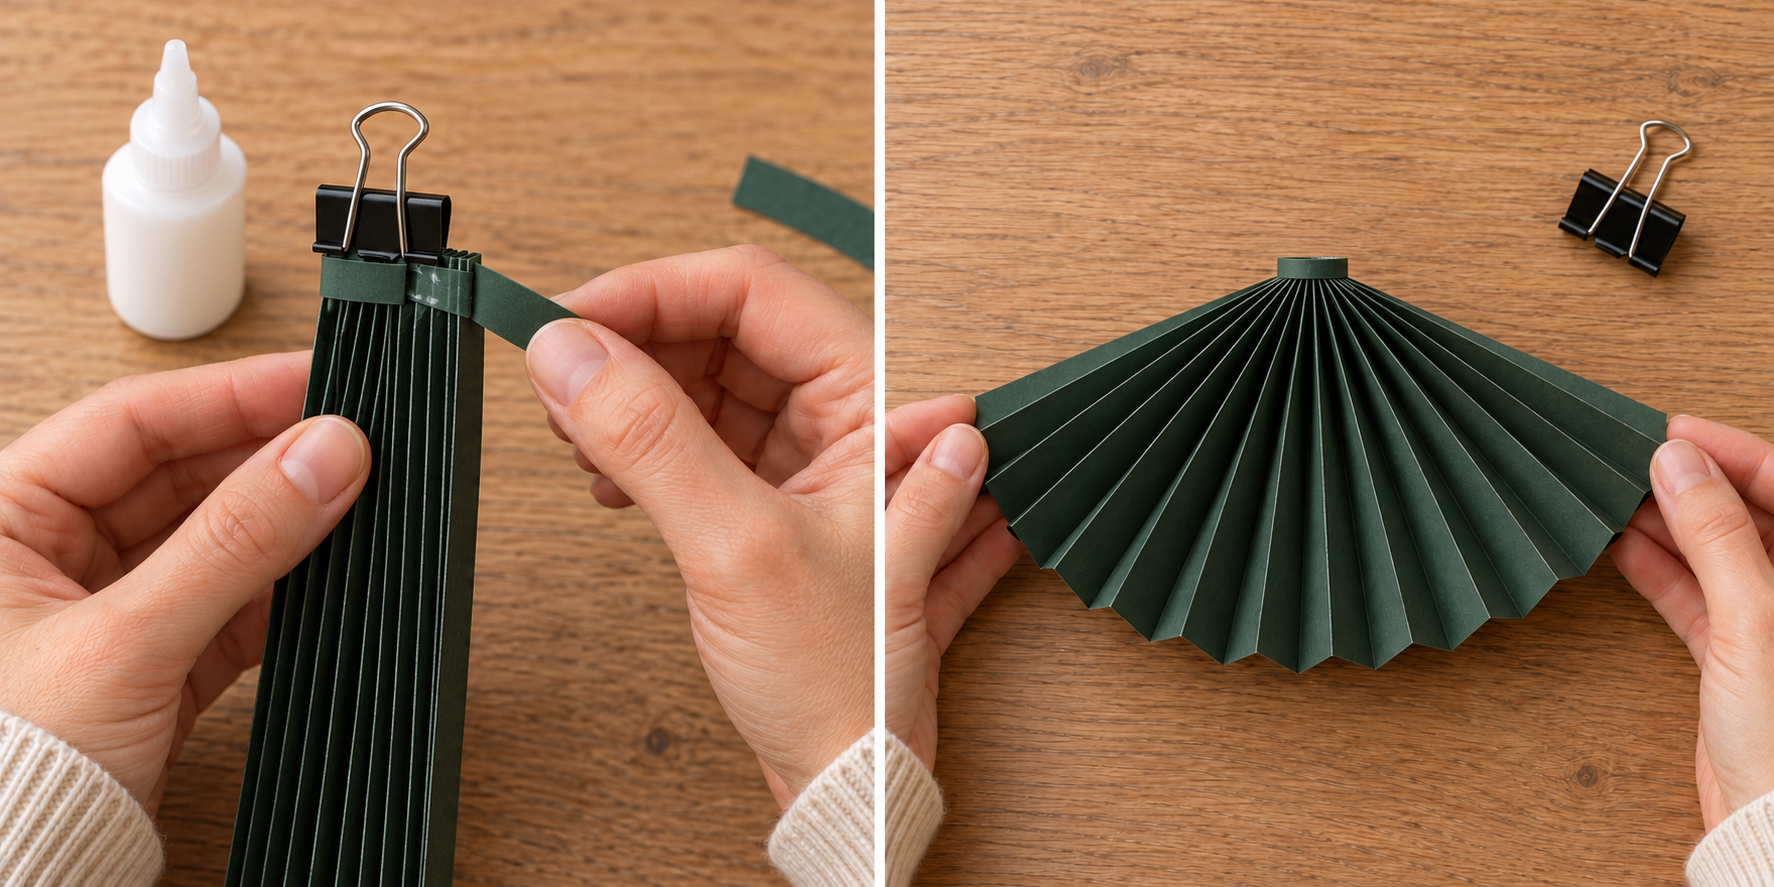
Compress that glued end. Wrap the matching 1½ by ¼ inch strip around it like a narrow collar, keeping the strip’s width within the glued ¼ inch zone. Trim the strip if needed so its ends overlap only slightly, then glue the overlapping strip faces together. Use the binder clip to hold the collar while the glue sets according to its product instructions.
Once the joint is secure, remove the clip and gently spread the free lower end into a downward-opening fan. Keep the gathered top fixed while opening the outer pleats to the left and right. Aim for a broad opening, roughly 140 to 160 degrees, rather than pulling the sides into a circle. Adjust the pleats gradually so the bottom edge forms a balanced arc. Stop if the collar shifts or a crease begins to tear.
4 Make the reinforced circular hanger
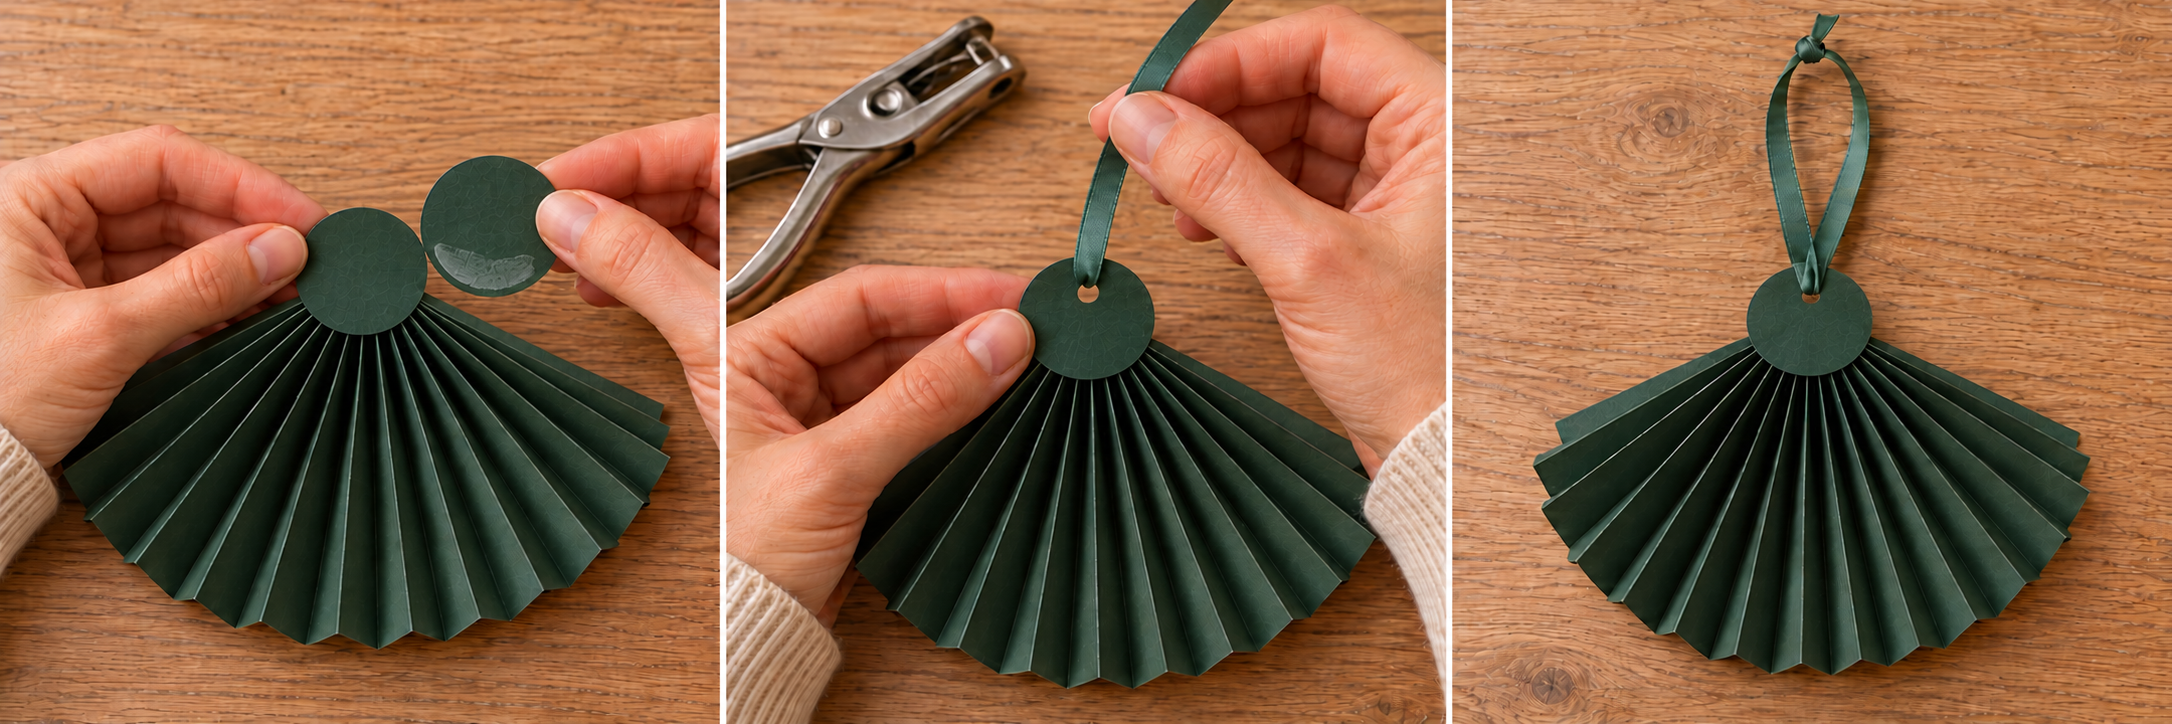
Use the adjustable circle ruler set to a 1-inch diameter to draw two circles on matching cardstock, then cut them out. Alternatively, trace around a bottle cap of the same diameter. Dry-fit one circle on the front and one on the back of the gathered top. Set their centers approximately level with the top cut edge of the accordion. Their lower halves overlap the collar and upper fan, while their upper halves extend above it.
Apply glue to the inside lower portion of each circle where it contacts the collar and the outermost paper faces at the gathered top. Apply glue between the two upper semicircles as well. Align the circles and press them together, sandwiching the collar between their lower portions. The bonded upper semicircles form a two-layer tab above the fan. Keep glue off the freely opening pleats below the attachment area.
Let this assembly set fully according to the glue instructions before punching it. Punch through both bonded layers on the vertical centerline, with the hole center about ¼ inch below the top of the circle. This places the hole above the fan’s cut edge, away from the pleated stack. Do not punch through the folded fan itself.
5 Thread the ribbon and check the joint
Cut a 12-inch length of narrow ribbon to match your ornament. Pass one end through the hole, bring both ends together above the ornament, and tie them into a secure knot to form a loop. The bonded paper circles form a reinforced hanging point above the fan. Trim uneven ribbon ends if needed.
Hold the finished ornament low over the table by its loop. Check that the circles remain bonded, the hole does not tear, and the collar does not slip. Repair a loose joint and allow it to set again before hanging.
Keep the Pleats Looking Crisp
A fan that twists often has uneven folds rather than too little decoration. Compare the panel widths before attaching the hanger; reopening a few folds is easier than correcting a finished joint. Use glue sparingly around the top so damp paper does not soften the surrounding pleats.
If the paper resists opening, choose a more flexible sheet for the next sample rather than forcing the top apart. Do not hide a weak joint under a larger decorative circle.
Adapt the Colors and Scale
Repeat the same construction in ivory, burgundy, and softly metallic champagne, using matching ribbon or a quiet contrasting neutral. A low-sheen finish keeps the folds readable; heavily glittered paper may be harder to crease and bond.
For a smaller ornament, try a 9 by 3 inch rectangle with ⅜ inch folds. This preserves 24 panels and the same length-to-depth proportion. Dry-fit the circle and collar before gluing, since the attachment should suit the smaller fan rather than overwhelm it.
Hang and Store Your Paper Fans
Hang the ornaments from a securely supported display branch or sturdy Christmas tree boughs. Keep the paper clear of candles, heaters, and hot lights. Choose a dry location where passing hands will not repeatedly catch the pleats.
Store the fans open in a shallow box with space around their edges. Avoid stacking heavy decorations over them or trying to flatten the glued top into a rectangle again.
A few crisp paper fans give a Christmas display movement and texture without covering every branch. Leave enough space between them for each pleated silhouette to show.