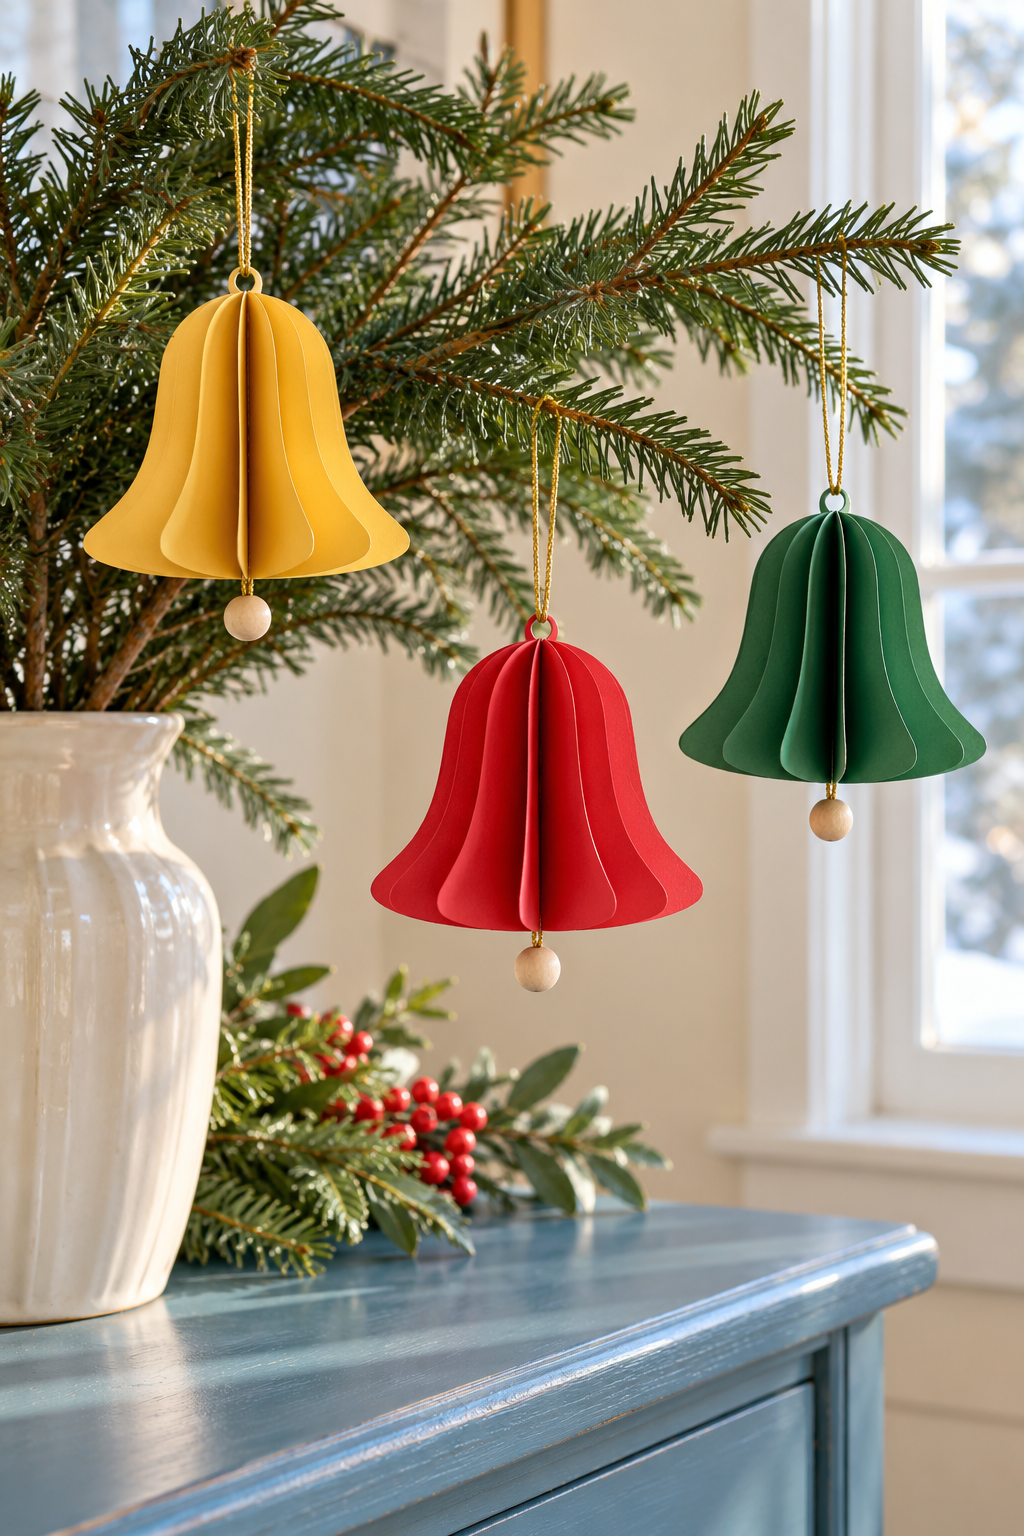
*This post may contain affiliate links for which I earn commissions.*
Image created with AI. This image serves as visual inspiration for the project below. The method here uses folded paper silhouettes, glued surfaces and a small paper hanging tab to recreate that look.
These paper Christmas bells bring red, yellow and green to a branch display without adding much weight. Their flared outlines and fanned paper sides give them a rounded shape, while a wooden bead below each bell suggests a little clapper.
What You’re Making
Each ornament consists of a stack of identical bell shapes folded down the middle, joined back-to-back and opened into a circle. A cord carrying a bead runs down the center. A separate paper loop at the crown holds the hanging cord. These are decorative paper ornaments, so they will not ring.
Materials and Supplies
Main Materials
- Colored craft paper or light cardstock that folds cleanly
- White paper-craft glue suitable for your paper
- Thin gold-colored craft cord that fits through the bead hole
- Small wooden beads with through-holes
Tools
- Paper scissors
- Pencil
- Ruler
- Small binder clips
Before You Start
Choose paper that bends easily without cracking along a crease. Very stiff cardstock makes the bell difficult to fan open. Plan one solid color per bell for the clean red, yellow and green look shown.
Start with a palm-height ornament and make one before cutting a whole collection. The bead should be a modest accent beneath the paper body, not a heavy weight. Check the glue’s instructions for suitable materials and drying conditions. Protect the table with scrap paper already on hand.
Step-by-Step Tutorial
1. Draw a bell profile you can repeat
Fold a rectangle of colored paper vertically. On the folded piece, draw half a bell with the straight center line along the fold. Begin near the top of the fold, round outward into a narrow domed shoulder, curve down with a slight outward slope, then flare outward near the bottom. Finish with a shallow curved base returning to the fold.
Keep the crown rounded rather than pointed, and give the lower rim enough flare to be recognizable. Cut along the outer pencil line while leaving the center fold intact. Open the piece to check that it resembles a symmetrical bell, then fold it again. This first shape becomes your tracing guide; no separate downloadable pattern is needed.
Trace and cut seven more identical shapes in the same color, folding each along its center. Eight shapes are a useful starting point for a rounded ornament; the paper’s stiffness and your bell width determine how comfortably the finished fins spread.
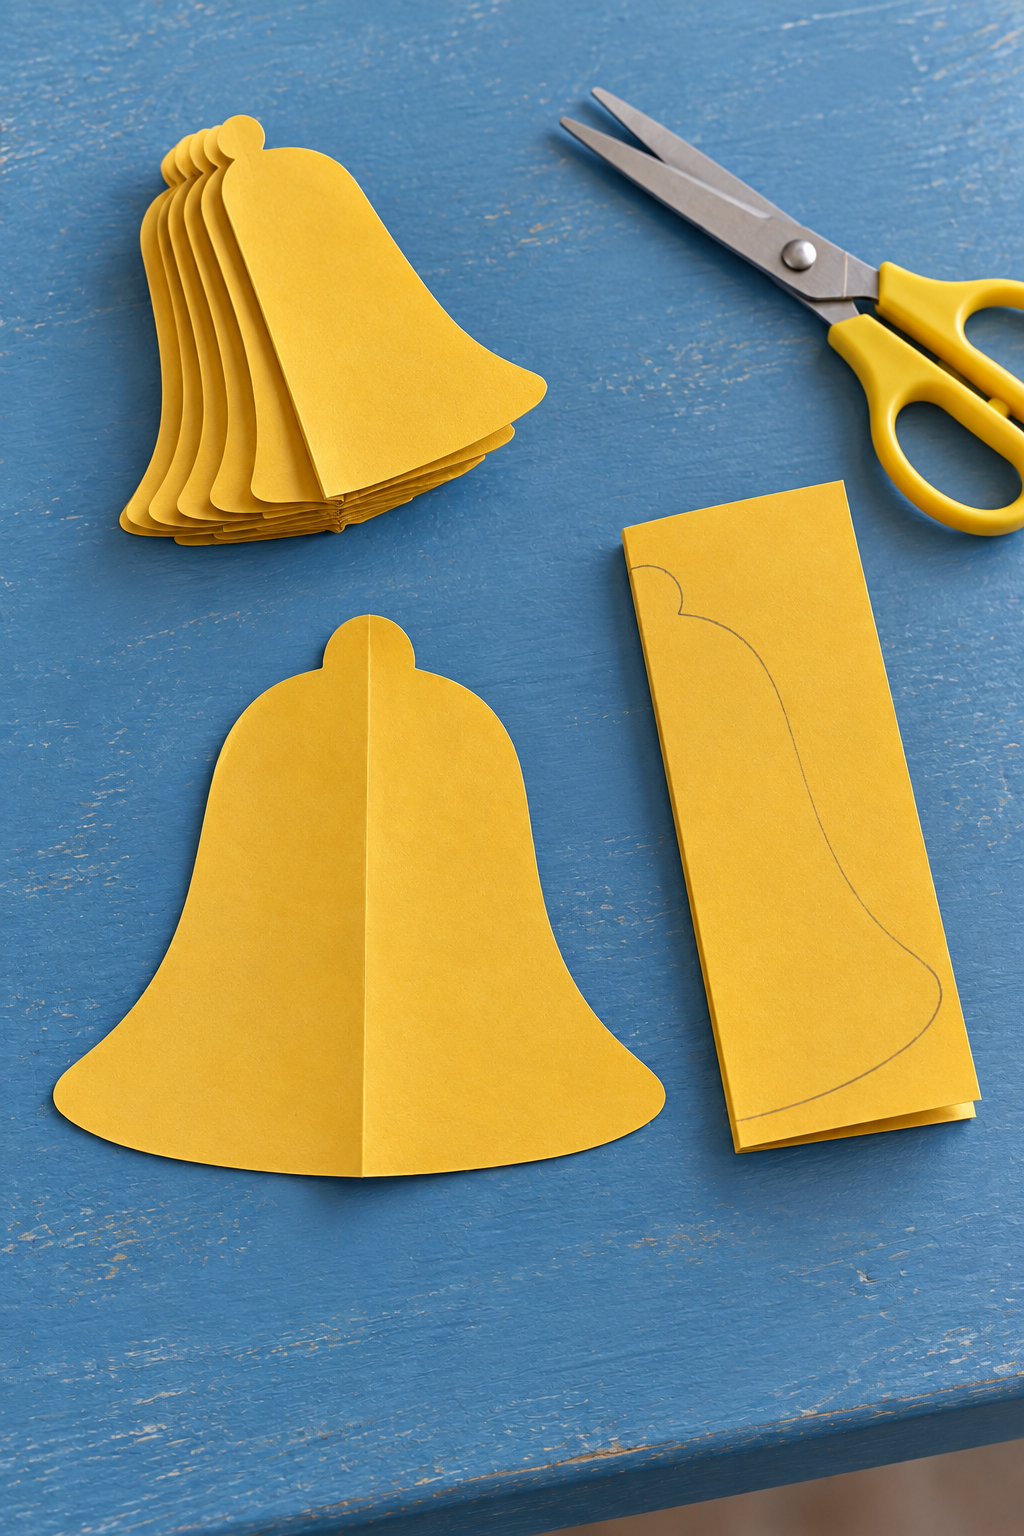
Trim any obvious mismatched edge now. Correcting an individual piece is easier than trying to trim a glued stack later.
2. Glue the folded pieces into one stack
Lay the first folded bell flat. Spread a thin, even layer of glue over its exposed outer half, reaching toward the edges without flooding them. Align the matching outer half of the next folded bell on top and press the surfaces together. Their center folds should meet along one straight spine.
Continue adding the folded bells one at a time, gluing only the mating halves. Do not glue the interior fold shut. Keep the first and last outside halves free: they will join when the stack opens into a circle.
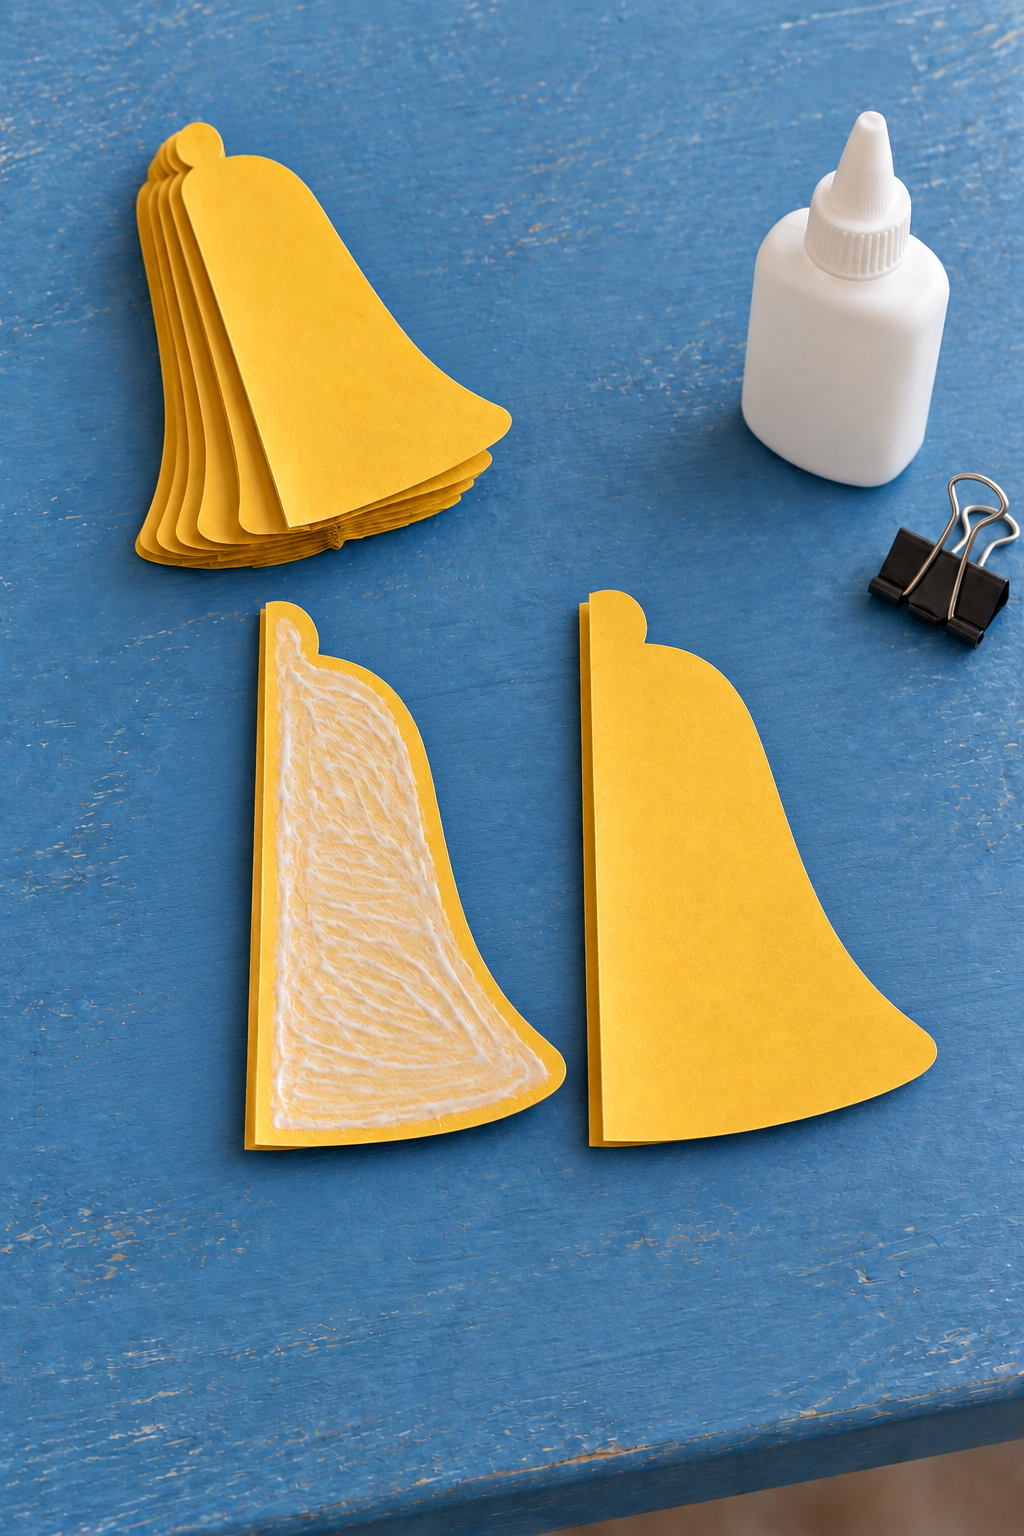
Use small binder clips at the broad lower edge while the joins set, checking that the clips do not leave deep dents. Follow your glue’s drying directions before pulling the stack open. A sliding stack needs more setting time, not firmer fanning.
3. Prepare the bead cord and paper hanging loop
Thread a wooden bead onto a piece of gold cord and tie a knot beneath it large enough to stop the bead slipping off. Hold the bead just below the bell’s lower edge to judge the visible cord length. Leave enough cord above it to run along the full central spine with a little extra at the crown.
Cut a narrow strip from the same colored paper. Fold the strip in half along its length and glue those layers together for a doubled strip. Bend its middle into a small loop and leave two straight tails below. The gold hanging cord must pass easily through the loop. Trim the tails so they can sit inside the upper part of the bell without reaching its lower rim.
This tab is a practical way to reproduce the small paper loop visible at the top of the inspiration bells. It is intended only for a lightweight paper ornament.
4. Trap the cord and tab at the center
Open the stack partway so you can reach its central spine. Lay the bead cord along that spine, with the bead below the lower edge. Place both paper-loop tails against the spine near the crown, leaving the loop projecting above the bell.
Spread glue on the adjacent paper surfaces and over the cord where it meets the spine. Keep the loop opening clear. The broad paper joins capture the tab tails; do not rely on a tiny dot of glue at the crown.
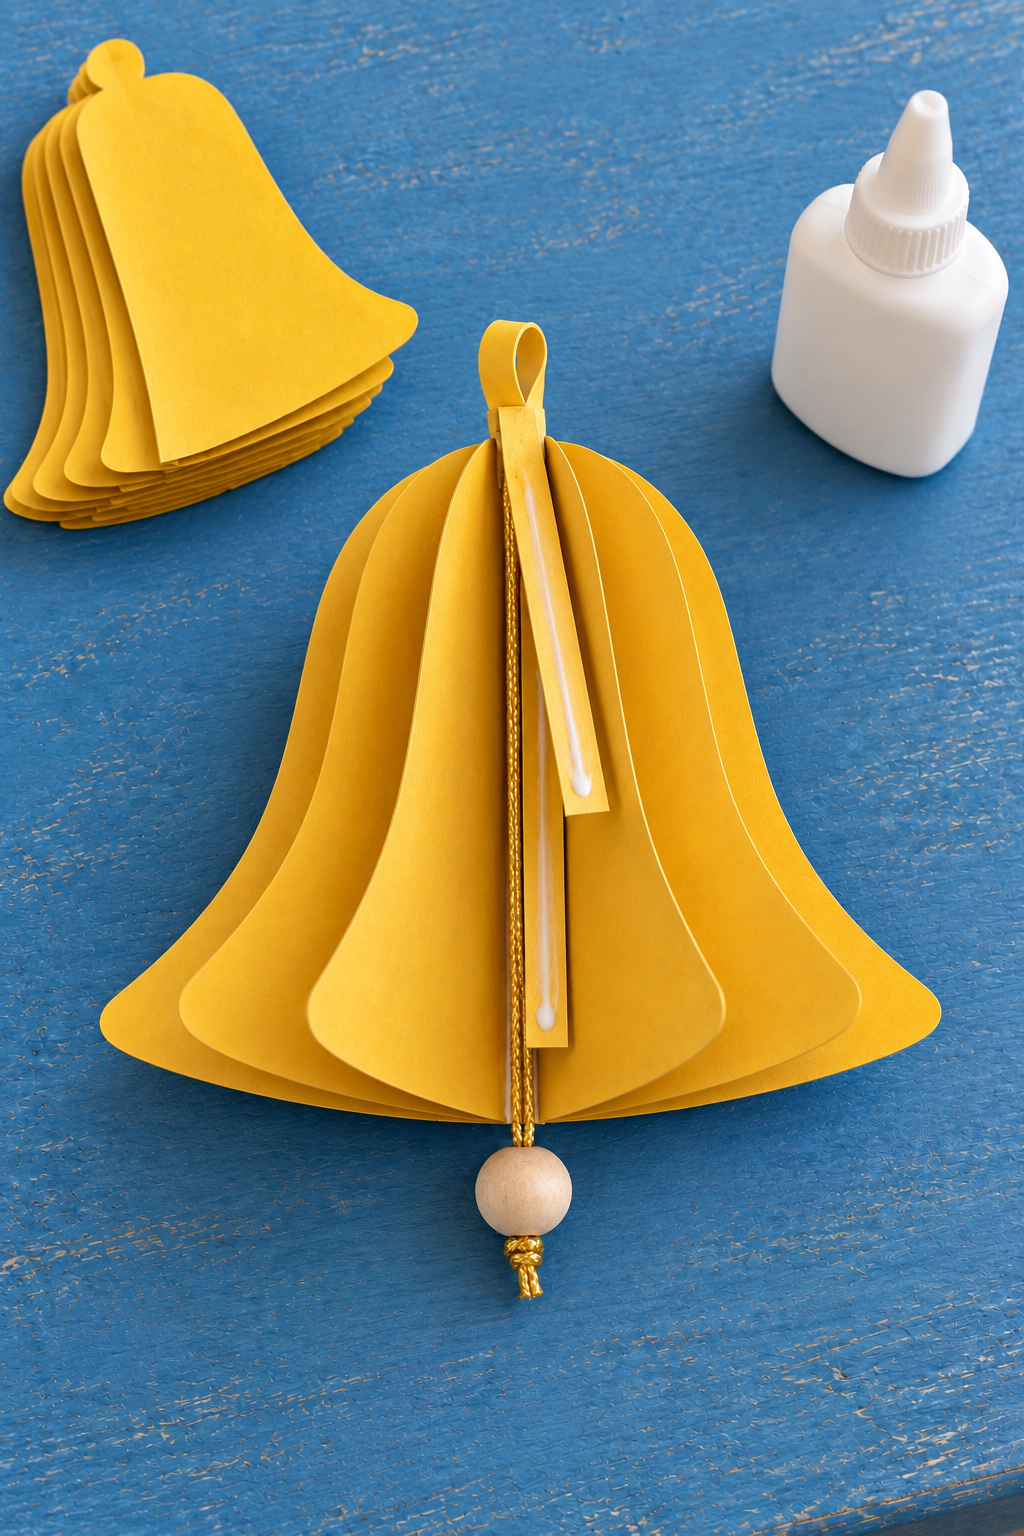
Check that the bead hangs along the center line and that the tab faces upward before closing the bell. Let the glued parts set according to the adhesive instructions.
5. Fan the bell open and join the last halves
Gently spread the folded pages around the spine. Bring the first and last free outer halves together, apply a thin layer of glue across their matching surfaces and press them into one final fin. Align the curved lower edges so the rim stays even.
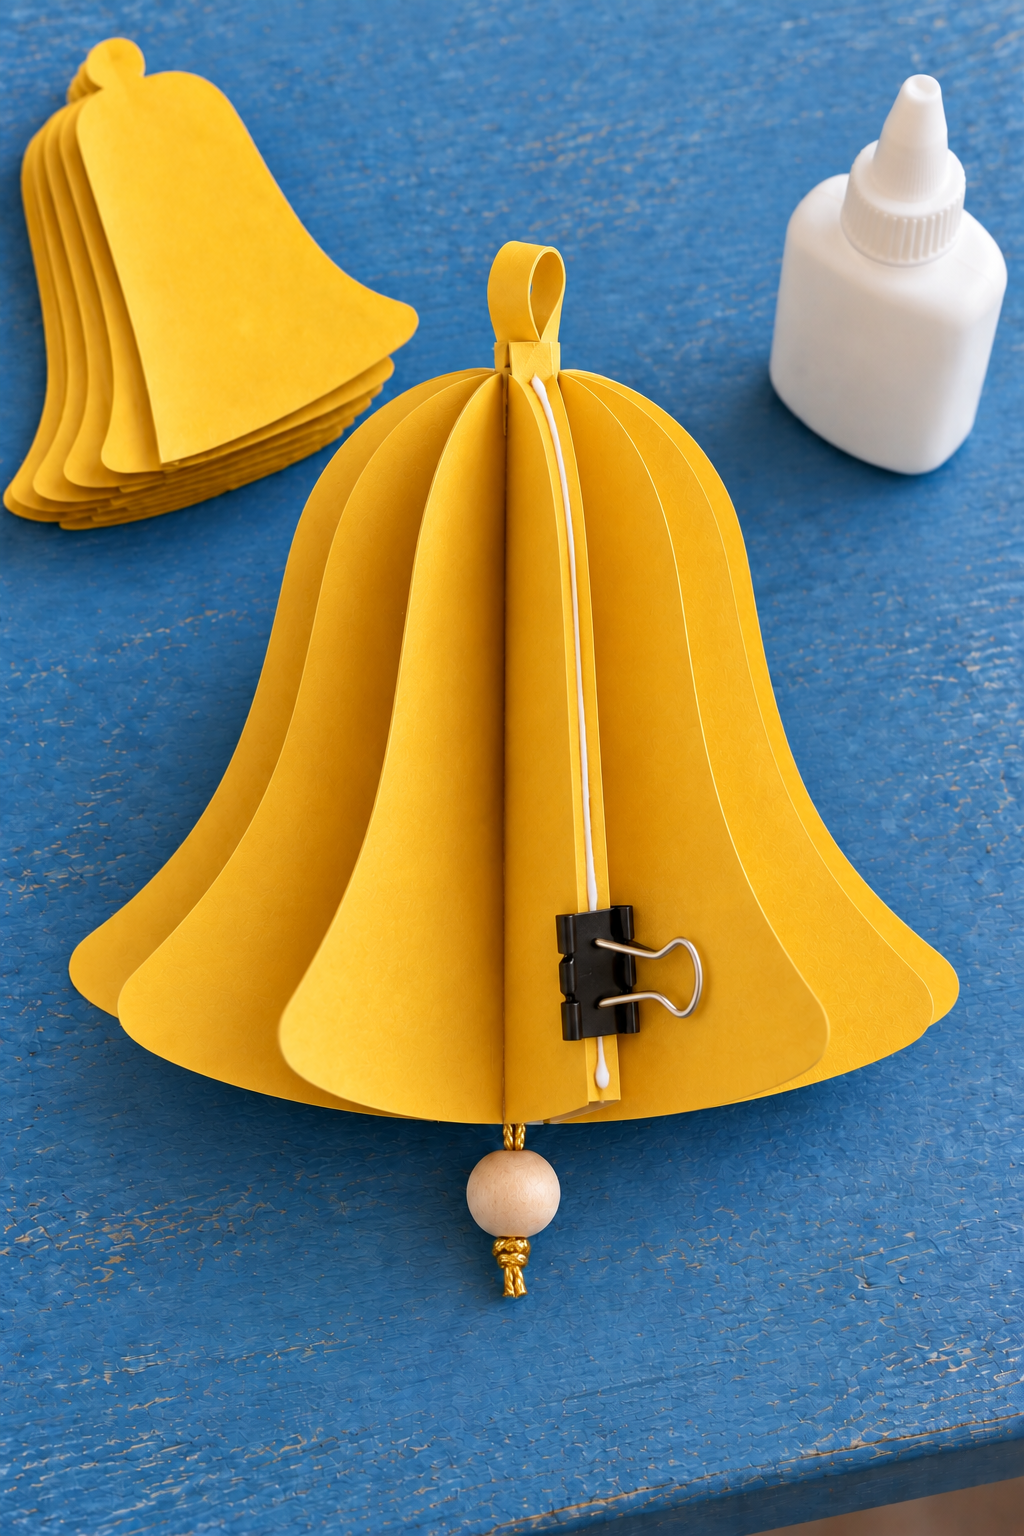
Support that last join with a clip if needed. After the adhesive has dried, ease the fins apart around the full circle. If a fin sticks to its neighbor, separate it carefully rather than tearing outward from the rim. Thread a separate gold cord through the paper loop and tie its ends into a hanging loop. Lift the ornament over the work surface to check that the tab and bead stay secure before displaying it.
Keep the Paper Edges Neat
Pencil marks are most noticeable on yellow paper. Place the traced side inward when joining halves, or erase visible marks gently before assembly. A blunt crease can make the bell lean; if the stack twists, check whether one silhouette was folded off-center before forcing it into shape.
Change the Color Story
For a different collection, alternate two colors between the bell silhouettes. The construction stays the same, but the fins create a striped effect. Make separate smaller bells by reducing the whole tracing guide, keeping the bead proportionate to the new body. Avoid adding heavy trim to the paper rim.
Hang a Small Bell Collection
Use individual loops on a tree branch or a supported vase arrangement, leaving room for the beads to hang freely. Keep the paper away from water and heat-producing lights. Store the ornaments in a shallow box with space around the fins so the flared rims are not crushed.
A few bells at different heights let their folded shapes catch the daylight, turning ordinary colored paper into a Christmas detail worth looking at closely.