*This post may contain affiliate links for which I earn commissions.*
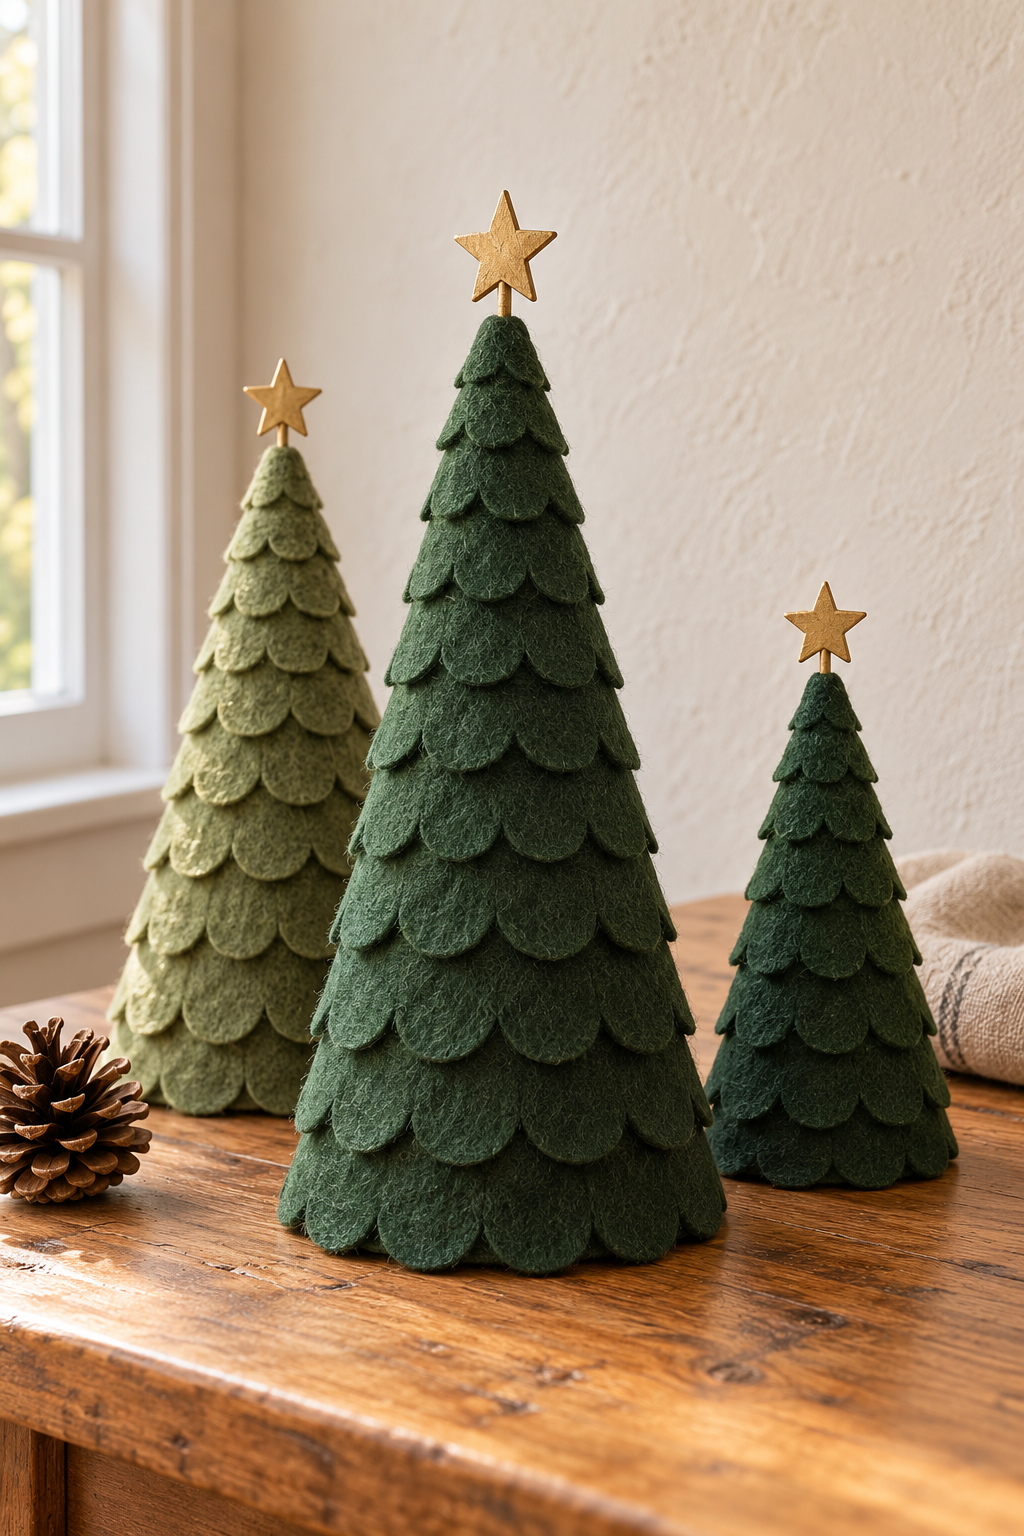
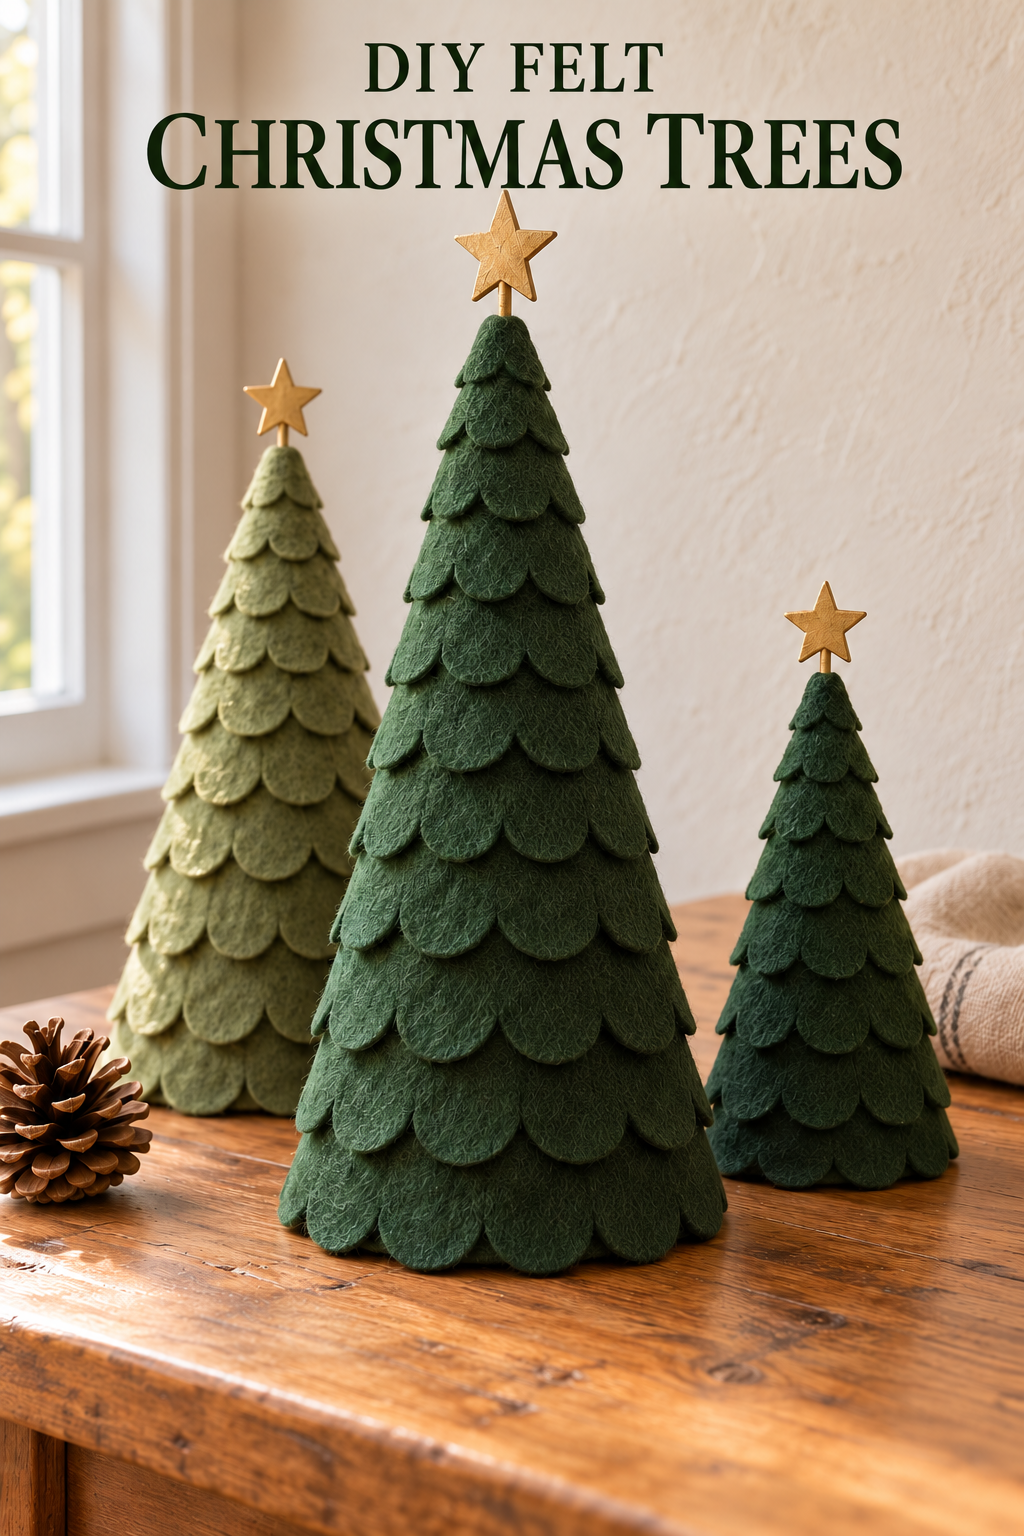
Image created with AI. This image serves as visual inspiration for the project below.
Soft green scallops give these little Christmas trees their layered, almost pinecone-like texture. Make one for a narrow shelf, or repeat the project in different heights for a tabletop cluster. A small gold star adds a crisp finish without covering up the felt.
What You’re Making
This version uses a hollow cardstock cone covered with individual felt pieces arranged in overlapping rows. Each piece has a straight upper edge and a rounded lower edge. Together, they recreate the scalloped surface without requiring a sewing pattern. A lightweight wooden star on a short dowel finishes the tip; the cone’s open bottom rests directly on the table.
Materials and Supplies
Main Materials
- Forest-green craft felt, with moss green if making a second tree; choose flexible sheets that cut cleanly rather than thick, rigid felt.
- Sturdy kraft cardstock large enough for your chosen cone; choose stock that can curve without cracking while still holding its shape.
- Craft glue suitable for felt, paper, and unfinished wood.
- Small unfinished wooden stars; choose thin, lightweight blanks rather than chunky ornaments.
- Short, thin wooden dowels with blunt ends.
- Muted gold acrylic craft paint suitable for unfinished wood.
- Low-tack masking tape.
Tools
- Small paintbrush
- Sharp fabric scissors
- Paper scissors
- Ruler
- Pencil
- Small craft clips
Before You Start
Choose the height and felt scale
A cone around 8–10 inches tall is a manageable starting point, but its exact height will depend on the sector you cut and how much you overlap its sides. Use the space where it will sit to choose the scale. A smaller companion tree should have smaller scallops, rather than the same large pieces crowded onto a narrow cone.
Check the glue on your materials
Bond two felt scraps and a scrap of felt to cardstock. Let them cure according to the adhesive instructions, then check for separation and obvious staining. Change the glue or felt if either test fails. Work on a washable or protected surface; paint and adhesive can mark the tabletop.
Step-by-Step Tutorial
1. Cut a quarter-circle and form the cone
On a square of cardstock, use one corner as the center of a quarter-circle. Make pencil marks at the same distance from that corner along both adjacent edges and at several points between them. Join those marks with a smooth arc. For a small tabletop tree, a radius around 9–11 inches is a useful starting range; choose a size that fits your sheet and display.
Cut along the arc. Bring the two straight edges together and overlap them to form a narrow cone. Adjust the overlap until the circular rim sits flat on the table. Keep a tiny opening at the apex for the dowel, checking it against the actual dowel before gluing.
Apply glue to the overlapping seam and hold it with masking tape while it sets. Keep the tape on the outside so it can be removed afterward. If the base rocks, mark only the high spots and trim them gradually with paper scissors. Let the seam cure before adding felt.
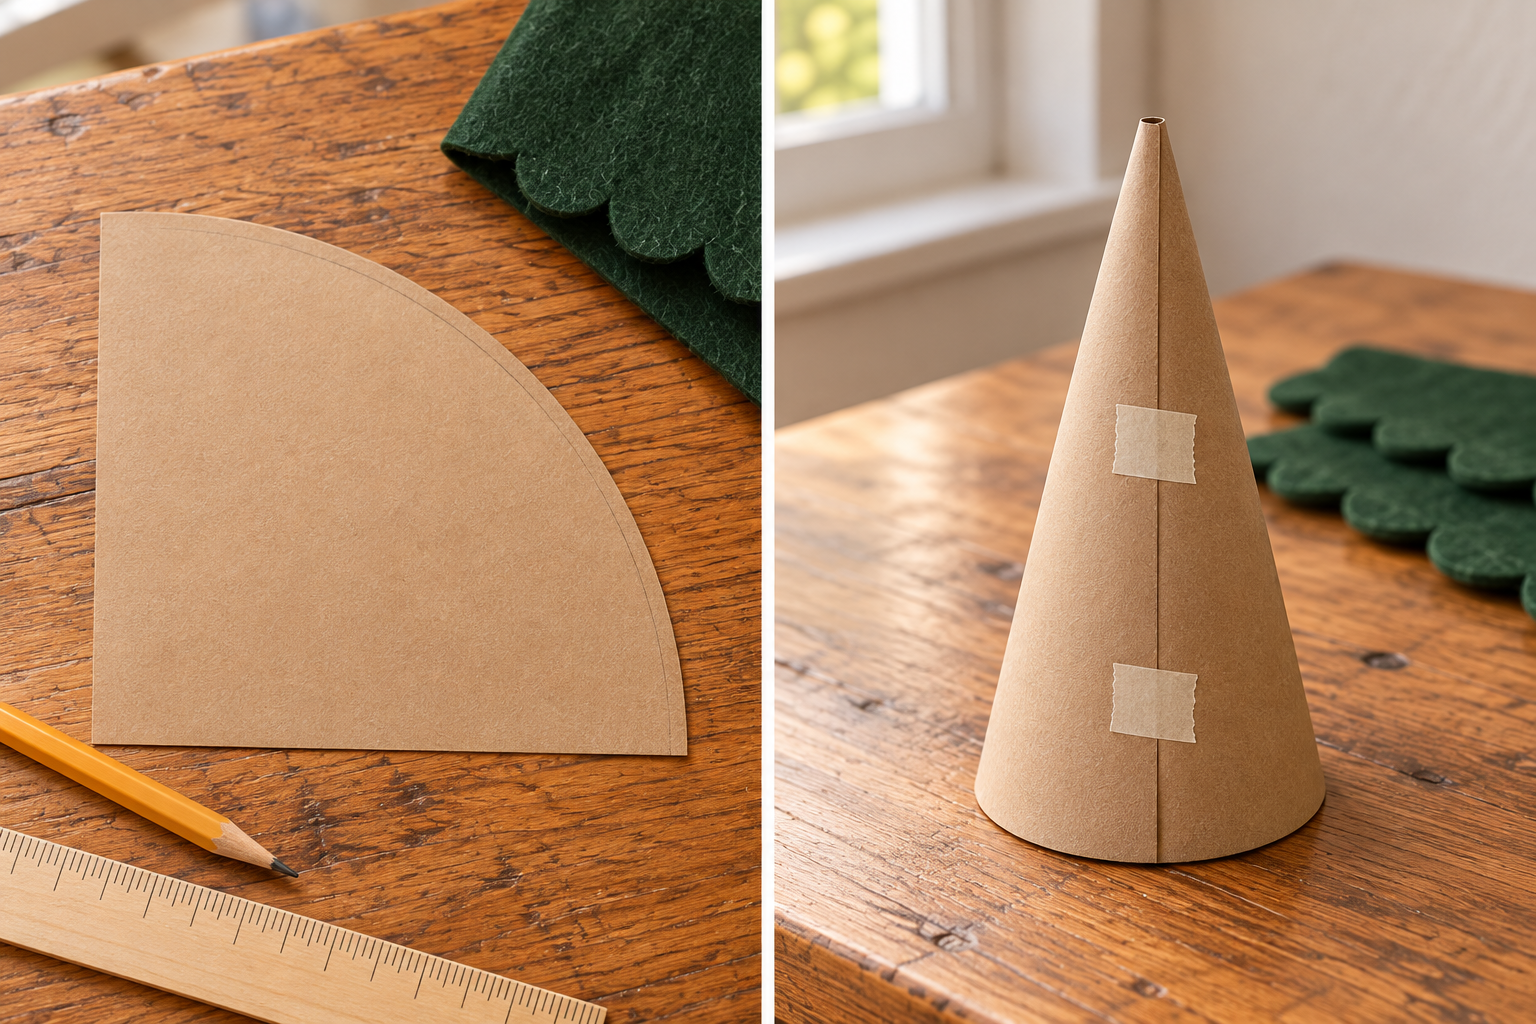
The quarter-circle is your complete cone pattern. No separate template is needed, and increasing the overlap makes a slimmer tree.
2. Make a rounded felt pattern and cut the pieces
Draw a small rectangle on a cardstock offcut, then round its two lower corners into one broad semicircular bottom. Keep the upper edge straight. As adaptable starting proportions, try a piece about 1 inch wide and 1½ inches tall; leave roughly the upper third as the attachment area. Test it against the bottom of your cone before cutting a batch.
Use that paper shape to cut forest-green felt pieces. Cut a few slightly smaller versions for the upper rows. Keep the bottoms rounded rather than sharply pointed, and avoid cutting through the straight attachment edge.
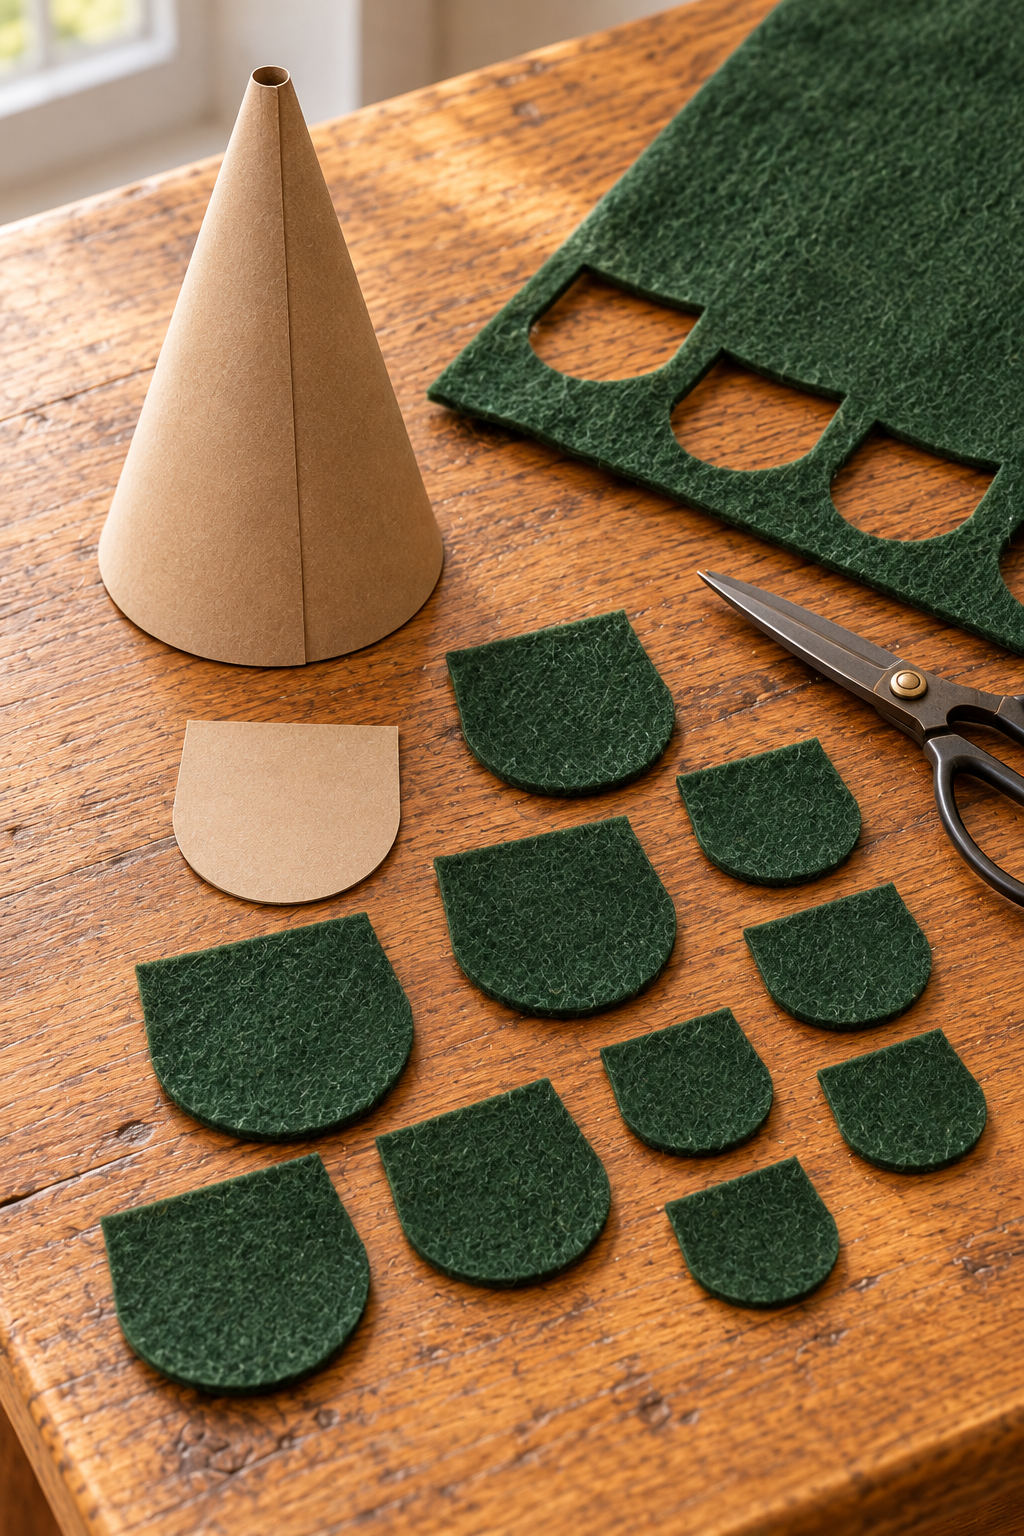
Cut more pieces as you go instead of guessing an exact total. Cone circumference, piece width, and overlap determine how many you need.
3. Build the first row around the base
Stand the cured cone upright. Place a felt piece against it with the rounded edge aligned to the base, staying just above the tabletop so the cardstock rim still supports the tree. Apply a thin layer of glue only to the straight upper portion, press that area to the cone, and leave the rounded end free.
Continue around the base. Slightly overlap neighboring side edges so no kraft card shows between them. Fit the last piece to close the circle without a thick clump. Let the attachments grip before working above them; follow the adhesive’s instructions rather than rushing a slipping row.
4. Overlap the next rows and narrow toward the tip
Start the next row above the first, positioning its rounded ends over the straight attachment areas below. Shift the pieces sideways so the scallops do not all line up in vertical columns. Check that the new row hides both the card and the glued upper edges underneath.
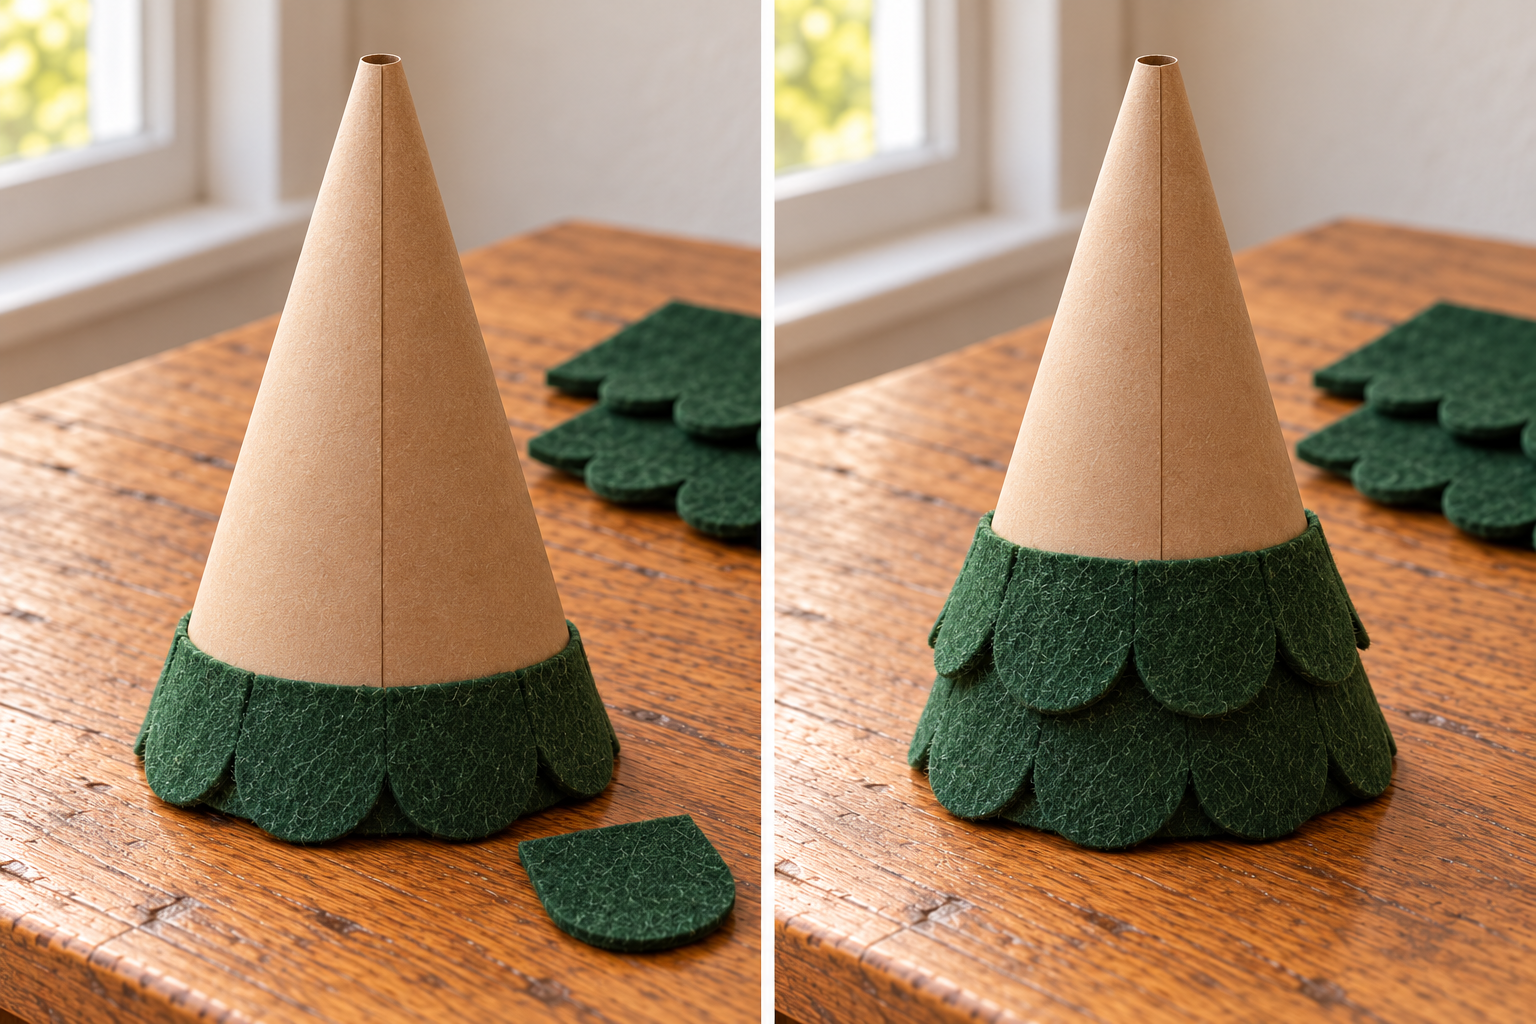
Repeat upward, switching to smaller pieces as the cone narrows. Fit each row before gluing it. If a gap appears, move the neighboring pieces closer or add a smaller piece; do not pile on thick glue to fill the opening. Keep the rounded ends free so the surface retains its layered texture.
At the apex, use small felt pieces to cover the remaining card while leaving the dowel opening clear. Trim their straight tops as needed to fit the narrowing surface. Allow the felt attachments to cure before handling the tree by its sides.
5. Paint and mount the gold star
Paint the wooden star, including its edges, with the compatible gold craft paint. Let each coat dry according to the paint instructions. Leave a small unpainted area on the back where the dowel will attach, so the adhesive bonds to unfinished wood rather than relying on the paint film.
Lay the star face down on protected scrap paper. Put glue along the upper part of the dowel and press it onto that bare area, aligned with the star’s lower point. Hold it gently with a craft clip. Keep the assembly flat and undisturbed until the adhesive has cured.
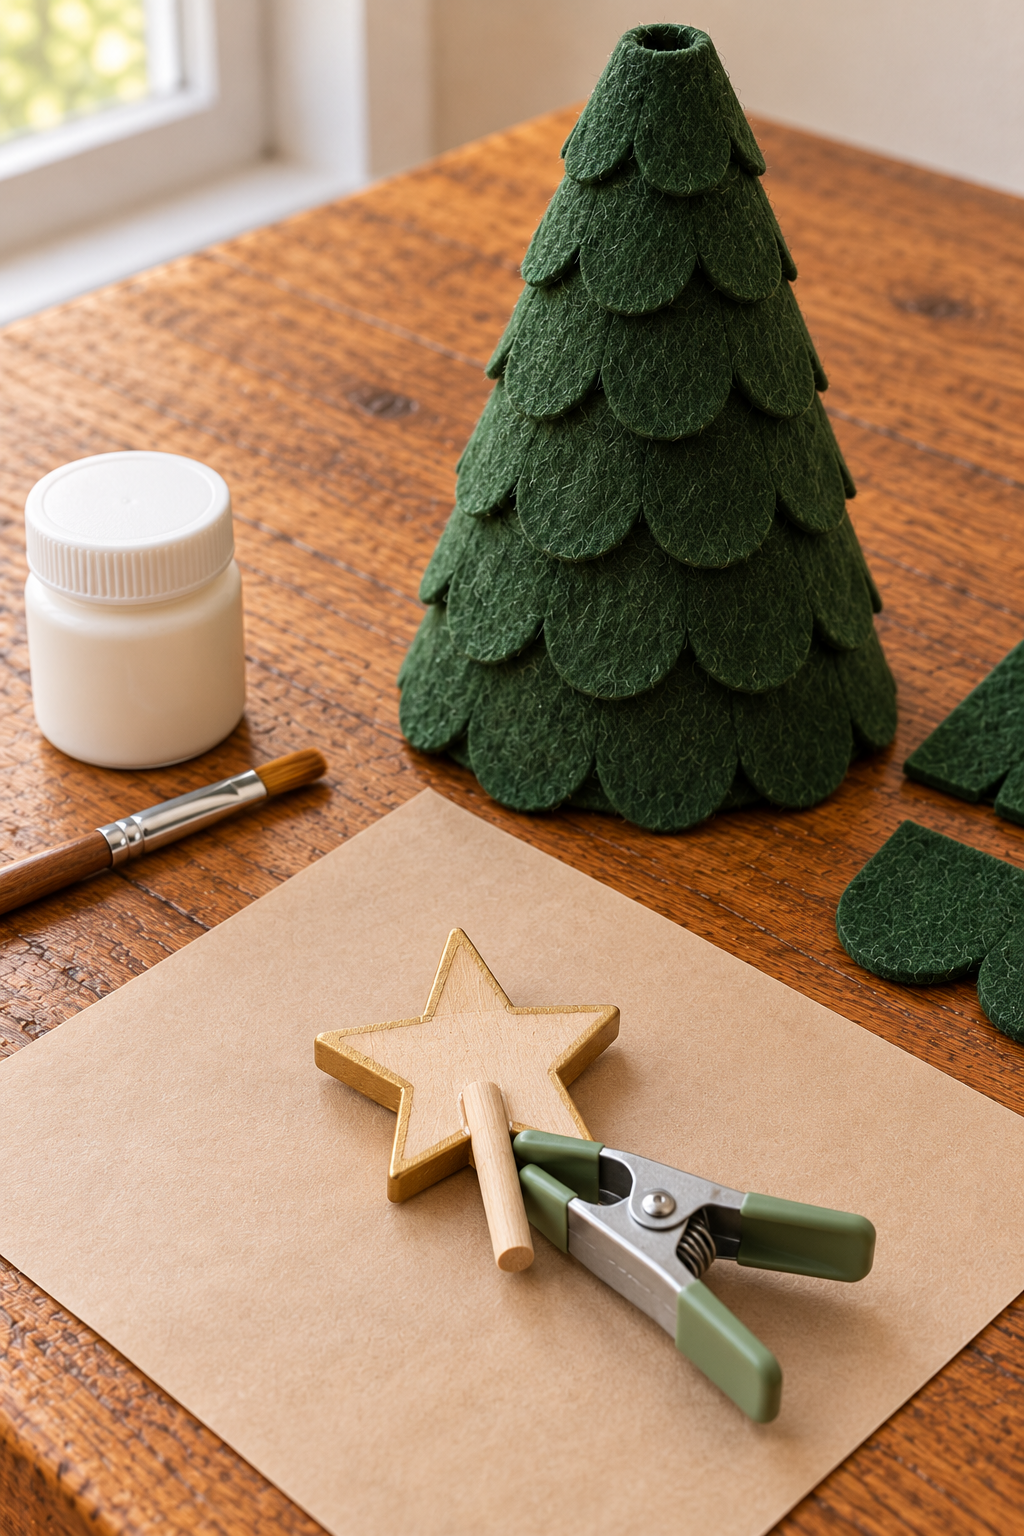
Dry-fit the dowel into the cone’s apex. Only a short length should show between the felt and star. If it is too loose, wrap a little masking tape around the concealed section to make a snug fit. If the opening is too small, ease it slightly with the pencil before reinserting the dowel. Do not force it and split the seam. The topper is removable for storage; it should sit upright without wobbling.
Keep the Layers Light and Even
Look at the tree from table height before declaring it finished. This angle reveals exposed card between rows that a top-down view can miss. Trim a fuzzy stray fiber rather than shaving whole scallops, which can change their rounded silhouette.
An oversized star can make a small cone look top-heavy. If the topper overwhelms the felt, use a smaller blank instead of making the stem longer.
Change the Color, Keep the Texture
Try a moss-green companion beside the forest-green tree, as in the inspiration image, or make a single oatmeal version for a neutral shelf. Keep one felt color per tree for a clear layered silhouette. For a darker finish, use antique-gold paint on the star while leaving the felt unembellished.
Arrange a Small Tabletop Grove
Place different heights slightly apart so the scalloped outlines remain visible. A folded linen cloth nearby softens the arrangement, but keep the cone rims on a level surface. These paper-and-felt decorations are for dry indoor display, away from candles, heat, and damp windowsills.
Remove the toppers before storage. Keep the trees upright in a box with room around the scallops so the free edges are not crushed.
A trio of these soft little trees brings Christmas into a small corner without needing a full-size evergreen. Their appeal is in the quiet repetition of rounded felt edges, with just one gold detail at the top.