*This post may contain affiliate links for which I earn commissions.*
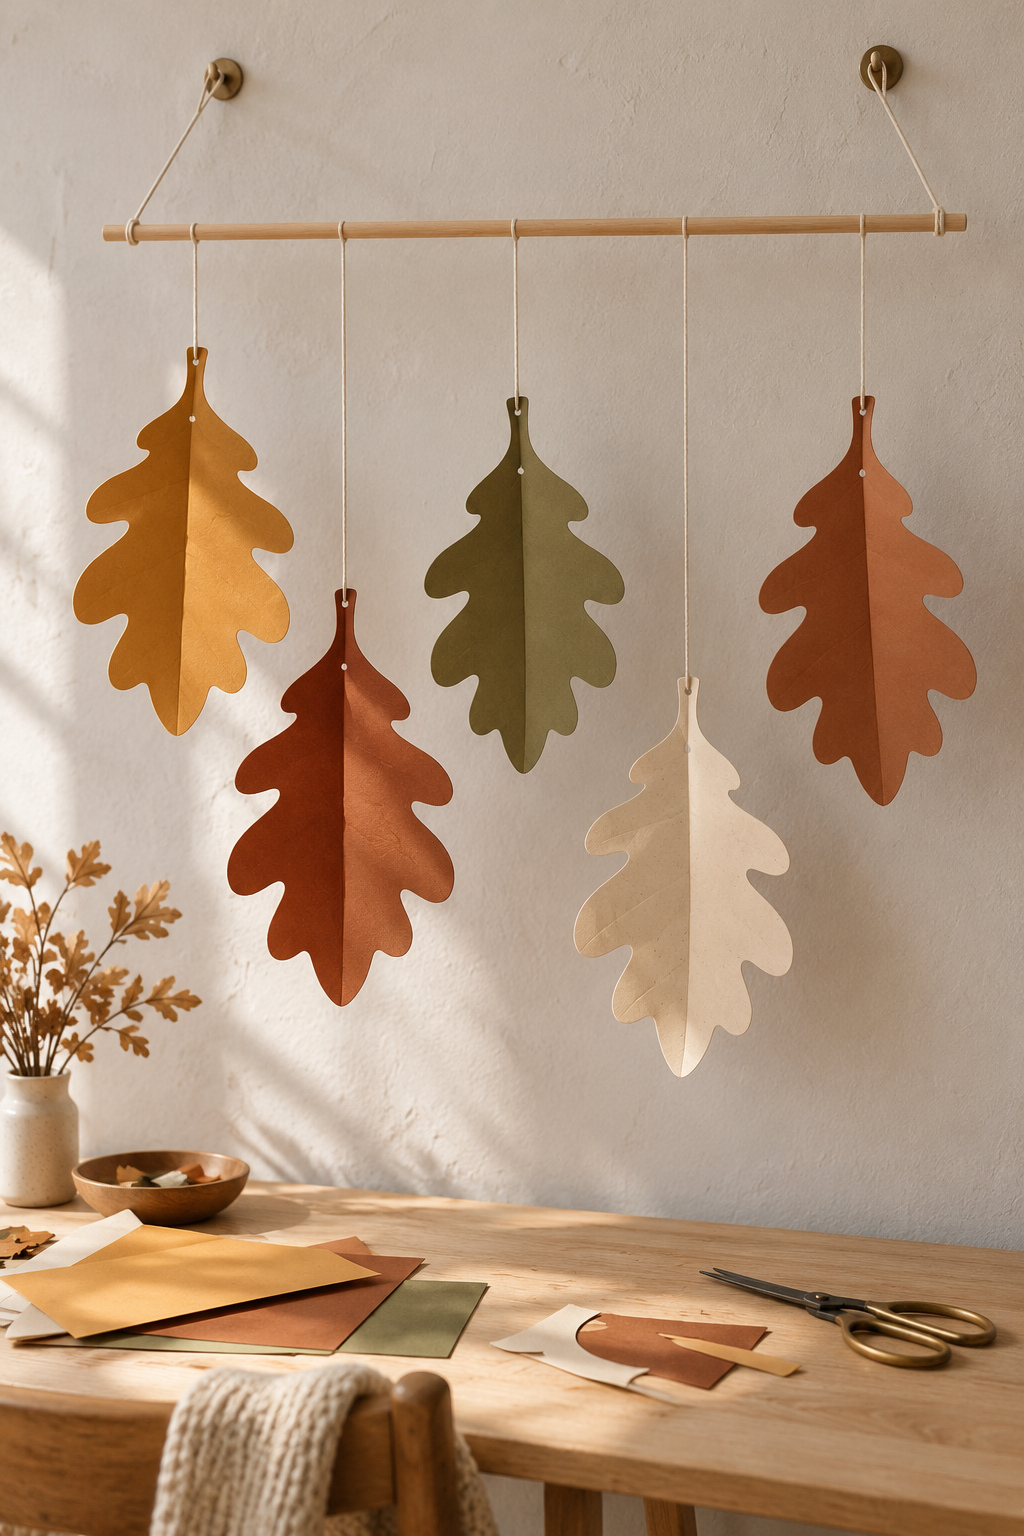
Image created with AI. This image serves as visual inspiration for the project below.
Large lobed leaves, quiet harvest colors and a simple hanging rod turn a botanical shape into a sculptural fall display. This paper oak leaf mobile is a project for a blank wall above a craft table, where its folds can catch the daylight.
What You’re Making
The practical version uses five individually cut cardstock leaves, each folded along its length and suspended from a wooden dowel. A separate length of thread holds each leaf, so the arrangement can be adjusted without rebuilding the whole mobile. Two end loops support the dowel on suitable wall hooks.
The pictured colors range from golden ochre and rusty brown to olive and cream. The leaves stay recognizable because their rounded lobes and central ridges do most of the work; elaborate origami is unnecessary.
Materials and Supplies
Main Materials
- Matte cardstock in ochre, auburn, muted olive and warm cream
- Smooth wooden dowel
- Fine cotton thread for individual leaves
- Cotton cord for the two dowel end loops
- Wall hooks suitable for your wall surface and finished display
Tools
- Craft scissors
- Pencil
- Ruler
- Bone folder or blunt scoring tool
- Small single-hole punch suitable for cardstock
Before You Start
Fit the display to the wall
Measure the usable wall width and the distance between your proposed support points. Choose a dowel that allows the leaves to hang separately, with room outside the outermost strands for the end loops. Plan the lowest leaf so it clears anything normally placed on the table.
An adaptable starting point is to make each leaf roughly one-quarter to one-third of the dowel length. Lay paper sheets beside your chosen rod before committing: broad lobes need lateral room as well as height. This is a sizing guide, not a fixed pattern.
Check the paper and mounting
Use a cardstock offcut to test a gentle fold. It should hold a ridge without splitting or requiring force. If the surface cracks, try a shallower crease or a more flexible card before cutting the final shapes.
Select hooks and cord for the actual wall and the assembled weight, following their product instructions. This lightweight display does not justify guessing an attachment rating. Keep it indoors and away from a heater or candle.
Step-by-Step Tutorial
1. Draw a rounded oak outline
On the back of one sheet, draw a long central line with a short narrow stem at one end. Imagine the stem as the top of the hanging leaf. Mark three broad lobe positions on each side of the line, leaving a rounded or softly pointed tip at the bottom.
Connect those marks with outward rounded bulges and inward shallow valleys. Make the lower pair a little broader than the upper pair, then taper into the tip. Keep the valleys comfortably wide so they can be cut with scissors. The two sides can differ slightly, but the centerline should remain inside the shape from stem to tip.
Draw a second outline if your first would leave a very narrow stem or fragile lobe. Erase unwanted lines before cutting rather than trying to hide them in the finished display.
2. Cut the first leaf and use it as a guide
Cut along the outer outline in smooth sections, turning the cardstock instead of forcing the scissor tips around tight curves. Keep the stem connected to the body. Trim any abrupt corners where a valley meets a lobe.
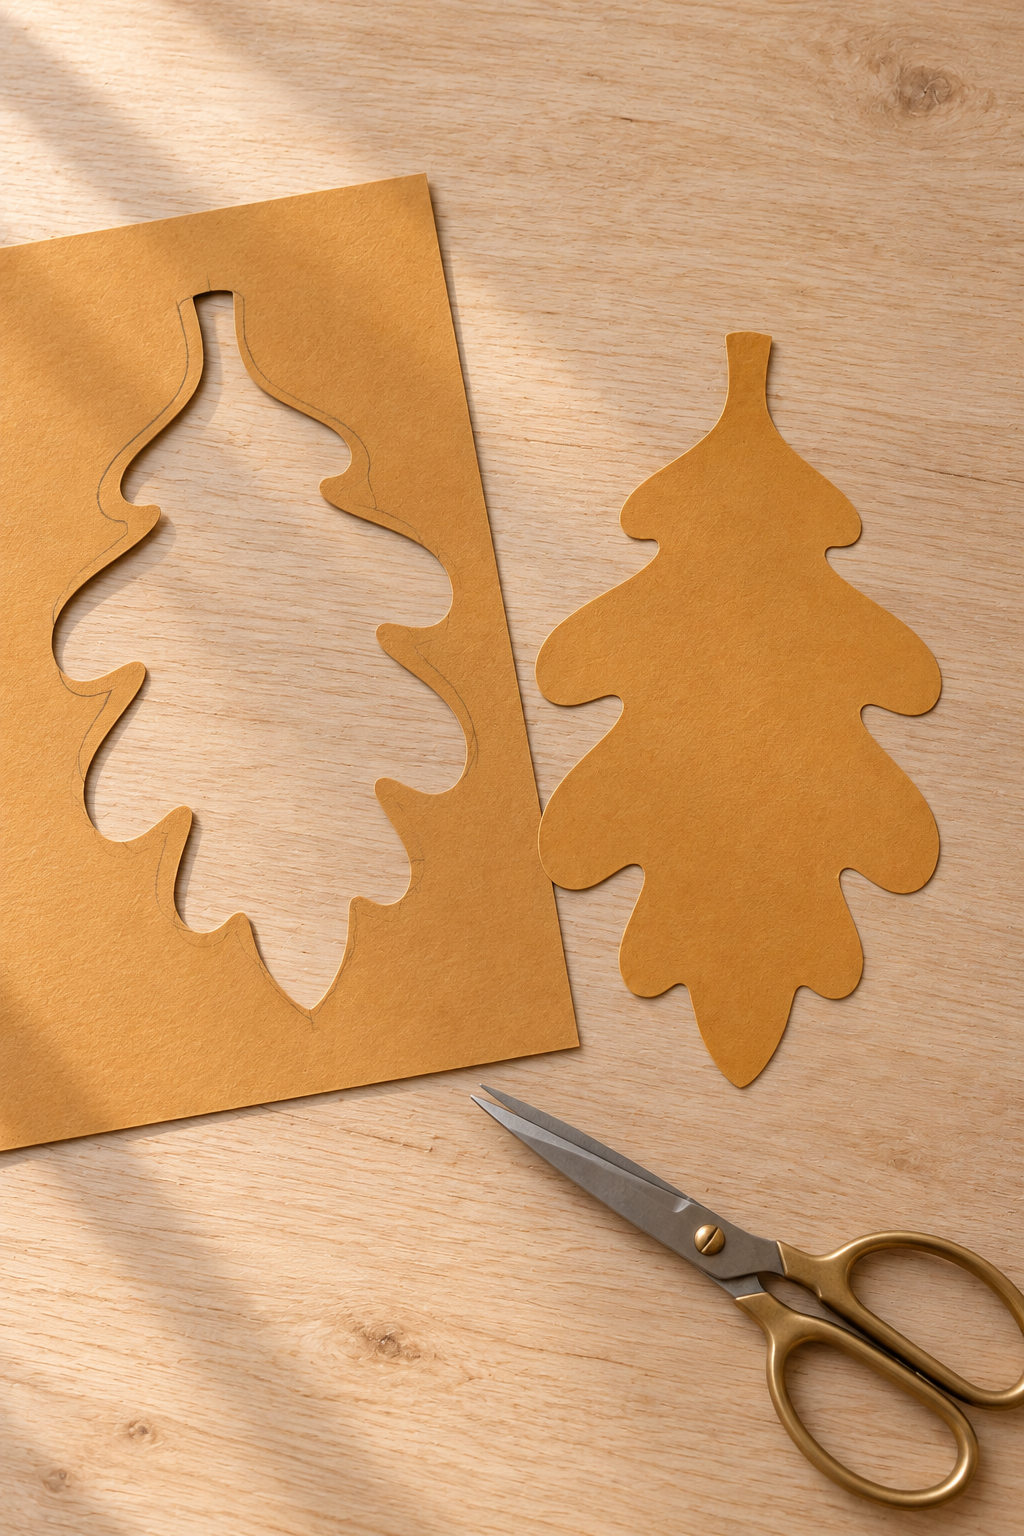
Place this first leaf over the other colors and trace around it lightly on their reverse sides. Shift a lobe or adjust the length on some copies so the collection does not look stamped out. Cut five leaves in total, mixing the four colors as in the inspiration.
3. Score and open the center ridge
Rest a leaf on a clean cardstock offcut. Align the ruler with its centerline, then run the blunt scoring tool lightly from below the stem toward the tip. Make a crease rather than a cut; a sharp knife is unnecessary.
Fold the leaf gently along that line, bring its two halves toward each other, then reopen them into a shallow V. View it from the front and adjust the opening until the ridge is visible without hiding the lobes.
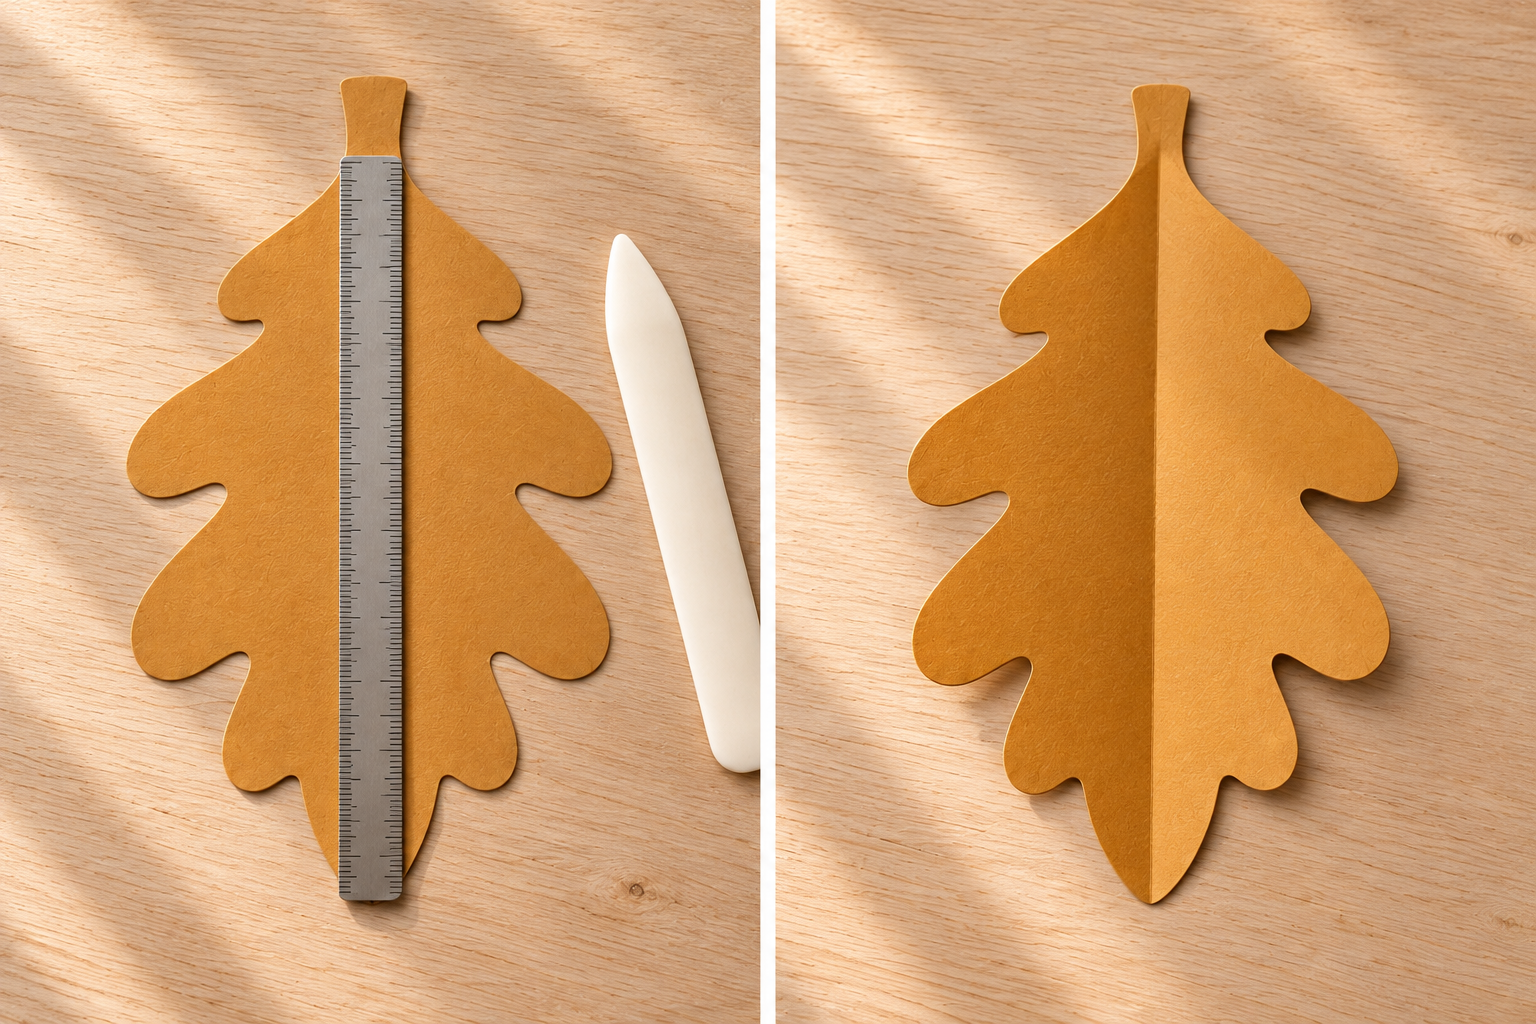
Repeat on the remaining leaves. The narrow stem can stay flatter than the leaf body, which makes the suspension easier to manage. The reference suggests faint vein lines, but a plain center fold is enough to recreate its main form.
4. Punch and thread each stem
Punch a small hole in the upper stem, leaving enough uncut card around it that the opening does not reach an edge. Test the punch on a scrap first if its hole would occupy most of the stem width.
Feed fine cotton thread through the hole. Bring the short end back toward the standing thread and tie them together in a snug double knot above the hole, creating a small loop through the card. Leave the long end available for tying to the dowel.
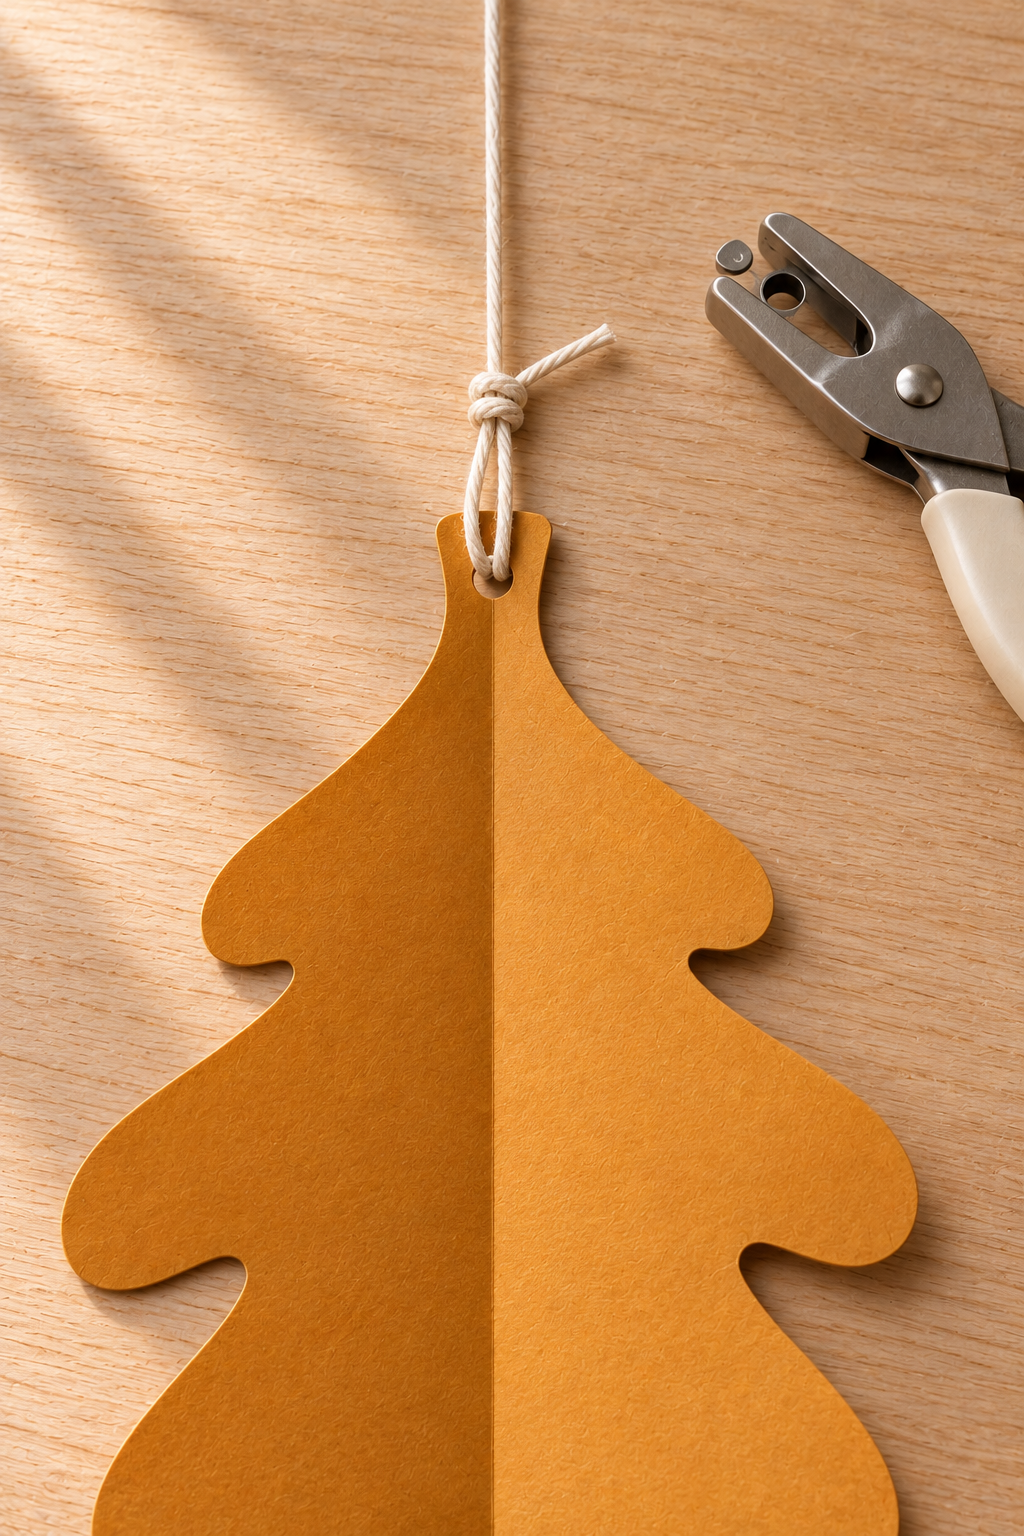
Lift the leaf by its thread to check that it hangs stem-up. If the paper tears, replace that leaf with a broader stem rather than covering the damage and hoping it will hold.
5. Build the staggered layout
Arrange the leaves below the dowel on the table before tying them in place. Alternate higher and lower positions instead of making a straight bottom edge. Leave clear spaces between adjacent outlines, allowing for the leaves to turn slightly after hanging.
Wrap each long thread end around the dowel and tie a secure double knot. Keep the strands separate. Adjust one at a time until the staggered layout feels settled, leaving the longest cream or rust leaf clear of the work surface below.
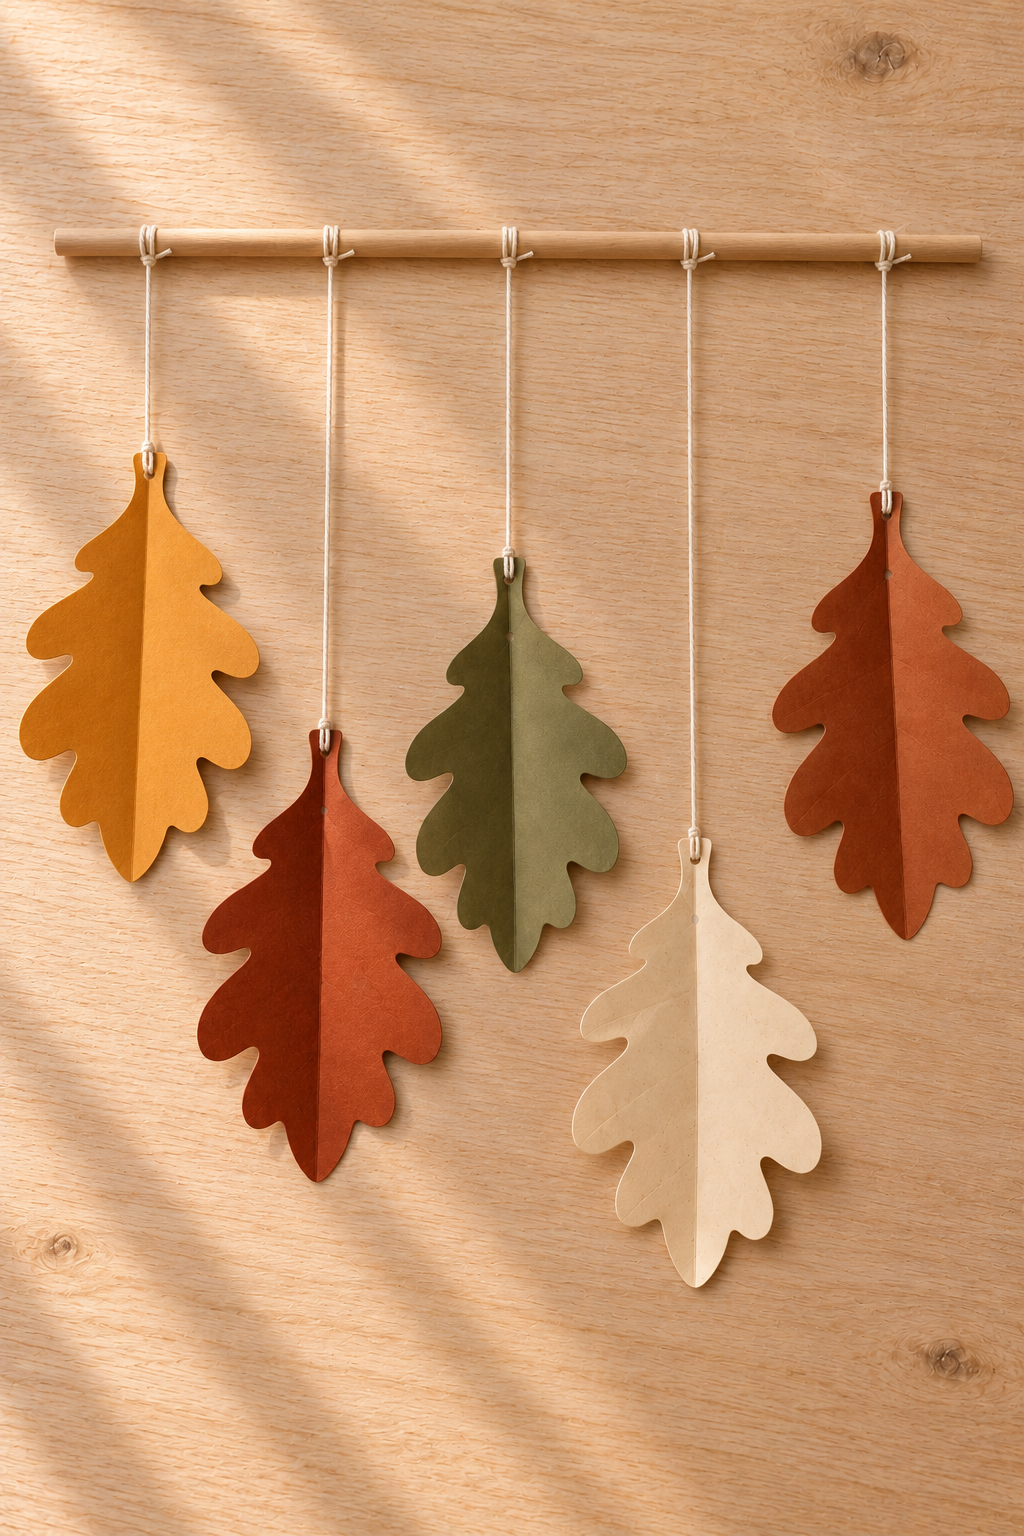
Avoid trimming every loose end immediately. First lift the dowel and check whether a strand slides or a leaf swings into its neighbor. Retie any slipping knot and reposition the attachments as needed.
6. Add the end loops and hang
Tie a cotton cord loop near each end of the dowel, outside the leaf attachments. Place the loops on the two suitable wall hooks, then check the rod with the ruler as a straight reference. Adjust loop lengths until the rod sits level.
Shorten a leaf strand if it brushes the table or other leaves. Once the arrangement stays balanced, trim loose thread ends neatly without cutting into the knots. The final display should show five readable silhouettes rather than a dense stack of paper.
Keep the Lobes Open
If a leaf turns edge-on, gently open its fold before changing the suspension. A very tight crease makes the silhouette disappear from a frontal view.
Dark cardstock can show pale scuff marks along a hard fold. Keeping the crease shallow preserves both the color and the broad botanical shape.
Change the Botanical Collection
For a quieter variation, use cream leaves with just one olive shape. To make a wider display, increase the rod length and spacing before enlarging every leaf; oversized lobes need room to remain distinct.
You can also sketch a different oak outline with four smaller lobe pairs. Keep the same center-fold and individual-thread construction so the variation stays manageable.
Display and Store the Mobile
A wall position limits spinning compared with a ceiling-hung mobile and suits the specimen-study idea. Leave a little space between the paper and wall so the folds cast soft shadows. Keep threads out of reach of children and animals.
For storage, take down the rod and lay the leaves loosely together without flattening their ridges. Wrap the threads separately around small cardstock scraps to reduce tangling.
The finished mobile gives an autumn wall a larger gesture while leaving the table free for the next project.