
*This post may contain affiliate links for which I earn commissions.*
This inspiration image was created with AI.
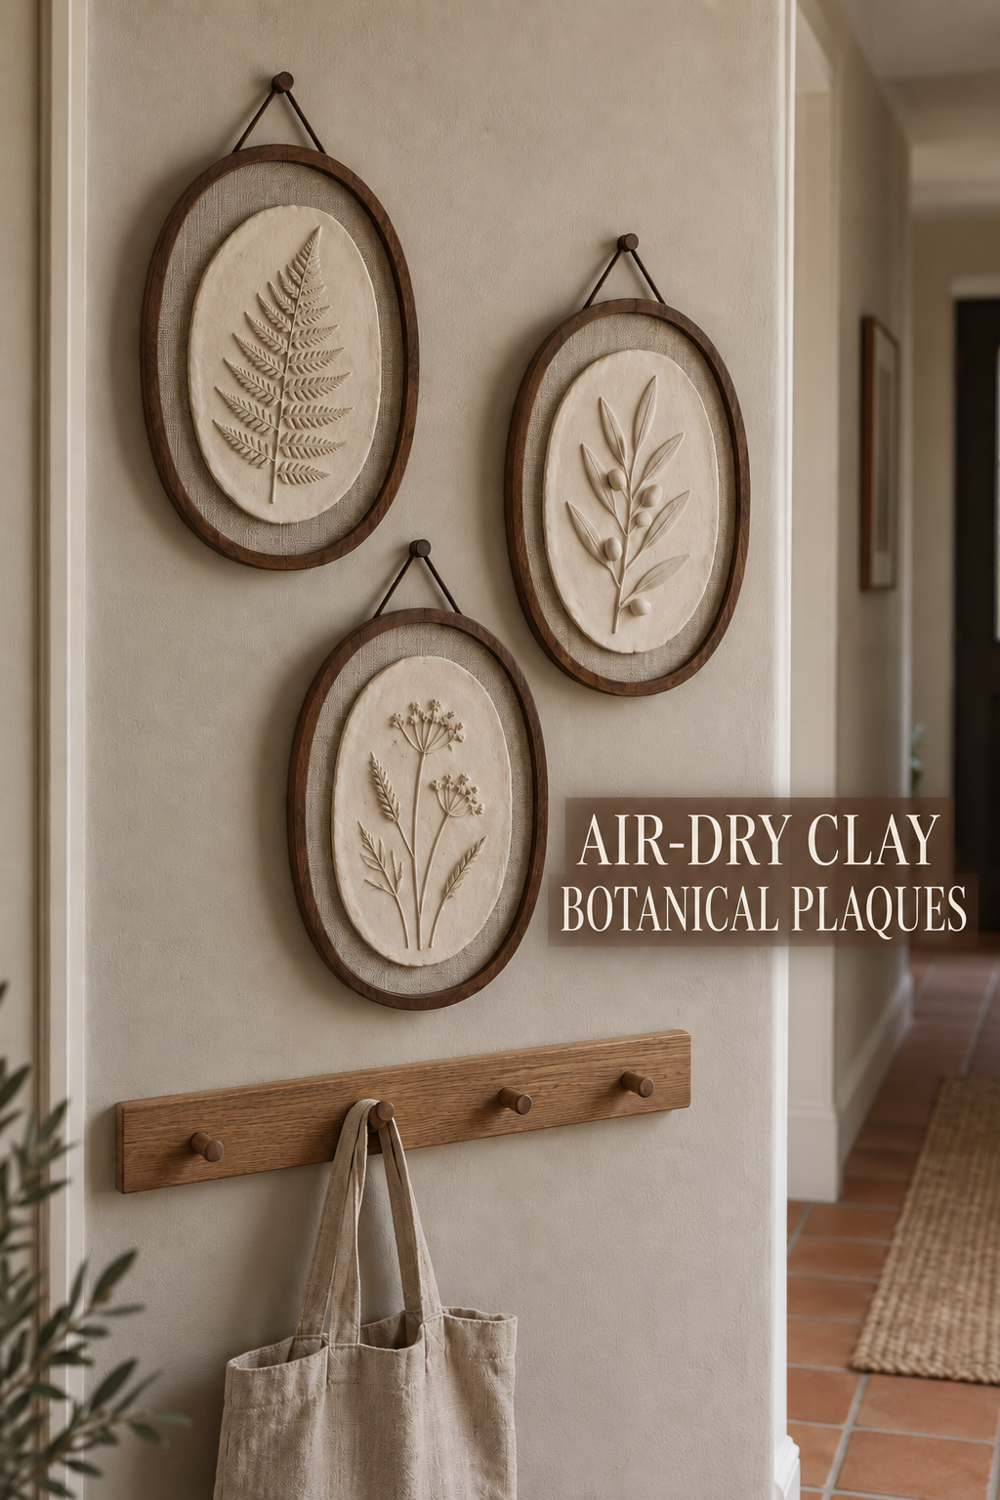
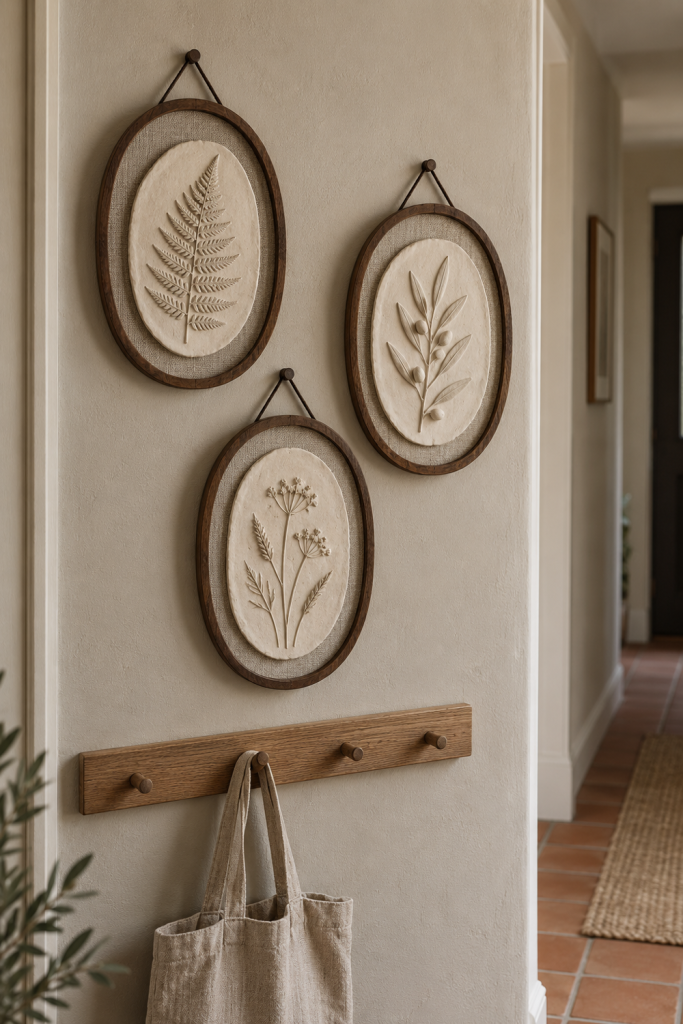
A small group of air-dry clay botanical plaques can bring an understated fall note to a hallway without requiring casting equipment. In the inspiration image, three warm ivory ovals sit inside dark wood frames backed with natural linen. A fern, a leafy stem, and airy seed heads suit the season while preventing the wall arrangement from looking mass-produced.
The image cannot confirm how its raised plant details were formed or mounted. This tutorial offers a low-risk recreation method: press real or artificial botanical shapes into rolled air-dry clay, refine the impressions, and add a few shallow clay accents where extra relief is wanted. The cured plaques are then attached to prepared frame backings using products selected for the actual materials and weight.
Materials and Tools
Air-dry modeling clay
Choose a clay intended for decorative craft use that can be rolled into slabs and finished after curing. Read its instructions for working thickness, drying position, cure time, sanding, sealing, and suitable adhesives rather than applying a universal schedule.
Botanical pressing pieces
Use a flat fern frond, a narrow leafy stem, and delicate seed-head grasses. Fresh material can contain moisture and may stick, so test it on scrap clay. Clean artificial sprigs or botanical texture stamps are alternatives when they produce a clearer release.
Rolling and shaping tools
A smooth roller, nonporous work surface, thickness guides, flexible craft blade, and small clay tools will help create even plaques. Use only tools recommended for the clay, and keep craft tools separate from food preparation.
Oval templates and smoothing supplies
Prepare three paper ovals sized to leave a visible linen border inside the selected frames. A soft brush and a small amount of water may help refine edges only if the clay manufacturer permits that technique.
Frames, linen, and backing boards
The image uses narrow dark wood oval frames, but simple round or rectangular frames can work if oval versions are unavailable. Use sturdy backing boards, woven natural linen, hanging cord, and wall hooks compatible with the finished frame weight.
Compatible adhesive and optional finish
Select adhesives based on the cured clay, textile, backing board, and frame components involved. If adding paint or sealer, use a product approved for the clay and follow its ventilation and curing directions.
Before You Start
Build the project around the frames rather than making plaques first and hoping they fit. Remove glazing if the frame design permits an open relief display, then measure the visible backing area. Leave enough linen around each oval to separate the clay from the dark wood.
Roll a small clay sample, press each botanical into it, and let the sample cure as directed. This test shows which leaves release cleanly and whether fine stems remain legible after drying. It also lets you test the chosen finish and adhesive away from the final pieces.
Plan a safe drying area where the plaques can remain flat and undisturbed. Air-dry clay can change as moisture leaves it, so follow the maker’s guidance for turning, covering, or supporting slabs and avoid promising that every clay formula will behave the same way.
Step-by-Step Instructions
Size three related oval templates
Trace the visible opening of each frame onto paper, then draw a smaller oval inside it to create the linen margin. Cut and test the templates against the frames. The image uses one larger fern plaque and two slightly smaller companions, but the relationship should follow the frames you actually find.
Vary the oval outlines subtly rather than trying to make machine-perfect duplicates. Controlled irregularity suits the softly worked clay edges while the frame supplies the crisp outer boundary.
Roll the clay into stable slabs
Condition and roll the clay according to its instructions, using thickness guides to keep each slab even. Avoid making the plaques paper-thin, especially near the pointed ends of the ovals. Move each rolled slab onto its designated drying surface before adding detailed impressions so the finished design does not have to be lifted while soft.
I would roll all three slabs in one session but complete the botanical work one plaque at a time. That keeps the material handling consistent while allowing full attention to each plant silhouette.
Cut and soften the oval edges
Lay a template over the first slab and cut around it with the recommended blade. Lift away the excess clay rather than pulling the oval from the surface. Refine the perimeter with a clay tool, preserving a lightly handmade contour like the irregular edges visible in the image.
If the manufacturer allows water smoothing, use very little. An overly wet rim can become soft while the center remains firm, making distortion more likely.
Press the fern without trapping it
Arrange the fern down the center of the largest oval. Cover it with a clean release sheet if appropriate for the clay, then apply gentle, even pressure with the roller or fingertips. Lift the plant slowly from the stem end and inspect the impression.
Do not repeatedly press the same frond if the first mark is blurred. Smooth the test area only if the clay remains workable under its instructions, or use a new slab. A clear single impression will look more intentional than stacked, uncertain leaf marks.
Compose the leafy stem relief
On the second oval, press a narrow branching stem at a slight diagonal. To suggest the low raised detail seen in the image, roll a very thin clay stem and a few small leaf shapes, then attach them over selected parts of the imprint using the clay maker’s approved joining method.
Keep the additions shallow. I would emphasize only the central stem and several leaves so the piece still reads as a relief plaque rather than a fragile clay sculpture.
Arrange the seed heads with open space
Press two or three grass stems into the third oval, allowing different heights. Small seed heads need blank clay around them to remain readable. If individual impressions disappear, clarify them with a fine clay tool instead of adding a dense field of marks.
Use a softer, more vertical arrangement than the leafy plaque. This change in direction helps each frame carry its own subject while the ivory material unifies the trio.
Cure the plaques on a flat support
Leave each plaque on the approved drying surface and follow the product directions completely. Do not attach, sand, coat, or frame clay that still feels cool, flexible, or damp. If the maker recommends turning or controlled airflow, use that guidance rather than accelerating the process with unapproved heat.
Inspect the cured backs and edges. Sand only if the product allows it, wearing any protective equipment and using the dust-control practices specified by the manufacturer.
Add a restrained ivory finish
The image shows warm matte plaques with shadows collecting around the botanical forms. If the cured clay already has that appearance, leave it unpainted or apply only an approved protective finish. Otherwise, use compatible matte craft color in thin coats, keeping darker glaze out unless you want a more antique effect.
For this set, I would test the finish on the cured sample and view it against the linen before coating all three. Warm ivory can shift noticeably beside flax-colored cloth.
Wrap and secure the linen backing
Cut linen larger than each backing board. Smooth it across the front, wrap the excess to the back, and secure it with a textile-compatible method that will not create bumps within the visible field. Keep the weave straight enough to look deliberate, but do not stretch it so tightly that the backing bows.
Mount each cured plaque
Place the plaque inside the empty frame and adjust the linen border. Weigh or otherwise assess the real cured piece, then select an attachment method explicitly compatible with cured clay, fabric, and the backing structure. Follow the adhesive or mounting-product instructions, including surface preparation and cure time. Do not rely on decorative linen alone to carry the load.
Reassemble the frame without glazing pressing against the relief. Attach the specified hanging cord or hardware, then hang from wall fixings suitable for the wall type and completed weight.
Building the Three-Frame Wall Group
Arrange paper tracings on the wall before installing hooks. A compact triangular grouping reflects the image and fits a narrow hall: the large fern sits high on one side, the leafy stem balances it across the top, and the seed-head plaque drops below. Keep enough distance between frames for their dark outlines to remain distinct. Confirm that doors, bags on nearby pegs, and passing shoulders cannot strike the reliefs.
Shop Materials and Tools
Choosing clay for flat relief work
Look for manufacturer guidance covering slab projects, expected drying behavior, finishing options, and adhesive compatibility. Package size should suit three plaques plus a test tile and some margin for recutting.
What matters in a clay roller set
A nonporous roller with removable thickness guides helps keep broad plaques even. Check that the working width accommodates your largest oval and that all components are intended for the chosen clay.
Find frames with useful backing depth
Select frames whose openings leave room for a linen border and whose backing can support the cured plaque. Removable glazing and clear hanging-hardware instructions are more useful here than ornate molding.
Select linen for a quiet backdrop
A medium, visible weave resembles the natural backing in the image, but it should still lie flat when wrapped. View a swatch beside the cured or painted clay to ensure there is enough tonal separation.
Match adhesive to every contact surface
The correct product depends on the cured clay formula, fabric, and backing board. Read the compatibility, surface-preparation, weight, ventilation, and cure information rather than choosing by general craft labeling alone.
Final Project Tip
Keep the original paper templates with a note naming each botanical. If one plaque is damaged later, its outline and composition can be recreated without removing the other frames from the wall.